S3 cloud storage
Upload and store any number of DaDaDocs documents in your S3 Cloud Storage. Edit documents saved in S3 Cloud Storage, without leaving DaDaDocs.
Connect S3 to Salesforce organization
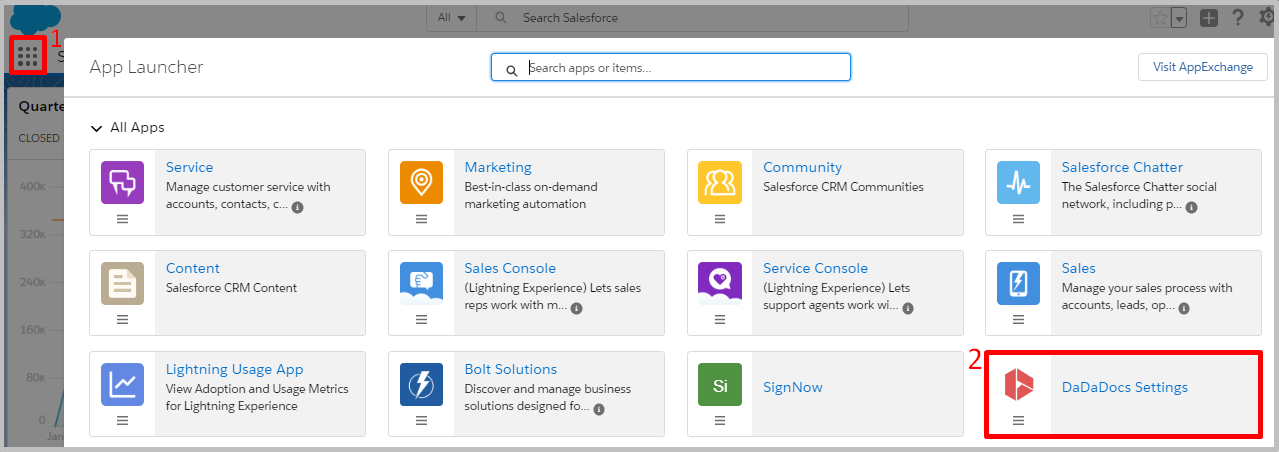
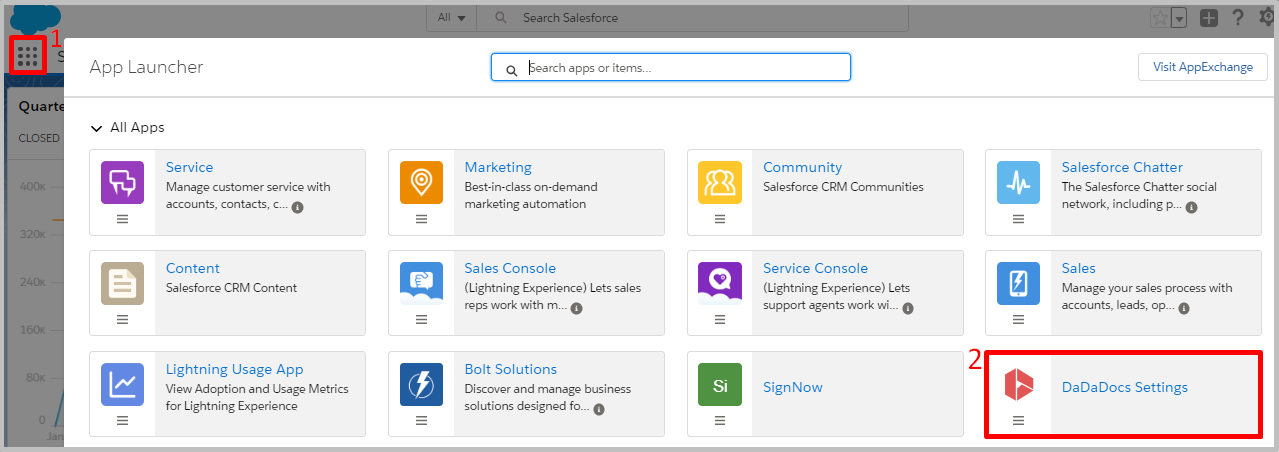
- To connect your S3 Cloud Storage with your Salesforce organization, go to the App Launcher and select DaDaDocs Settings.
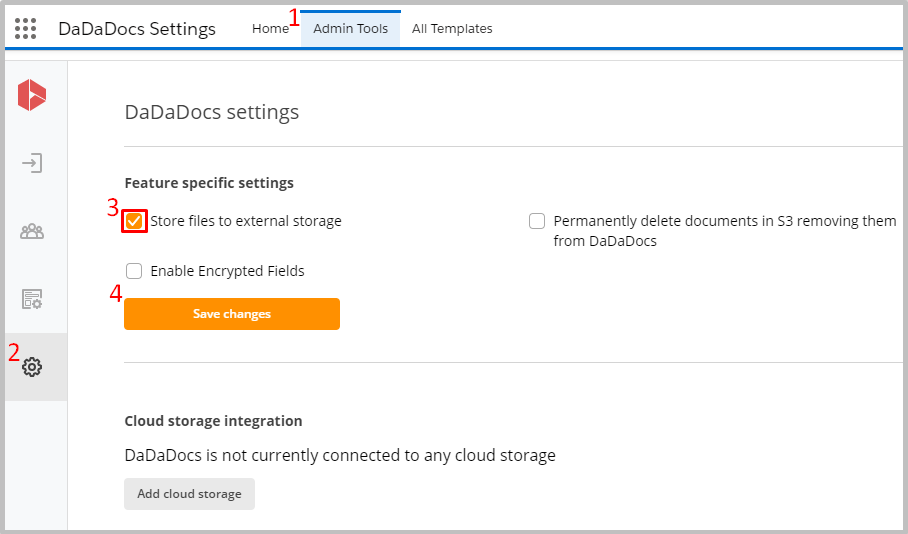
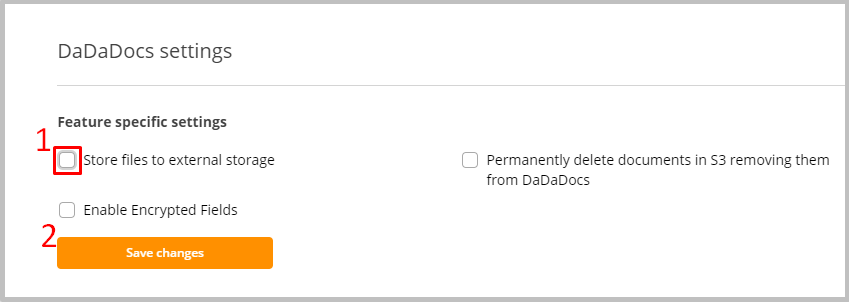
- Proceed to the Admin Tools tab. Switch to Settings and in the Feature-specific settings section, select the Store files to external storage checkbox. When finished, click Save.
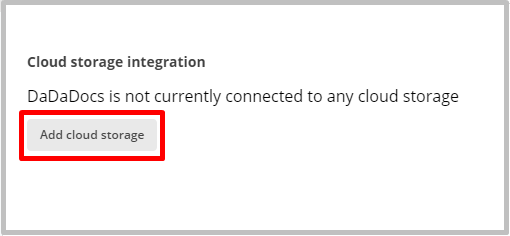
- In the Cloud storage integration section, click Add cloud storage.
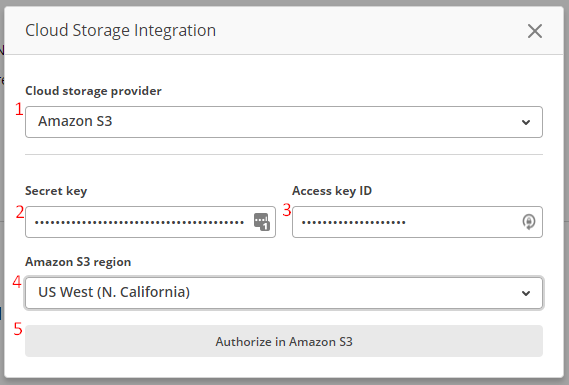
- In the Cloud Storage Integration pop-up, choose Amazon S3 as your cloud storage provider.
Enter your credentials such as Secret Key and Access Key ID to authorize with Amazon S3 cloud storage.
Select the region where your documents are stored when creating the S3 bucket (US West (N. California) in the example).
To save your settings, click Authorize in Amazon S3.
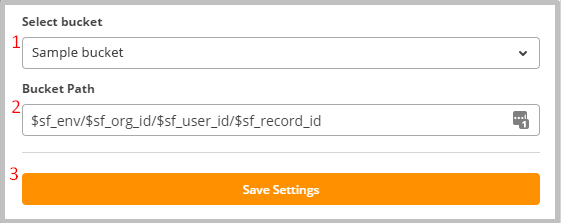
- For the Select Bucket field, select the desired bucket from the Select bucket dropdown (Sample bucket in the example).
The Bucket Path field is not obligatory and should only be added if needed.
However, if you need your documents stored in S3 to a certain bucket path, specify this criteria when configuring the upload path.
Below is a list of variables to assist with forwarding uploaded documents to the desired S3 bucket path.
| Variable | Description |
|---|---|
| $sf_record_id | Add to specify an object which a document is related. |
| $sf_user_id | Add to specify an ID of a user who will upload a document. |
| $sf_org_id | Add to specify an ID of the Salesforce organization for a document being uploaded. |
| $sf_env | Add to specify the environment of your Salesforce organization. |
| $sf_first_upper_env | Add to start an environment's name with a capital letter. |
| $filename | Add to specify a document’s name. |
| $sf_rand | Add to allow saving document copies with the same name in new folders instead of replacing documents with their copies. |
When finished, click Save Settings.
Once saved, the variables will be changed along with your data and will appear in S3.
Refer to the the example below:
production/00D0v0000004cMi/0050v000001BmD8/0060v000003sSam
whereby:
- production is $sf_env
- 00D0v0000004cMi is $sf_org_id
- 0050v000001BmD8 is $sf_user_id
- 0060v000003sSam is $sf_record_id
If S3 has been successfully connected to your DaDaDocs application, it will appear as follows:

Note that only user(s) with administrator privileges can authorize in Amazon S3 Cloud Storage.
When editing a document stored in S3, you can create a new version or save changes you’ve made to the existing document.
Enter a new name to save your edited version as a new document or leave the name as-is to save the changes you’ve made to the original document.
To stop saving your documents to the Amazon S3 cloud storage by default, simply uncheck the Store files to external storage checkbox in the Feature-specific settings section.
When finished, click Save Changes.
However, disabling the S3 connection with your Salesforce organization after sending documents to be filled or signed by customers will result in all signed and filled documents being returned to your Salesforce organization once you reconnect it.
Delete documents in S3
Permanently delete documents from your S3 by simply removing them from DaDaDocs. Follow a few simple steps to set up automatic removal of unnecessary documents in your S3 cloud storage.
- Go to App Launcher and select DaDaDocs Settings.
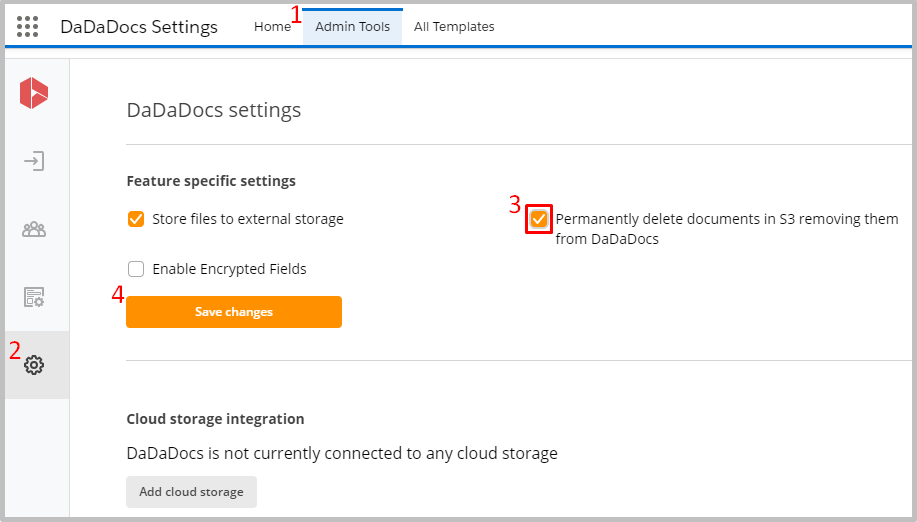
- Proceed to the Admin Tools tab and switch to Settings. In the Feature-specific settings section, check the Permanently delete documents in S3 removing them from DaDaDocs box.
When finished, click Save.
Once saved, proceed to DaDaDocs and choose the document you’d like to delete in the Documents tab. Select Delete in the Document Option sidebar to remove it from DaDaDocs. The document will be automatically deleted in S3 as well.
Updated over 5 years ago
