Fillable fields
Transform any document or form into a fillable form with smart digital fields using the Add Fillable Fields wizard.
Drag and drop fields
You can add fields the same way for all field types. While editing a document, open the Add Fillable Fields tab on the right.
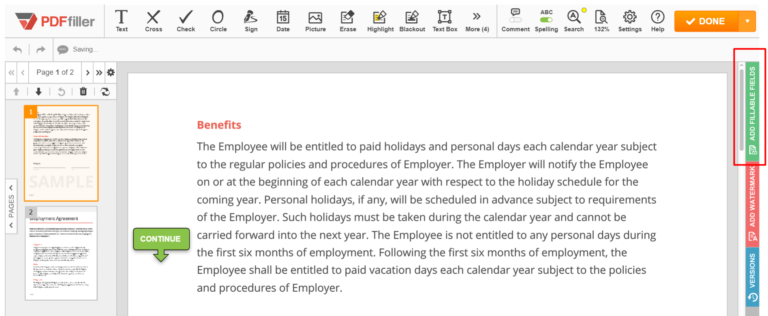
Select the field you need, then drag and drop it wherever you’d like in your document. Resize the field by dragging the corners or edges.

To delete a fillable field, click the trash can icon above it.
Required fields
You can mark any field as required. Check the box and a red asterisk will appear to the upper right of the field.

A form can’t be submitted until all required fields have been filled in.
Text fields
To add a text field, click the Text icon, then click where you’d like to place the field.

Use the text formatting tools to preset the format of a text field: font, size, color, and alignment. It’s not possible for someone filling out your document to change the format.
To customize the text field further, click Advanced.
Default Text is the text that will appear in the field when someone opens the form. If you lock the field, the default text cannot be replaced by someone filling out the form.
Note. You can enter instructions or tips for filling in a field. Users will see the note when they hover their mouse over the field.
Max Characters. Set the maximum number of characters allowed in a field. The auto setting will limit that number to what can physically fit inside the field.
Max Lines. Set the maximum number of lines allowed in a field.
Database Field Name. Create a name for the field that will appear when you export filled-in data to a spreadsheet or when you use the DaDaDocs API.
Number fields
To add a number field, click the Number icon and drag the field where you’d like to place it.
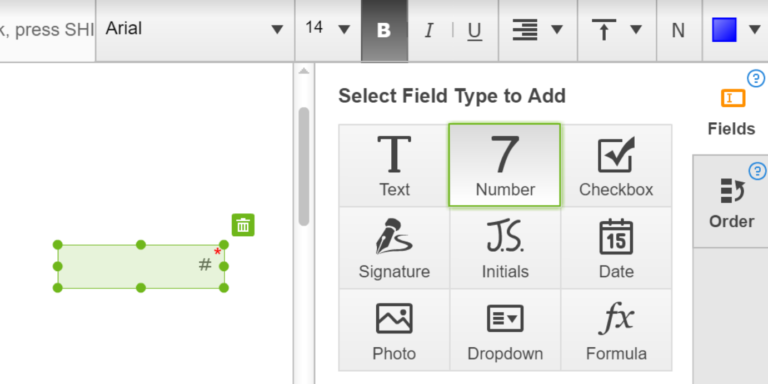
Use the text formatting tools to preset the number format: the font, size, color, and alignment.
To customize the number field further, click Advanced.
Default number is the number that will appear in the field when someone opens the form. If you lock the field, the default number cannot be replaced.
Note. Here you can enter any instructions or tips for filling the field. Users will see the note when they hover their mouse over the field.
Max Characters. Set the maximum number of characters allowed in the field. The “auto” setting will limit that number to what can physically fit into the field.
Database Field Name. Create a name for the field that will appear when you export filled data to a spreadsheet or when you use a DaDaDocs API. You can use the database field name as an operand when creating formula fields.
Date field
To add a date field, click the Date icon then place the field where it should be in the document.
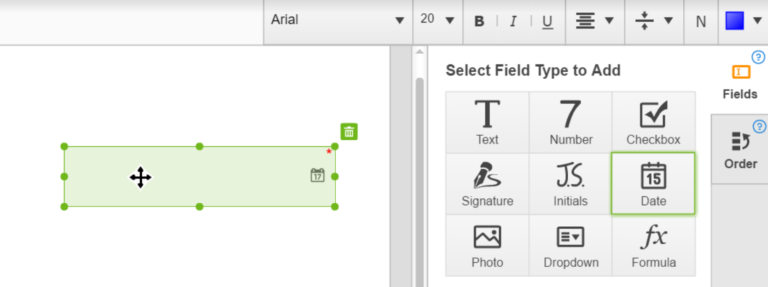
To customize a date field, click Advanced to expand options.
Format. Select one of many date formats.
Default. Choose the date that the field will display before the user changes it.
Note. Enter any instructions or tips for filling the field.
Database Field Name. Create a name for the field that will appear when you export filled data to a spreadsheet or when you use a DaDaDocs API.
Dropdown field
To add a fillable dropdown field, click Dropdown and drag the field where it should be in the document.
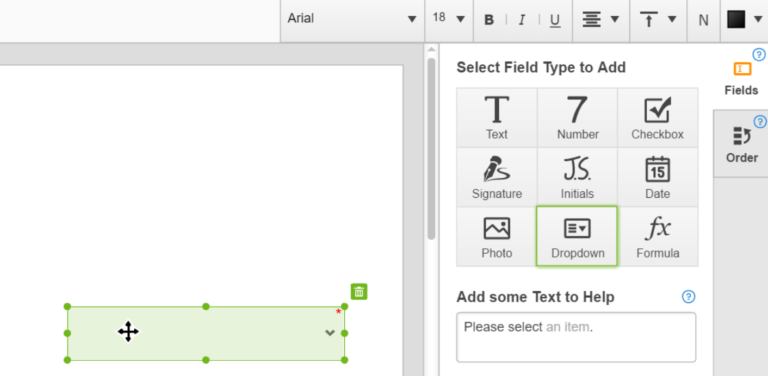
To help users choose an item from the list, provide a suggestion in the Add Some Text to Help textbox.
To add an item to the list, type a new value in the empty field and click + Add. To allow users to provide their own alternative, check the respective box.
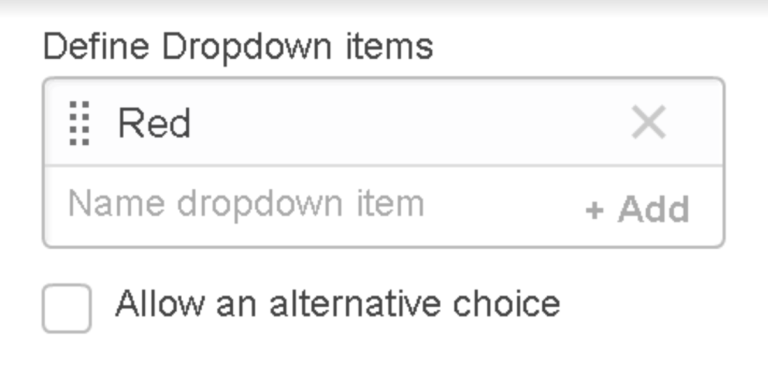
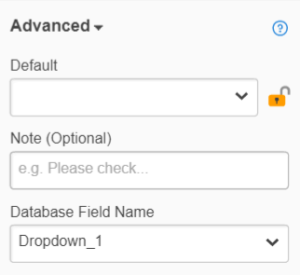
To customize a drop-down field, click Advanced to expand options.
Default. Select the default item from the list you’ve created.
Note. Enter any instructions or tips for filling the field.
Database Field Name. Create a name for the field that will appear when you export filled data to a spreadsheet or when you use a DaDaDocs API.
Use the text formatting tools to preset the field’s text format including the font, size, color and alignment of text.
Checkboxes
To add a checkbox field, click the Checkbox icon and click where you want to place it.
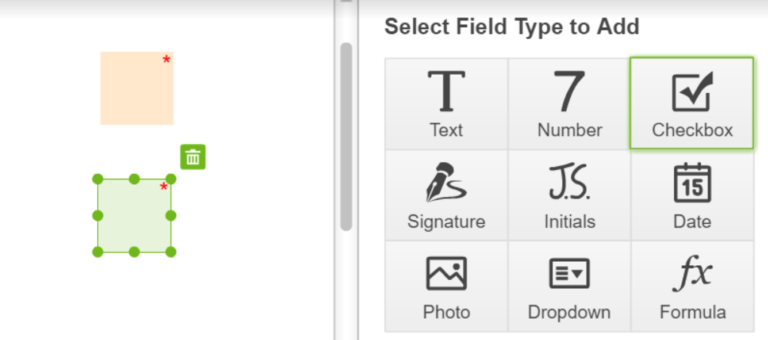
When you resize a checkbox, the next one will be of the same size so you will not have to resize each checkbox separately.
To customize a checkbox, select it, then click Advanced to expand options.
Type of Checkbox. You can format the checkbox to be filled with a simple checkmark, “X”, or circle.
Default. Select whether the default setting for a checkbox is checked or unchecked.
Note. Enter instructions or tips for filling the field. Users will see the note when they hover their mouse over the field.
Database Field Name. Create a name for the field that will appear when you export filled data to a spreadsheet or when you use a DaDaDocs API.
Group Name. Group checkboxes together by entering the same group name for each box. Only one checkbox within a group can be checked at any time.
Signature field
To add a signature field, click the Signature icon and drag the field onto your document.

Anyone filling out the document can click the signature field and use DaDaDocs to sign the document.
Initials field
To add a fillable field for initials, click the Initials icon and drag the field onto your document.

Photo field
To add a photo field, click the Photo icon, then click where you’d like to place it.
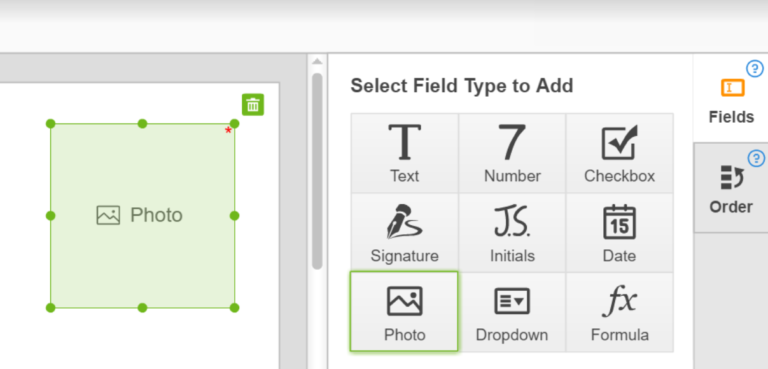
Anyone filling out the document will be able to click the photo field and either upload a photo from their device or take one with their webcam.
Formula field
You can make a calculation directly in your document without leaving Salesforce using the formula field.
First, create number fields that will be used as operands. Then, click Formula and place the formula field in the document.
Write the formula in the Formula Builder just above the document using the number field names as operands.
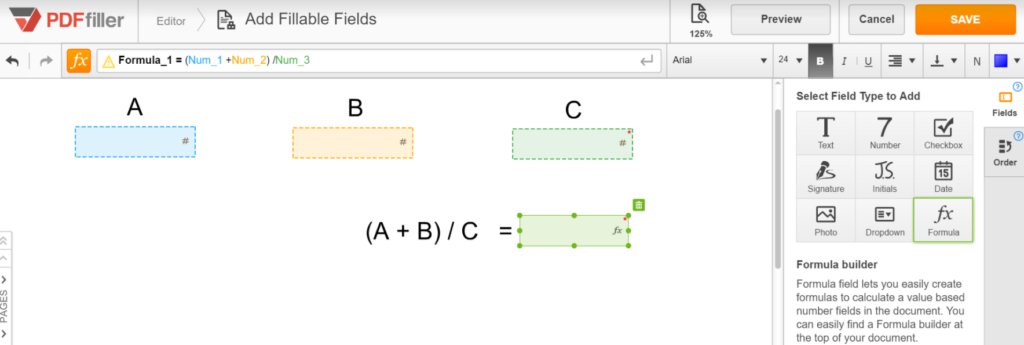
When number fields are filled in, the formula field will automatically show the result of the calculation.

Updated over 6 years ago
