SendToSign: Request Signatures
Request signatures from up to 20 recipients with the SendToSign option. Get legally-binding e-signatures without leaving Salesforce.
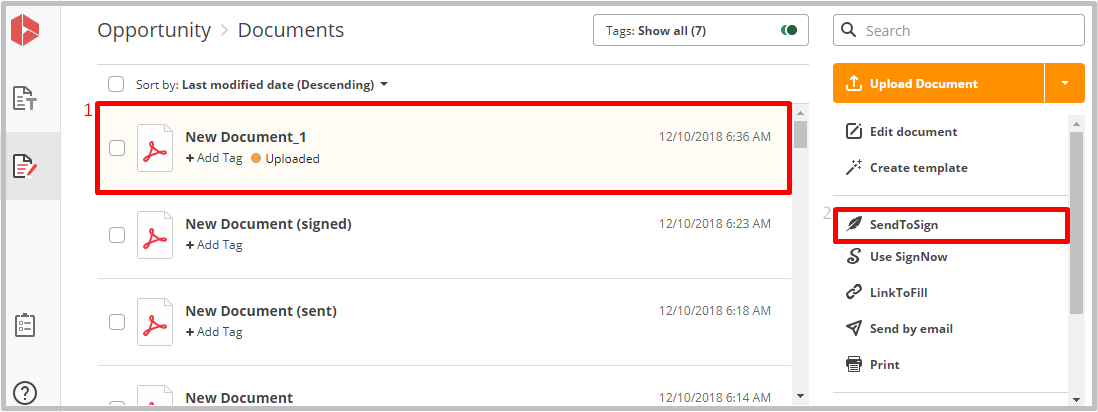
- In the Documents tab, choose the document you’d like to send for signing and click SendToSign.
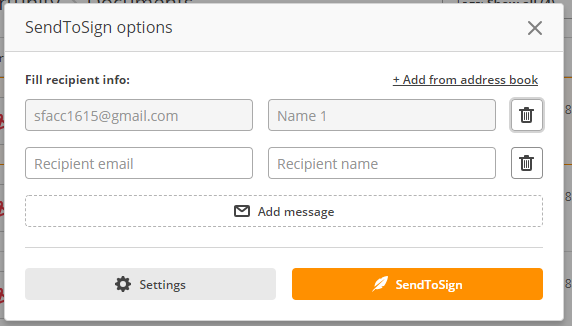
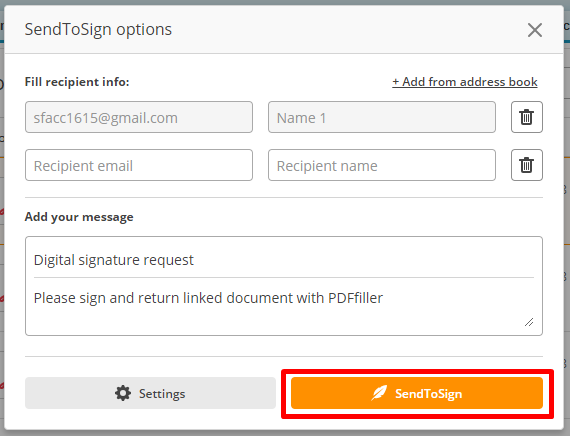
- In the SendToSign options pop-up, enter a recipient’s email and name. Click the plus icon to add another recipient.
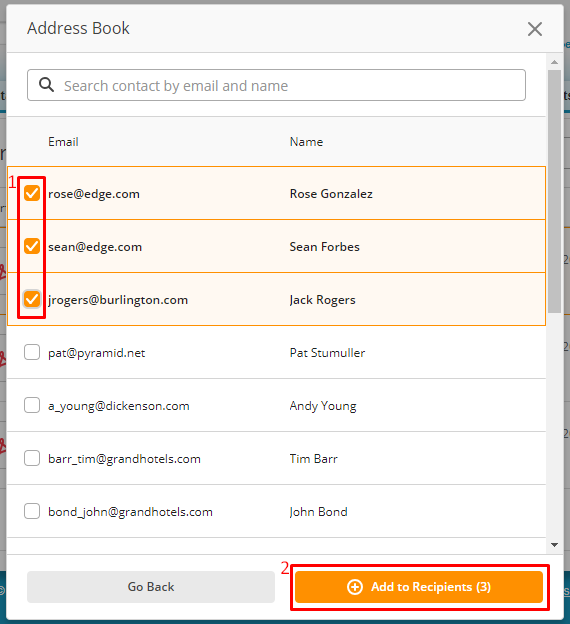
Alternatively, click +Add from address book to select recipients from your contact list.
Email addresses in the contact list begin with emails of the email fields for the related object. The most frequently used or most likely required contacts will appear first in the address book.
When finished, click Add to Recipients.
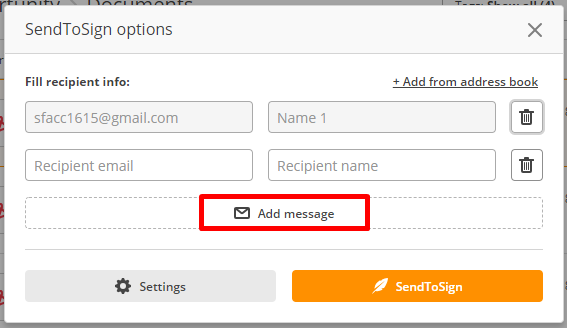
Click Add message if you would like to add a custom message to your recipients.
Note. To enable a timestamp for signature fields, go to App Launcher and select DaDaDocs Settings.
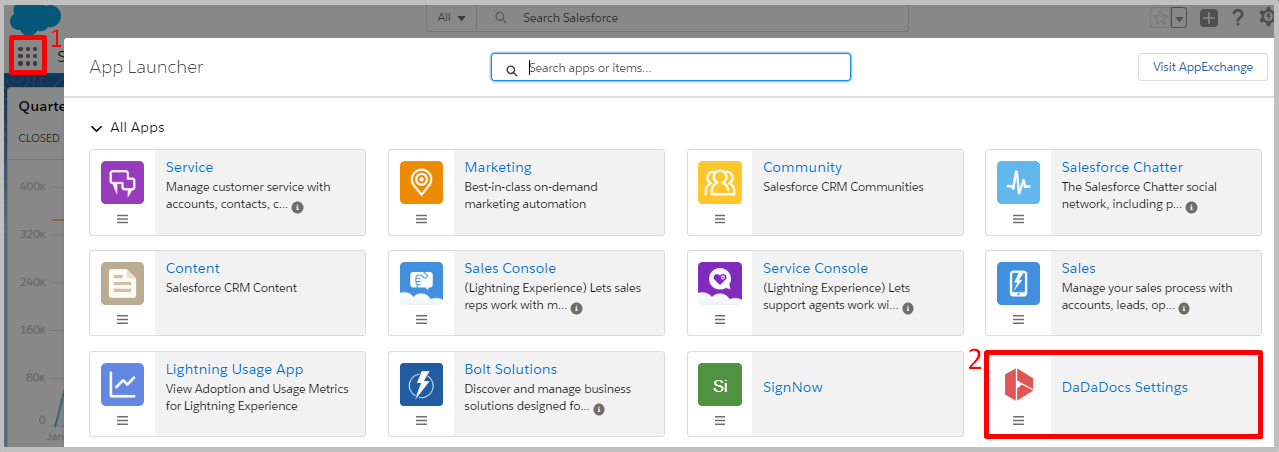
Proceed to the Admin Tools tab.
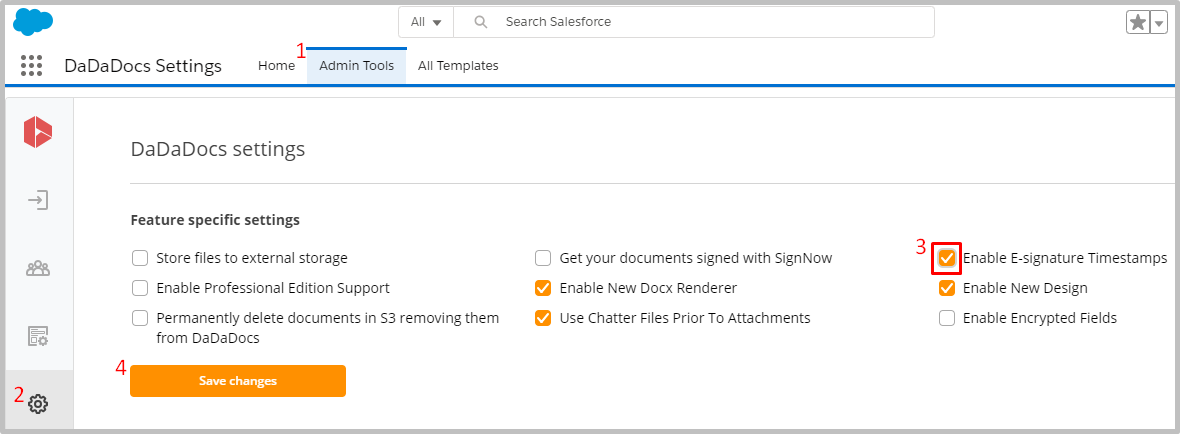
Switch to Settings and in the Feature-specific settings section, check the Enable E-signature Timestamps box.
When finished, click Save.
Once a document has been signed, the signature will be verified with a PDFfiller stamp that shows the date of signing next to each signature field.

To send your signature request, click SendToSign.
Recipients will receive their own copy of the selected document. The original document will remain unaltered.
To adjust additional settings, click Settings.
SendToEach & SendToGroup
Select your SendToSign method. There are two options for requesting digital signatures: SendToEach and SendToGroup.
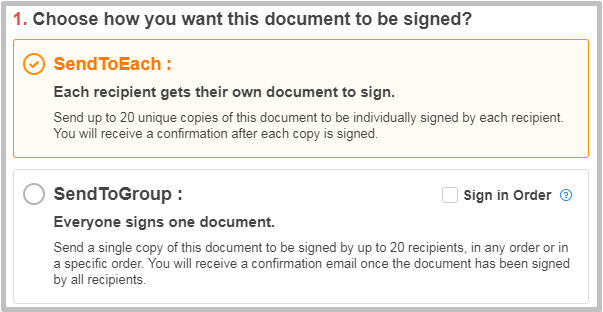
SendToEach: Send up to twenty unique copies of a document to be signed by each recipient individually. You will receive a confirmation email for each copy signed.
SendToGroup: Send a single copy of a document to up to twenty people. Once all recipients have signed the document, you will receive a confirmation email.
Add Recipients
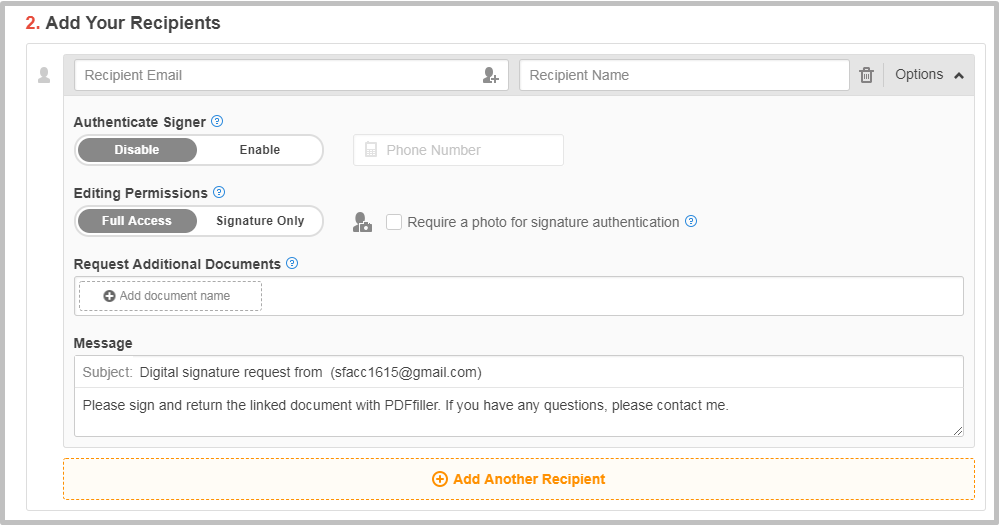
Signer Authentication. Enable two-factor authentication by moving the slider to the right and entering the recipient’s phone number.

The recipient will receive a unique passcode via text message. The recipient will have to enter this passcode to open the document.
Editing Permissions. If you set the editing permissions to Signature Only, recipients will only be able to sign and date the document. If you select Full Access, recipients will also be able to edit the document using all the tools in the editor.

Request a photo for signature authentication. Select this option to make recipients prove their identity by taking a photo with their webcam before returning the signed document.

Additional Documents. Request additional documents from your recipients directly in the SendToSign request. Click Add document name in the Request Additional Documents field.

Enter the names of the required additional documents that recipients should attach to the document they’re signing. Add as many documents as you need.

The signed document will be uploaded to the Documents tab together with the enclosed additional documents.
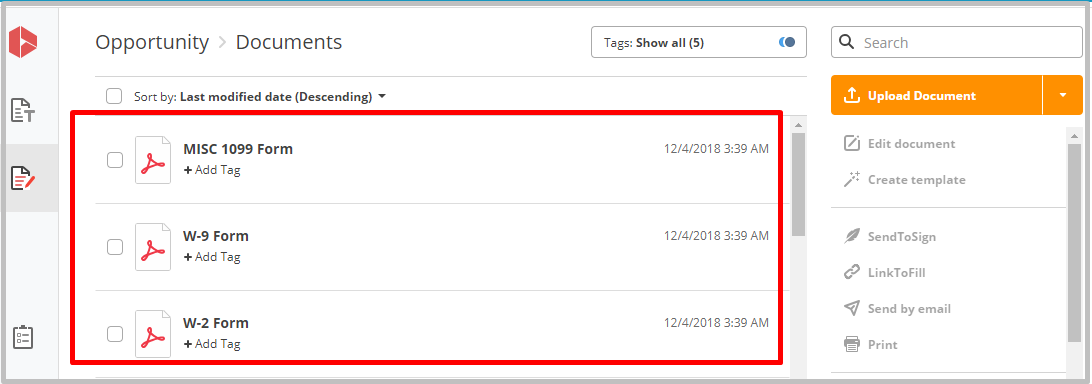
Alternatively, you will see the signed document along with the attached additional documents in the Notes and Attachments section of the current Salesforce record.

Message. Write a message that recipients will receive along with your SendToSign signature request.

Add more recipients by clicking Add Another Recipient.

Set individual options for each new recipient.
If you request signatures using SendToGroup, create an envelope name to label your group. Only you will be able to see this label.

Use the Sign in Order option to set the order in which SendToGroup recipients receive their requests to sign the document.
Check the Sign in Order box and then either drag or type the sequence number on the left of each recipient to set the signing order.


Add fillable fields and assign roles. Use this tool to create checkboxes and fillable fields for various types of data including text, numbers, signatures, dates and photos. For more information, please refer to the Fillable Fields section of this guide.
You can assign a fillable field to a particular recipient so that only this recipient will be able to fill it in. Click Add Fillable Fields and Assign Roles.

On the Add Fields and Assign Roles page, add fillable fields and assign them to recipients.
Select the field type in the right pane and click where you’d like to place the field. Then, select the recipient who will have the exclusive right to fill in the field from the dropdown list.
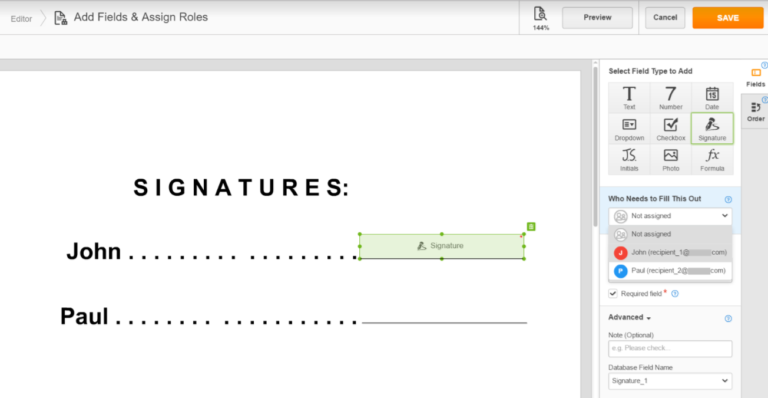
This step can repeated for up to 20 recipients.
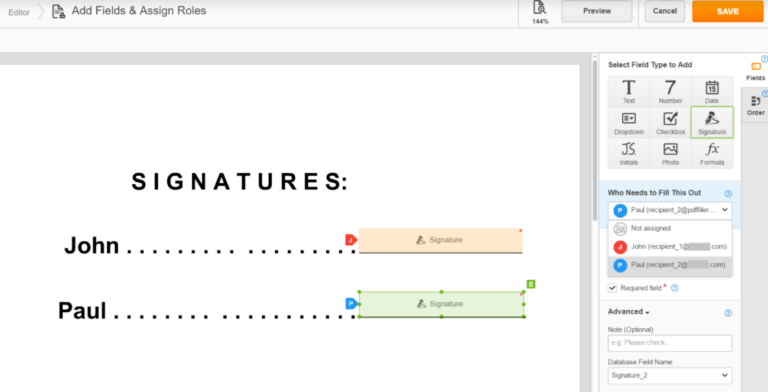
Click Preview to the upper right, and select a recipient from the dropdown list. You will view the document just as the selected recipient will see it.
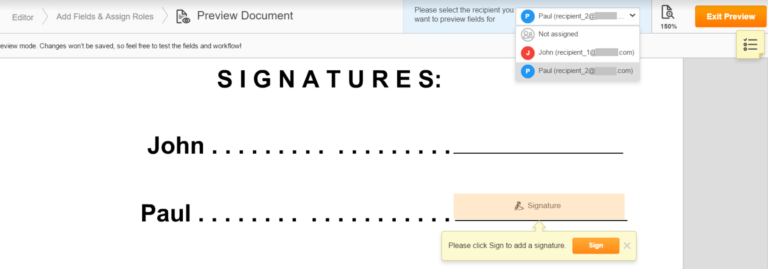
Exit the preview mode and click Save in the upper right corner to continue. If you do not assign a fillable field to anyone, any recipient will be able to fill it.
When finished, click SendToSign at the bottom.
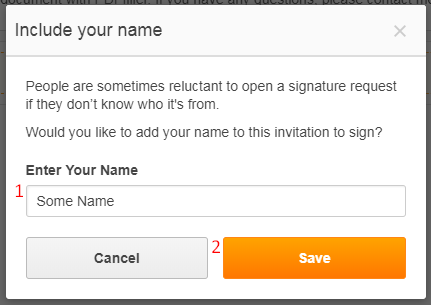
For the Include your name popup, enter your name so recipients know who they’re receiving the signature request from, then click Save.
The signature request will be automatically sent to your recipients.
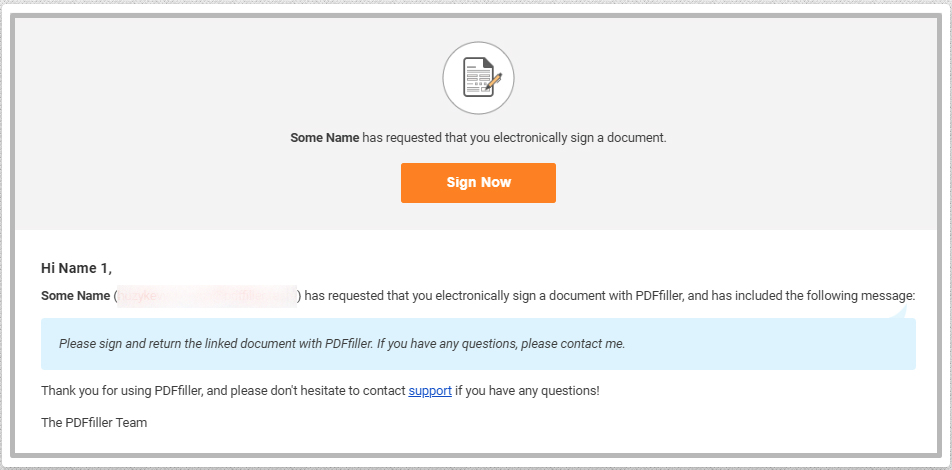
The signature request link will open the document in the editor where recipients are able to sign.
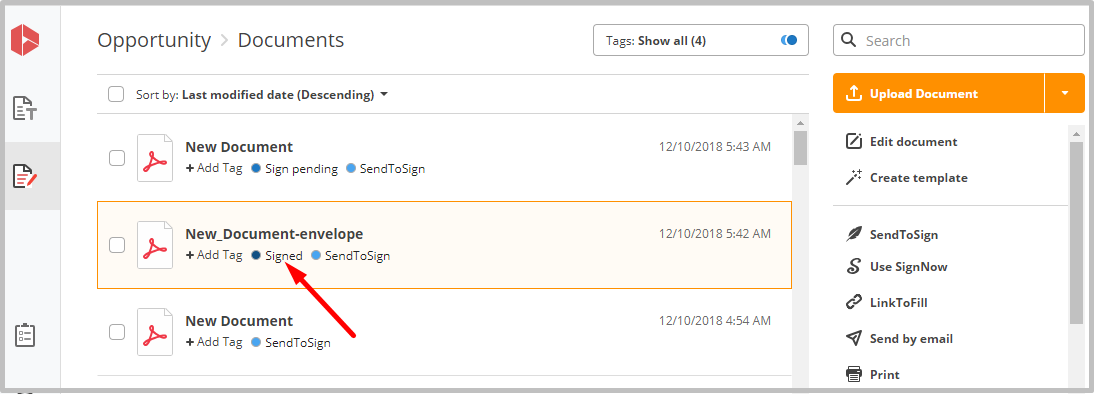
Signed documents are automatically uploaded to your Documents tab with the Signed tag.
Updated over 6 years ago
