Templates
Easily turn your static documents into smart fillable templates. Quickly pre-fill your documents with client data and send them out for signing. No need to manually transfer data from your Salesforce account.
Easily request the client data required to create new Salesforce records as well as update client data for existing Salesforce records. The smart template allows for several objects to be updated and/or created simultaneously.
Refer to the short step-by-step instructions below to begin.
- In the Document tab, select a document and click Create template.
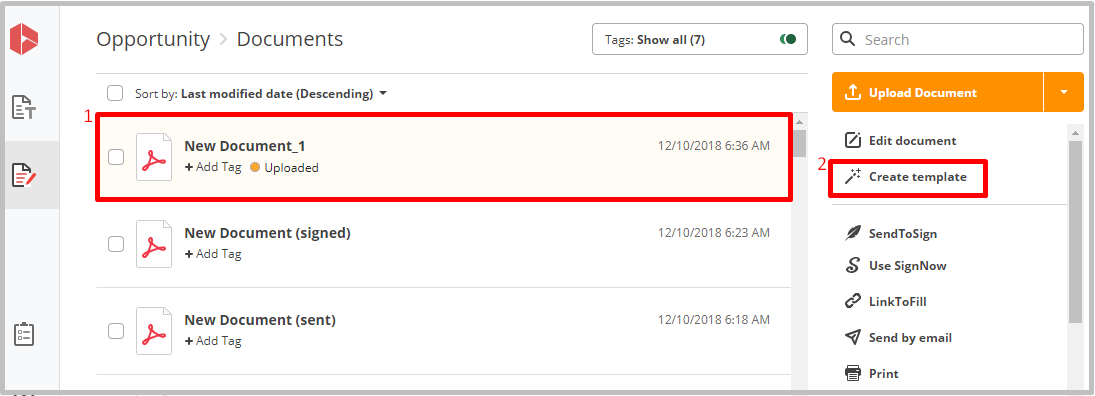
Alternatively, switch to the Templates tab and click New template.
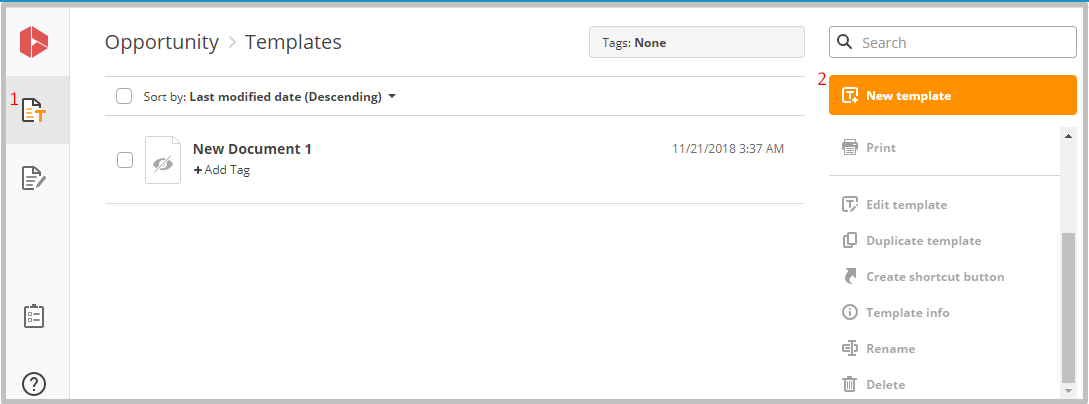
You will see the list of documents to create a template from. Choose the needed document and click Create template.
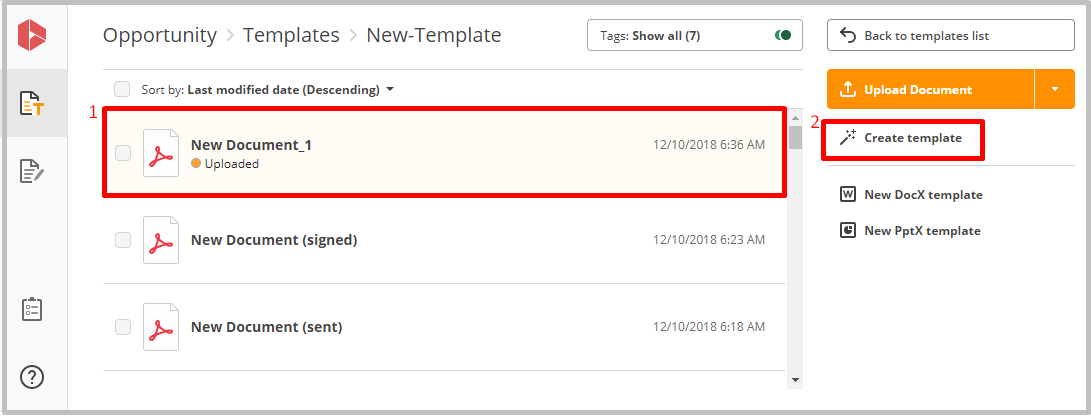
If you need a document that isn’t in the list, click Upload Document in the upper right corner.
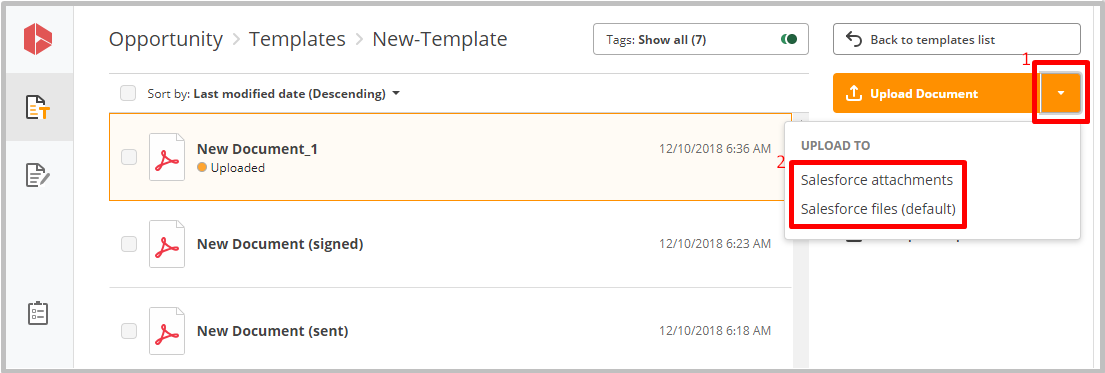
The uploaded document will be saved to the Salesforce files by default.
If you need to save it to other storage, click the arrow near the Upload Document button and choose the storage type from the dropdown menu. Uploaded documents can be saved to:
- Attachments
- Files.
- You will be redirected to a wizard for creating your template.
It is not required to complete all steps of the wizard as you can easily switch between tabs and set the template according to your needs.
Templates can be saved or deleted at any step of the wizard.
Template info
In the Template info tab, enter a name for your template and add a description, if needed.
A template description is optional, but can be useful for users to understand the purpose of a template.
To add fillable fields to your template, click Next to add fillable fields.
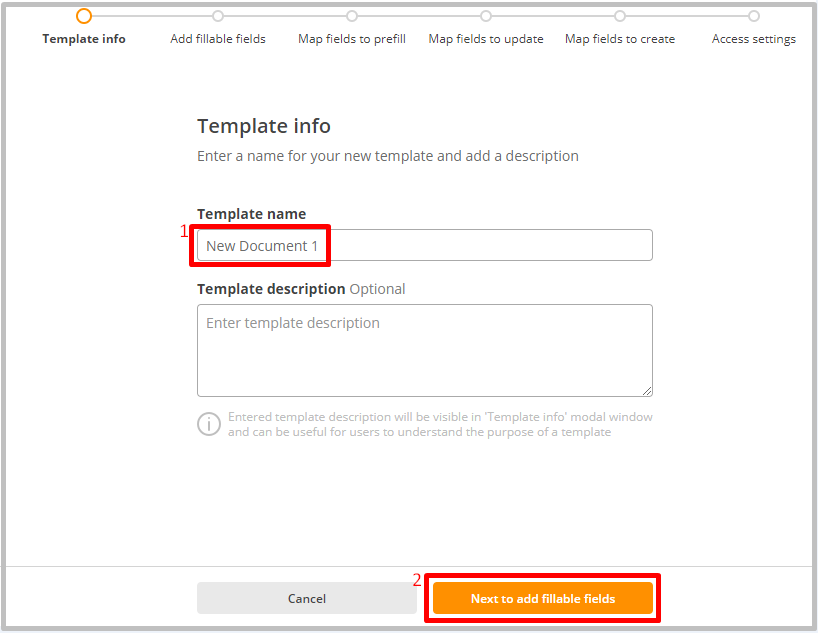
Alternatively, switch to the step of the wizard you need.
Add fillable fields
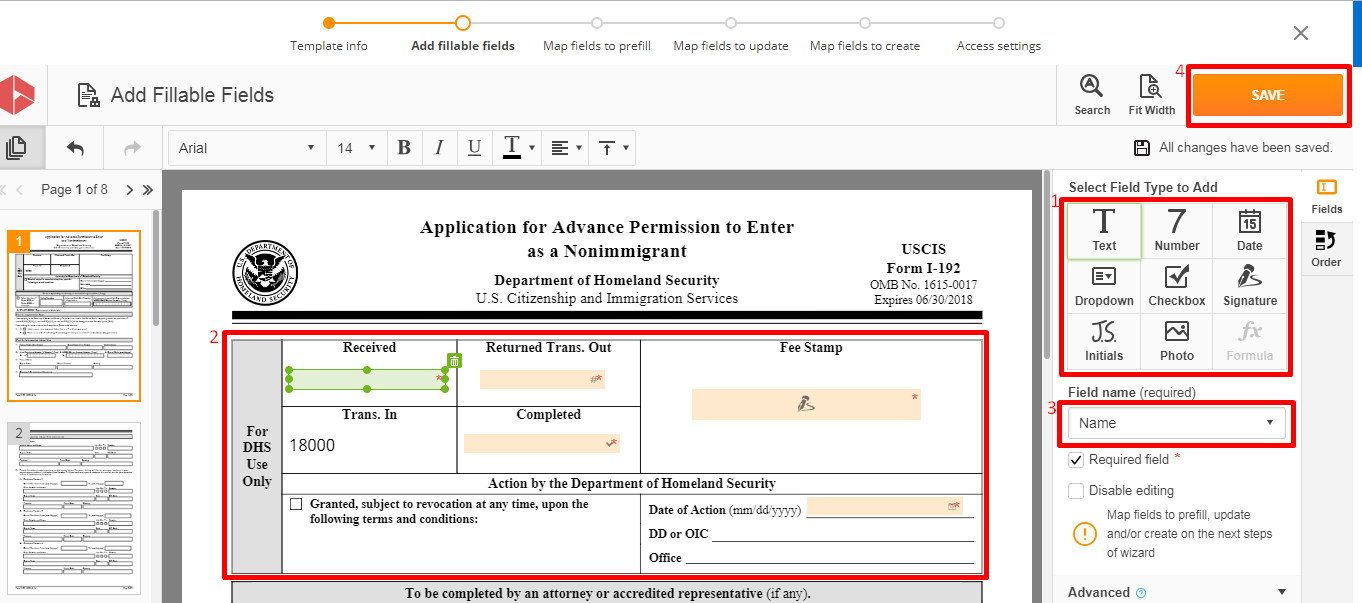
In the Add fillable fields tab, the editor for adding fillable fields to your template will open.
In the Field Name section, enter a name for each mapped field. This will help you easily find and map to the Salesforce object record fields on the next steps of the wizard.
Note that fields for prefilling the template or updating/creating Salesforce records can be mapped on the next steps of wizard.
When all desired fields have been added, click *Save** to proceed.
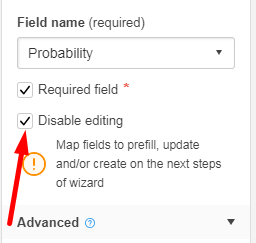
Select the Disable editing checkbox to lock the fillable field after filling it out. This ensures that data added to fillable fields cannot be changed after the template has been submitted.
Map fields to prefill
In this section, you can map fields to be prefilled with data from Salesforce records.
If you don’t need to prefill a template, you can proceed to updating records by clicking Next to map fields to update.
Alternatively, switch to the necessary tab by clicking on it.
To prefill the template fields with Salesforce data, click Add new mapping.
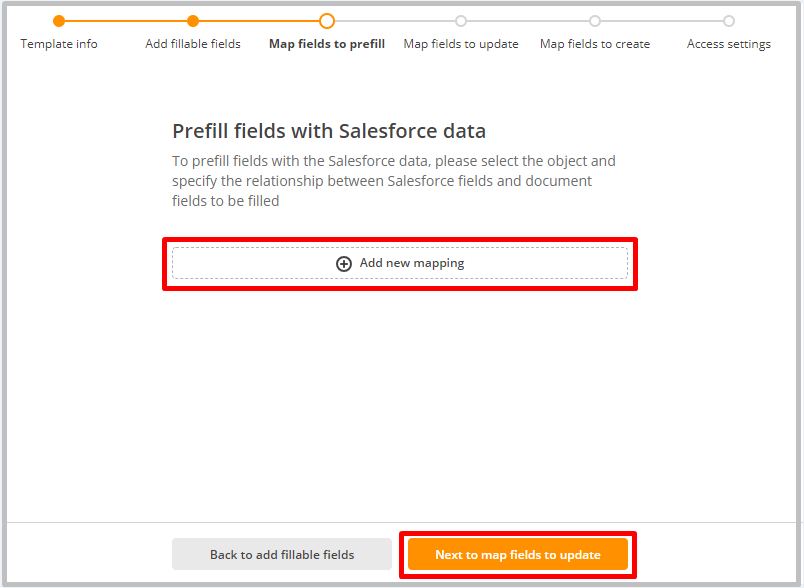
In the Add mapping to prefill window, choose the object you want to use Salesforce data from, then click the Add Field button to add fields you intend to prefill with Salesforce data.
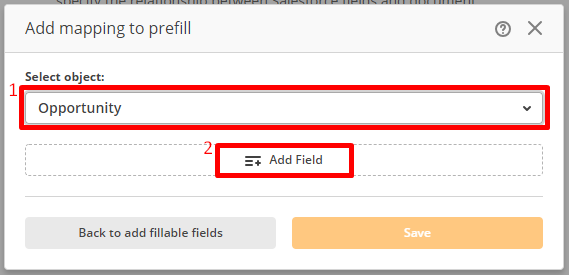
Once you’ve specified the desired object, specify the needed Salesforce fields that will match the fields of the current document.
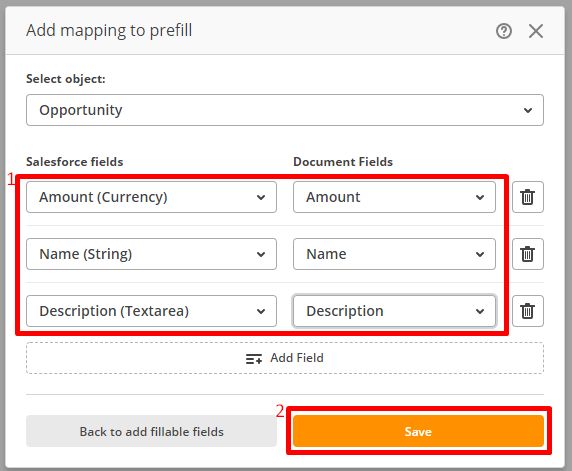
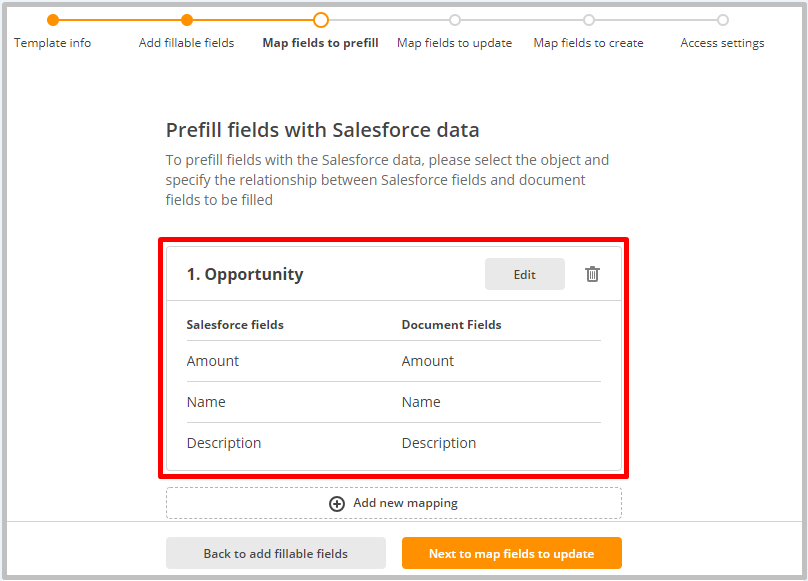
On the next page, you will see a list of fields to be prefilled along with the object you want to use the Salesforce data from.
To change the object or choose other fields, click Edit.
To add another mapping, click Add new mapping at the bottom.
To proceed to updating records, click Next to map fields to update.
Alternatively, switch to the necessary tab by clicking on it.
Map fields to update
In the Map fields to update tab, you can map fields to update records.
Once recipients have submitted a document, the Salesforce records will be updated using data from a filled document.
To proceed to updating records, click Next to map fields to update.
Alternatively, switch to the necessary tab by clicking on it.
In case you have previously mapped fields to prefill a template, you can copy mapping from the Prefill section.
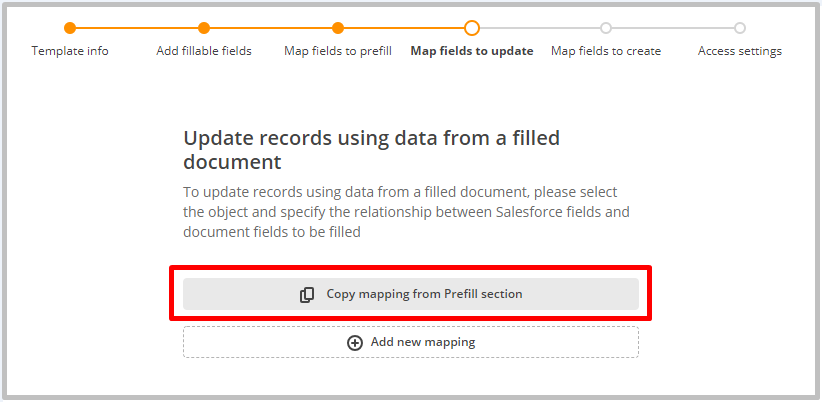
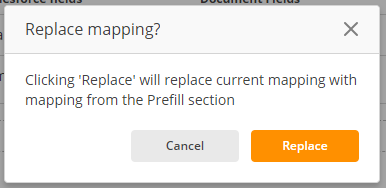
Note that mapping copied from the Prefill section will replace mapping from Update section.
To replace current mapping with that from the Prefill section, in the Replace mapping window, click Replace.
If you have not mapped any fields in the Prefill section, you can map new fields by clicking Add new mapping.
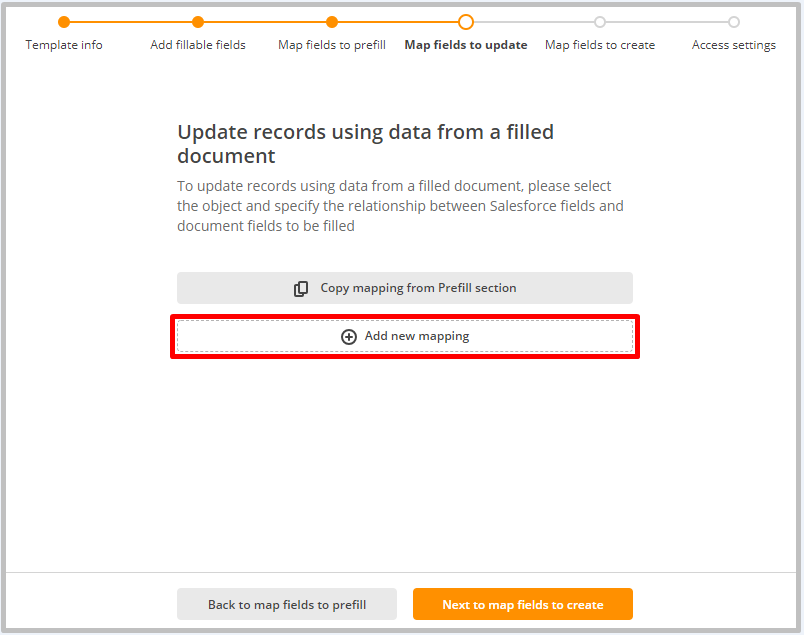
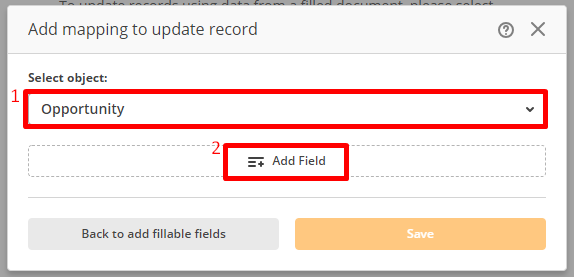
In the Add mapping to update record window, select the object for which you’d like to update a record.
Then, click the Add Field button to add fields which you’d like to update with data from a filled document.
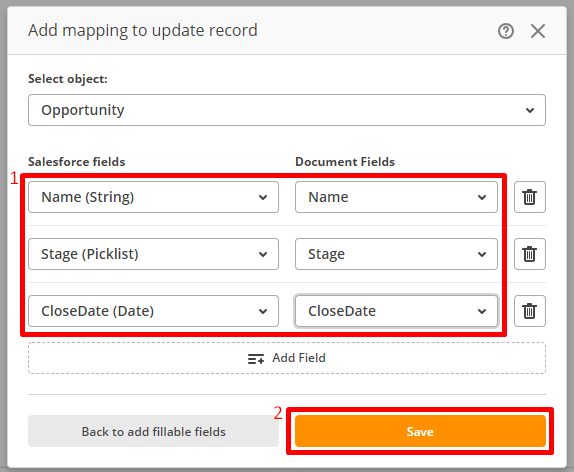
Once you’ve specified the desired object, specify the needed Salesforce fields that will match the fields of the current document.
When finished, click Save.
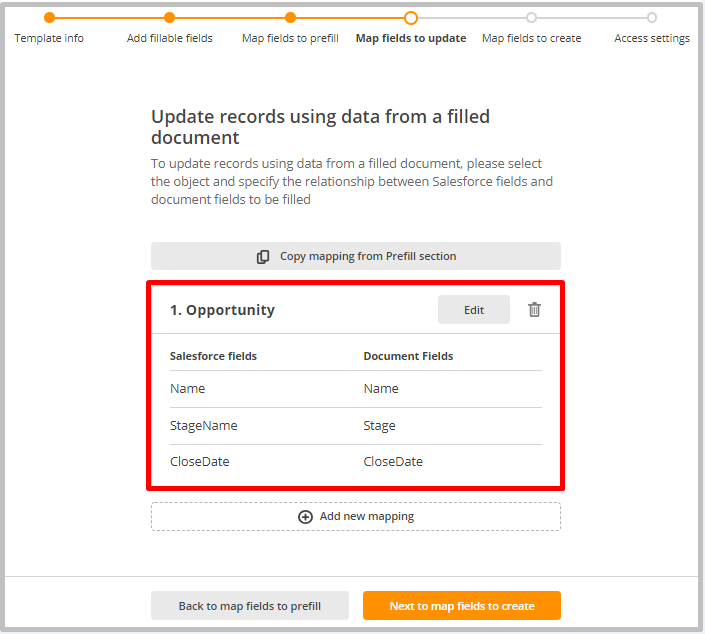
On the next page you will see the object for which a record will be updated along with a list of fields to be updated.
To change the object or choose other fields, click Edit.
To add another record, click Add new mapping at the bottom.
To proceed to creating a record, click Next to map fields to create.
Map fields to create
In the Map fields to create tab, you can map fields to create new Salesforce records.
Once recipients have submitted a document, new Salesforce records will be automatically created using data from a filled document.
To proceed to access settings, click Next to access settings.
Alternatively, switch to the necessary tab by clicking on it.
To map fields for creating new Salesforce records, click Add new mapping.
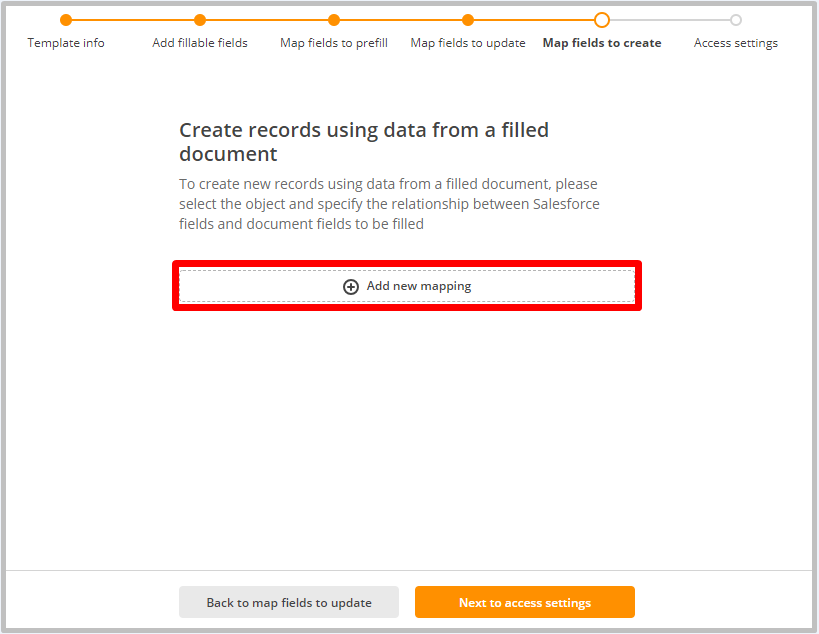
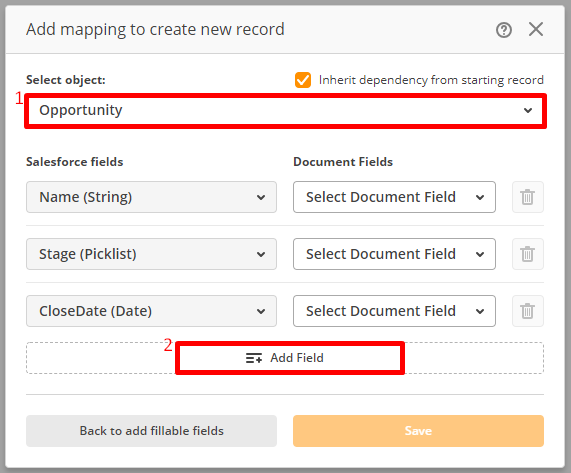
In the next window, select the object for which you’d like to create a new record. Then, click the Add fields button to add fields that will be populated with data from a filled document.
Note that the Salesforce fields highlighted with grey are required.
Assign the current record’s relation with its parent records, to the new record that is created, by checking the Inherit dependency from starting record box.
This option is only available for creating a new record of the same object type. If record dependency is required, the checkbox will be locked.
Note that after mapping has been saved, the checkbox cannot be altered.
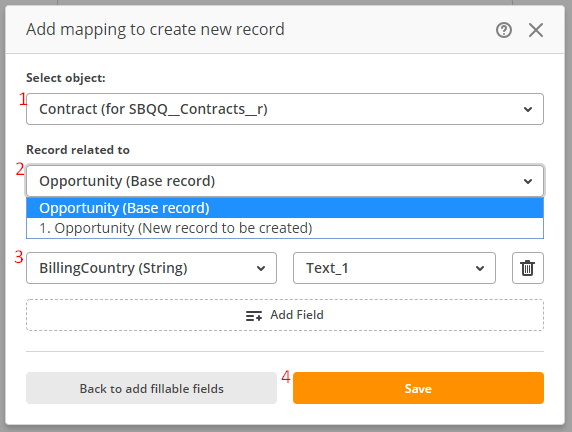
When creating a child record for a current object (Opportunity in the example), select where you’d like to attach it:
– to a base record you are using to create a template;
– to a new record to be created for a current object.
Once you’ve specified the desired object, specify the needed Salesforce fields that will match the fields of the current document.
When finished, click Save.
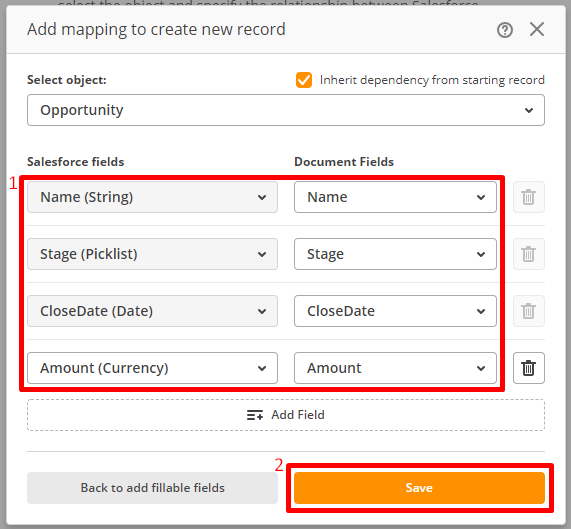
On the next page you will see the object for which a new record will be created along with a list of fields to be filled.
To change the object or choose other fields, click Edit.
To add another record, click Add new mapping at the bottom.
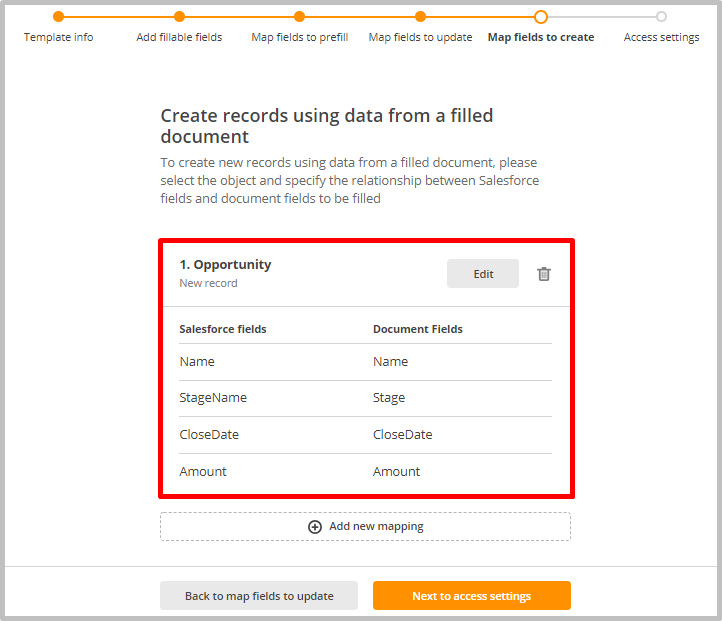
Access settings
Easily specify users who will be able to access your templates and create documents using these templates. You can select users by profiles and roles.
Once you’ve switched to the Access settings tab, all the users will be automatically selected.
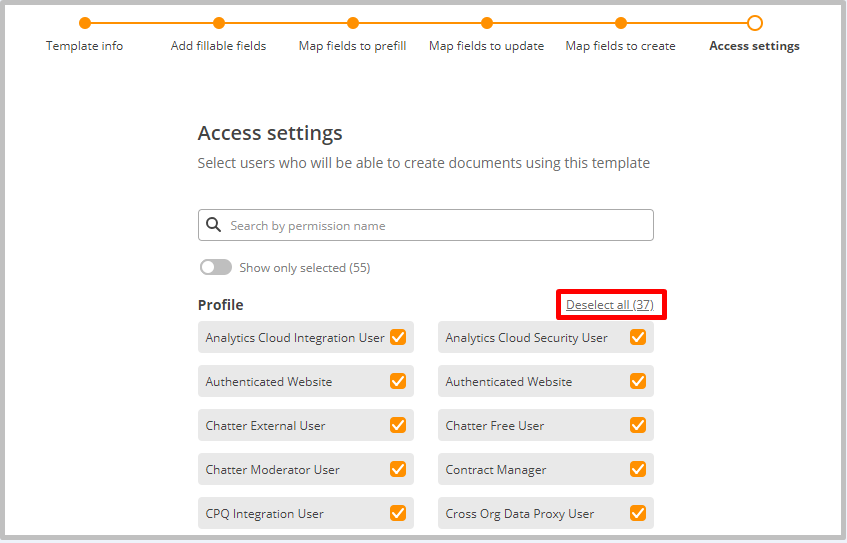
To select specific users you want to grant access to your template to, click Deselect all, then select checkboxes next to the needed users.
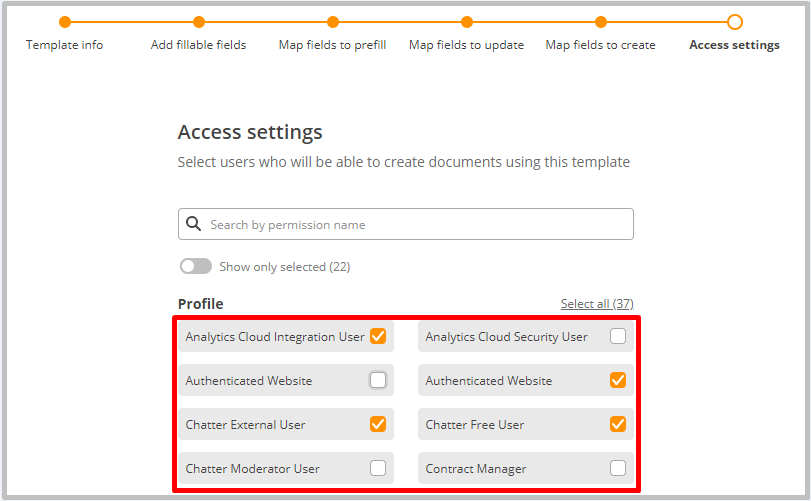
To only see a list of selected users, click Show only selected.
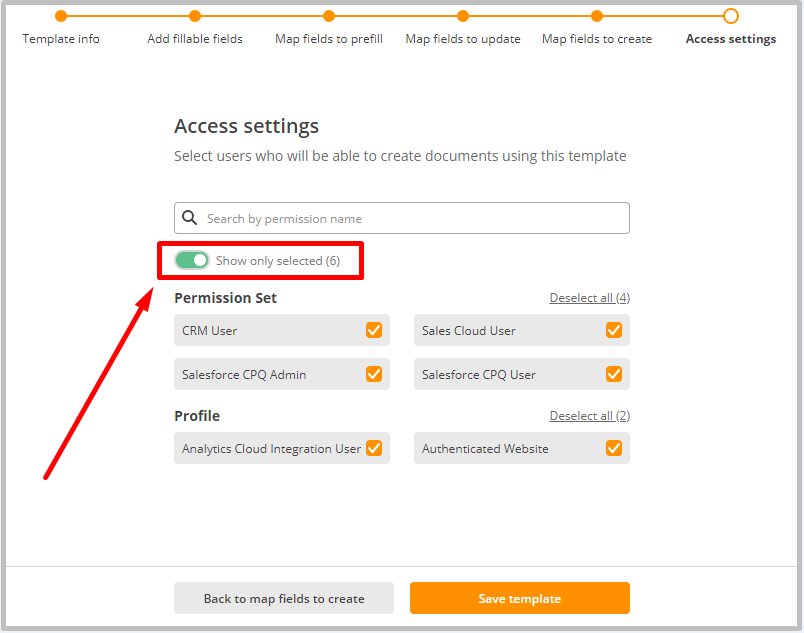
To save your template and template settings, click Save template.
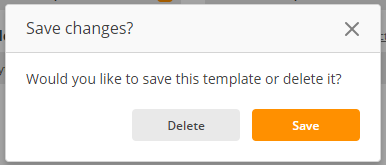
Remember that you can save your template in any step of the wizard by clicking the cross icon.

Once clicked, you will see the Save changes pop-up, where you can choose whether to save a template or delete it.
The template will be automatically saved to the Templates tab. Hover over the template to see a description of its intended use.
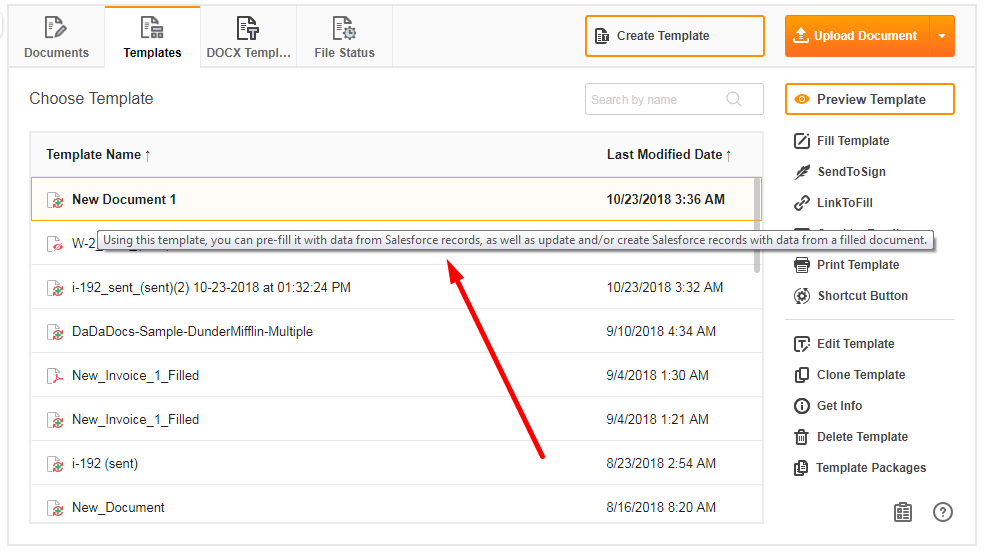
Now you can use your template directly from the Template tab to edit it as well as share to get it reviewed, filled out or signed.
Updated over 6 years ago
