How to Add Use DaDaDocs Button to Salesforce Professional Edition
If you use Salesforce Professional edition and you can not install the Use DaDaDocs button the way it described in the Installation and Configuration section of this documentation, then follow these steps to install it manually.
Create Use DaDaDocs Button
- Go to Setup and search for “buttons” in the Quick Find to locate to the Buttons, Links, and Actions menu of the required object (Contacts in the example).
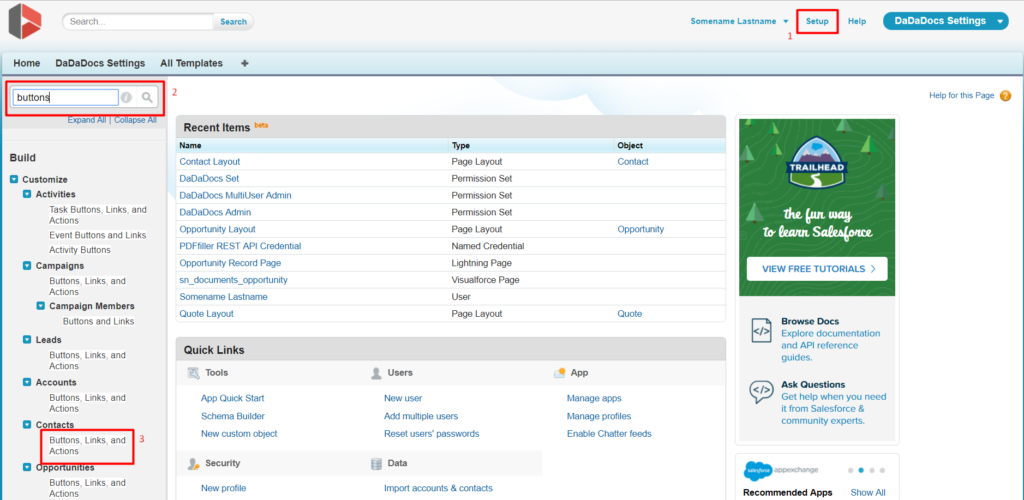
- Click New Button or Link.

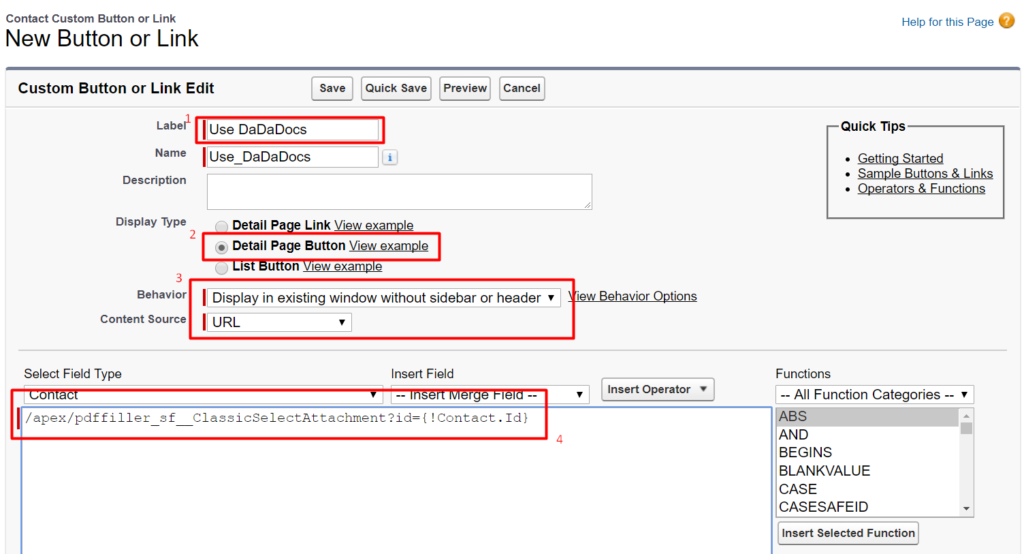
- Specify your button Label (Use DaDaDocs in the example). Notice that Name field populates automatically.
For the Display type select Detail Page Button.
Select your button behavior (Display in existing window without sidebar or header in the example).
Add the following line to the syntax field:
/apex/pdffiller_sf__ClassicSelectAttachment?id={!Contact.Id}
Note that the syntax above is specified for the Contact object. Change Contact for the required object name (case sensitive).
Click Save to apply your settings.
Note that the new custom button will not be displayed to the users until you add it to the page layout.
Add Use DaDaDocs button to the page layout
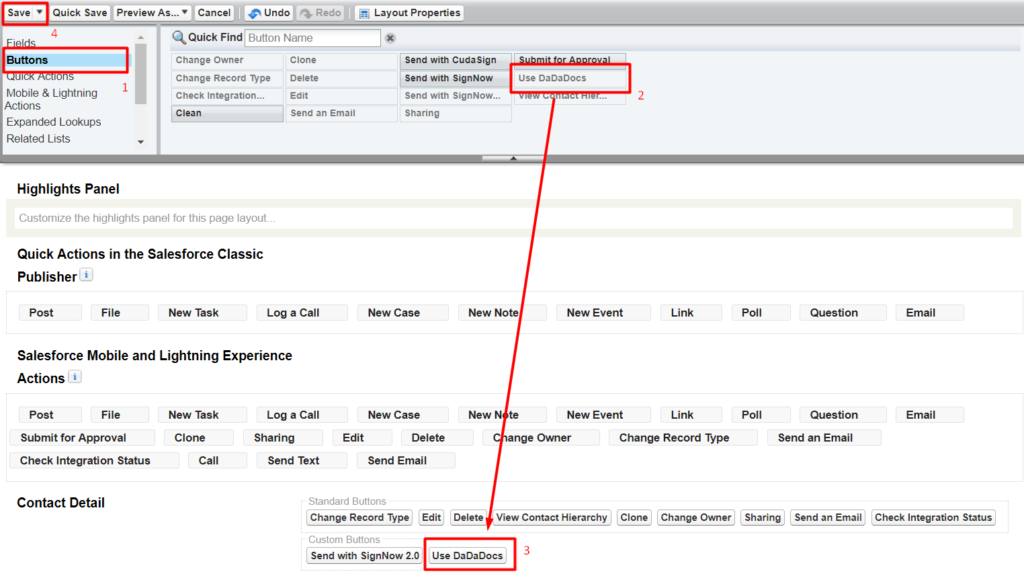
- Search for “layout” in the Quick Find to navigate to the required object Page Layouts (Contacts in the example).

- Click Edit next to the required layout.

- In the Object page Layout, select Buttons, select your button (UseDaDaDocs in the example), drag and drop it in the Object details Custom Button section. Click Save to apply changes.
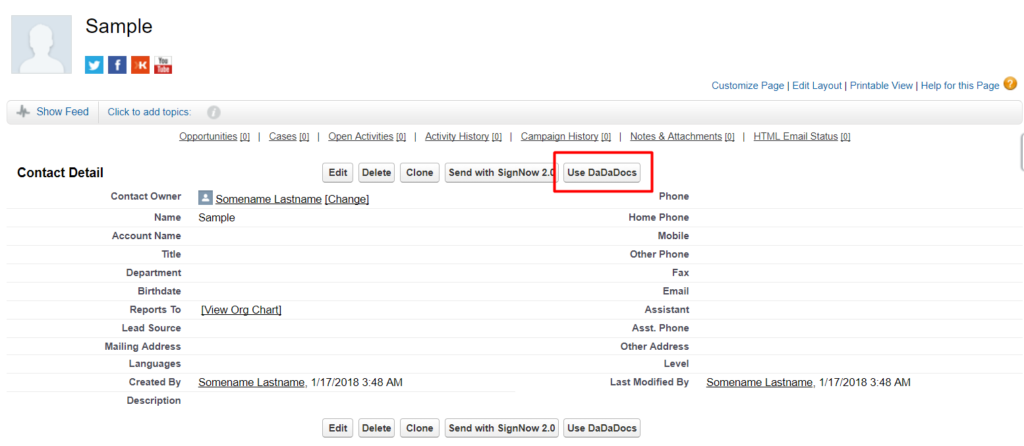
Now your Use DaDaDocs custom button is ready to use directly from your object record page.
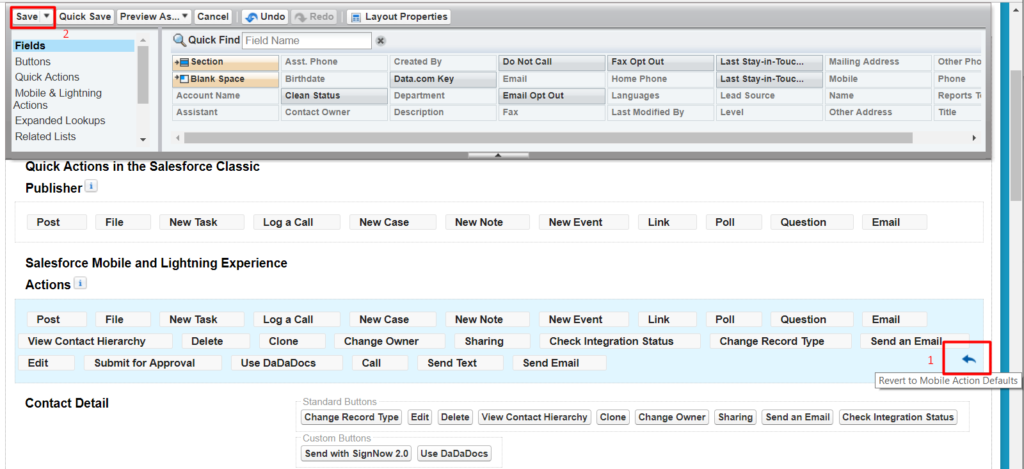
Note. If your Use DaDaDocs button hasn’t appeared in your object page when running Salesforce Lightning, do the following to enable it.
On your object page layout locate to the Salesforce Mobile and Lightning Experience Actions and click Revert to the Mobile Actions Default, then click Save.
Updated over 6 years ago
