Roles for DocX templates
Send your DocX template out for signing and assign roles to the recipients. Assign as many roles as you need.
- To assign roles to the recipients in your DocX template, previously prepare your DocX document.
Note that you can only use DocX documents created or saved with Microsoft Word or Office 365.
- Next add syntax to your DocX document for assigning roles to the recipients. Use fillable tags syntax from the table below.
| KEY | What does it mean? | Accepted format values | When fields need this KEY? |
|---|---|---|---|
| t | TYPE of the field | s (for signature) i (for initials) t (for text) d (for dropdown) c (for checkboxes) | For every field |
| r | REQUIRED | y (for required) n (for optional) | For every field |
| o | ROLE | "" | For every field |
| l | LABEL | "" | For every field |
| dd | DROPDOWN | "option1, option2, option2, ...." | For every field |
| w | WIDTH | w (width) | For every field |
| h | HEIGHT | h (height) | For every field |
- In the syntax, specify the role number as well as the number of the text and signature fields that should be completed by the recipient you’ve specified. Refer to the example when setting up your template.
Text field: {{t:t;r:n;o:"CEO";l:"text_field_1";}}
Signature: {{t:s;r:n;o:"role1";l:"signature_field_1";}}
Signature: {{t:s;r:n;o:"role2";l:"signature_field_2";}}
Signature: {{t:s;r:n;o:"role2";l:"signature_field_3";}}
Signature: {{t:s;r:n;o:"Business User";l:"signature_field_4";}}
Signature: {{t:s;r:n;o:"User";l:"signature_field_5";}}
Initials: {{t:i;r:n;o:"";l:"initials_field_1";w:200;}}
Dropdown: {{t:d;r:y;o:"CTO";l:"Dd_field_1";dd:first option,second option,third option;w:200;}}
Checkbox: {{t:c;r:y;o:"User";l:"checkbox_field_1";}}
Note that after the recipients have received the DocX template, they will be able to complete and sign only those fields to which their roles were assigned. Data provided by other recipients will be unavailable for each specific recipient.
When all the roles are properly set, create a new DocX template in your Salesforce organization. Check the DocX templates section -->Create DocX Template subsection of the following document for details.
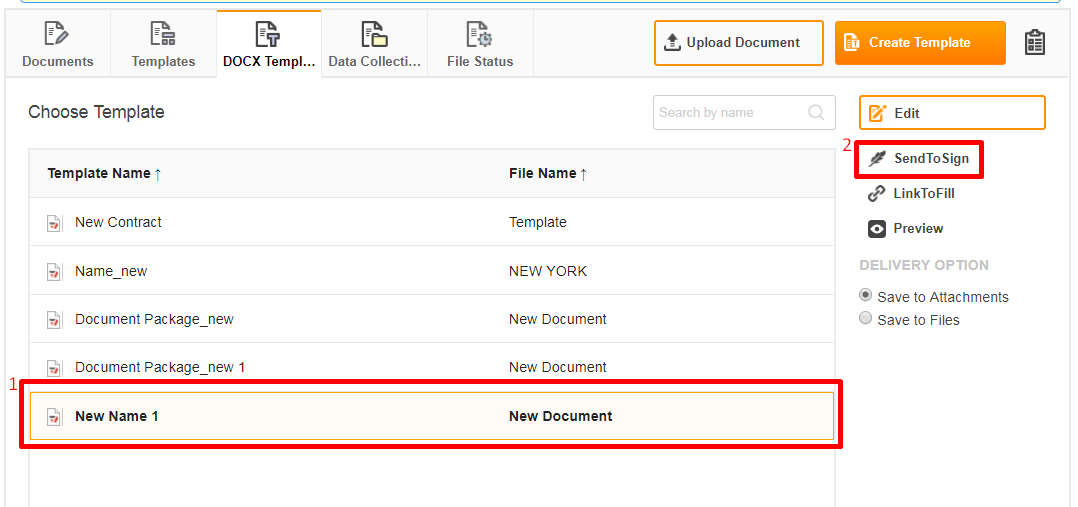
- After a new DocX template with assigned roles has been created, on your object page click Use DaDaDocs to proceed to DaDaDocs and select the DocX Template tab. Choose the required DocX template and click SendToSign in the Document Option section.

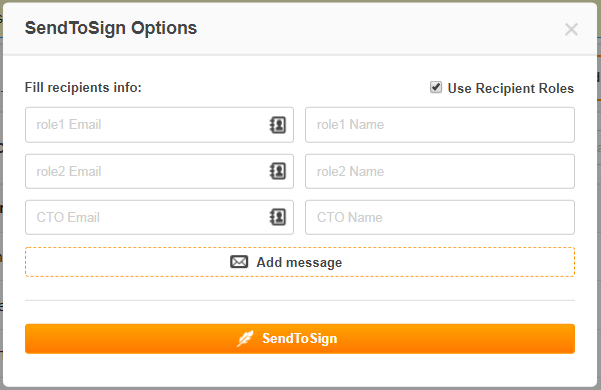
- In the SendToSign Options popup, enter the emails and names of the recipients you want to assign roles to and click SendToSign to send your DocX template out for signing.

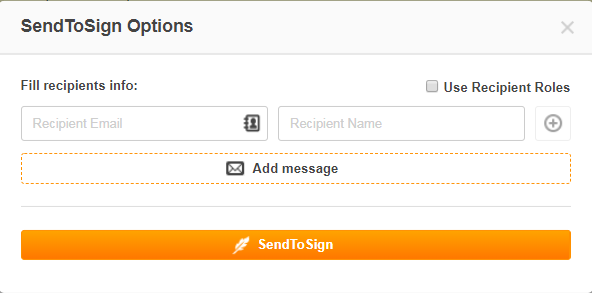
- To not use the roles, uncheck the Use Recipient Role box to the upper right. In this case all the fields in your DocX template will be available for all recipients.

Updated over 6 years ago
