Salesforce Process Builder
Forget about having to repeat the same steps for creating e-signature requests. Start automating your signature requests with the Salesforce Process builder. Set up your DaDaDocs templates to be automatically sent to specific recipients whenever certain changes occur to your records.
Just specify an action that will trigger sending a template. Below is an example of how to simplify your workflow with the Salesforce Process Builder.
Sending Templates out to Be E-signed
Easily send a signature request when a new contact has been created or added. Automatically send fillable and pre-fillable PDF templates as well as DocX out to be e-signed using the Process Builder. Sending your contracts, agreements and other important documents to new customers now takes seconds.
The instructions below will guide you through setting up automated e-signature requests using the Salesforce Process Builder.
- On the Salesforce main page, go to Setup, then type ‘build’ in the Quickfind. In the search result, select Process Builder.
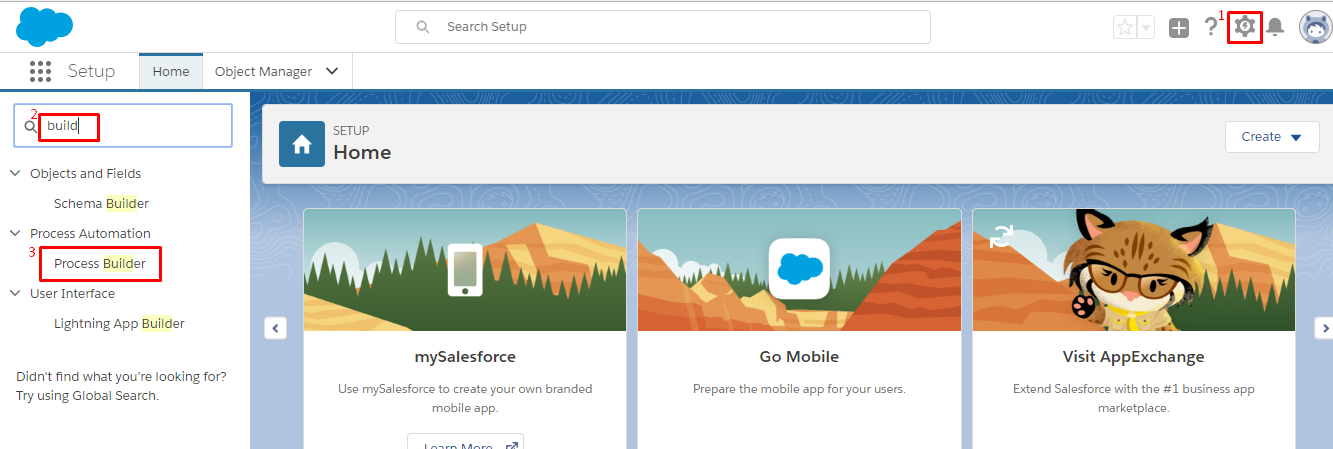
- On the Process Builder page that opens next, click New in the upper right corner to create a new process.

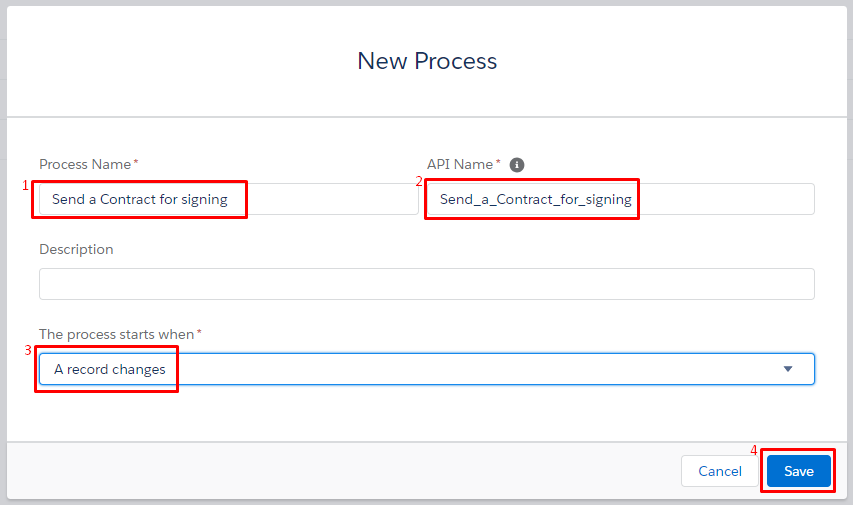
- In the New Process window, enter the name of the process you are creating. The API name will be entered automatically right after clicking the API name field.
You also have the option to add a description of the process being created.
Define the action that will act as the trigger for sending a template out to be e-signed. (The process starts when a record changes in the example).
When finished, click Save.
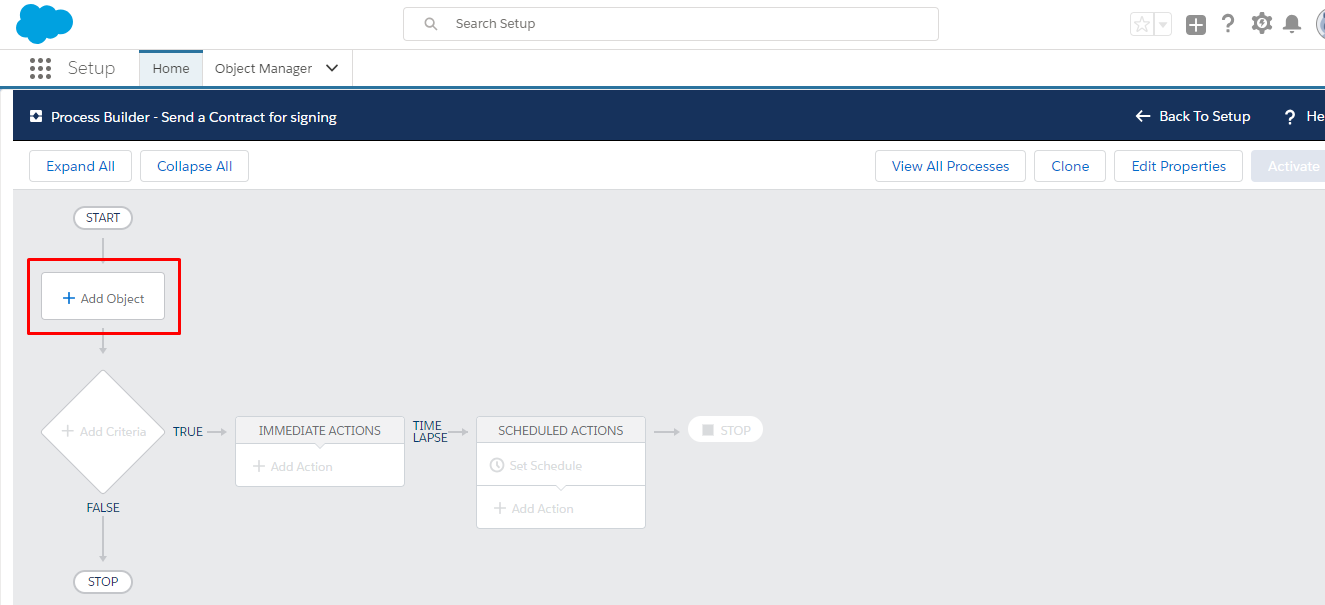
- The Process Builder creation scheme will open. Choose the required object for which you are creating a process, click Add Object.
Note that such objects as Campaigns and Contacts are only available for your Process Builder.
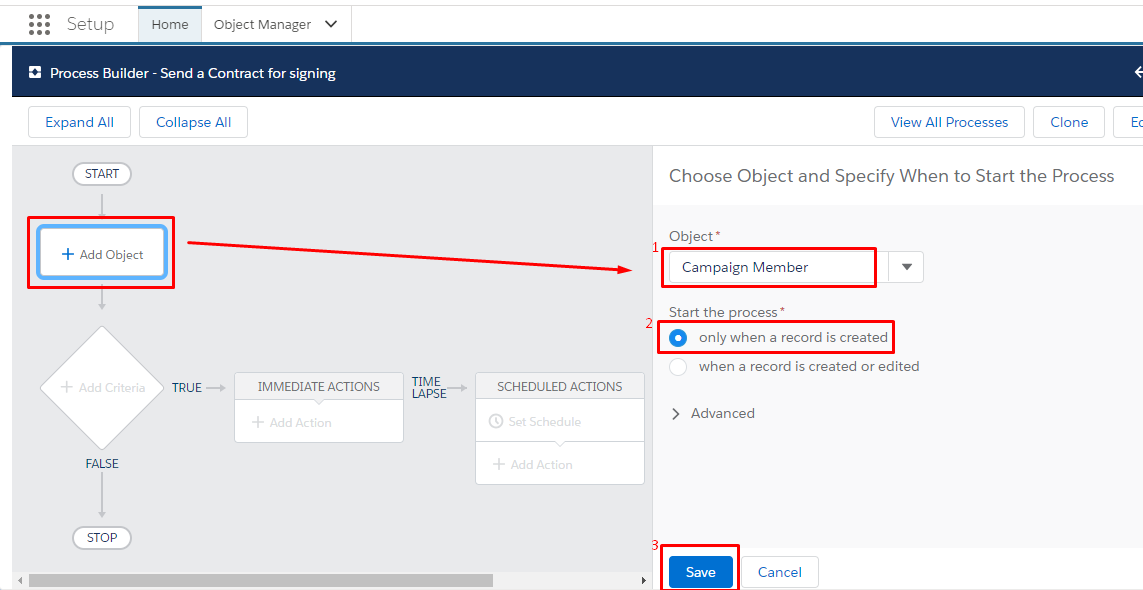
From the dropdown menu in the settings window on the right, choose the object that you want to base this process on (Campaign Member in the example). Then specify when to start the process (Only when a record is created in the example).
When finished, click Save.
Note! Before saving your changes, confirm the selection. You won’t be able to change the object after saving it.
- You will be redirected to the Process Builder creation scheme. Select Add Criteria.
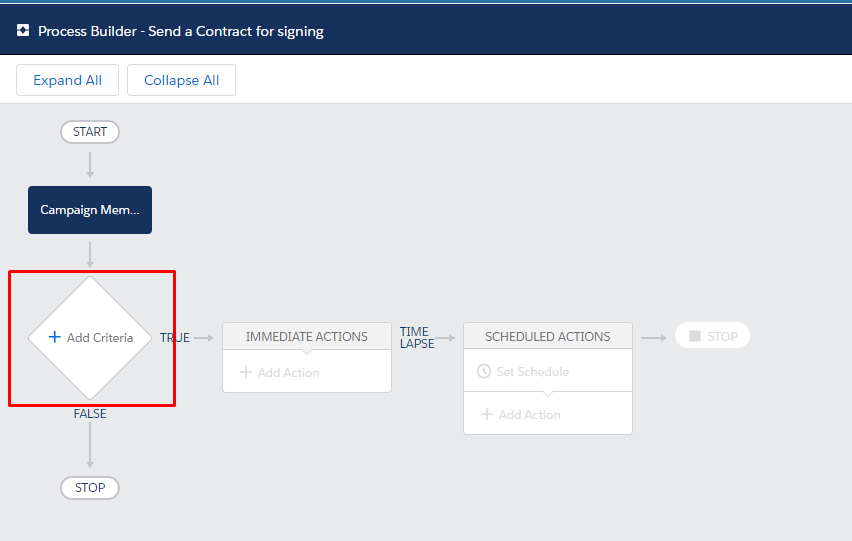
The Criteria Settings window will open.
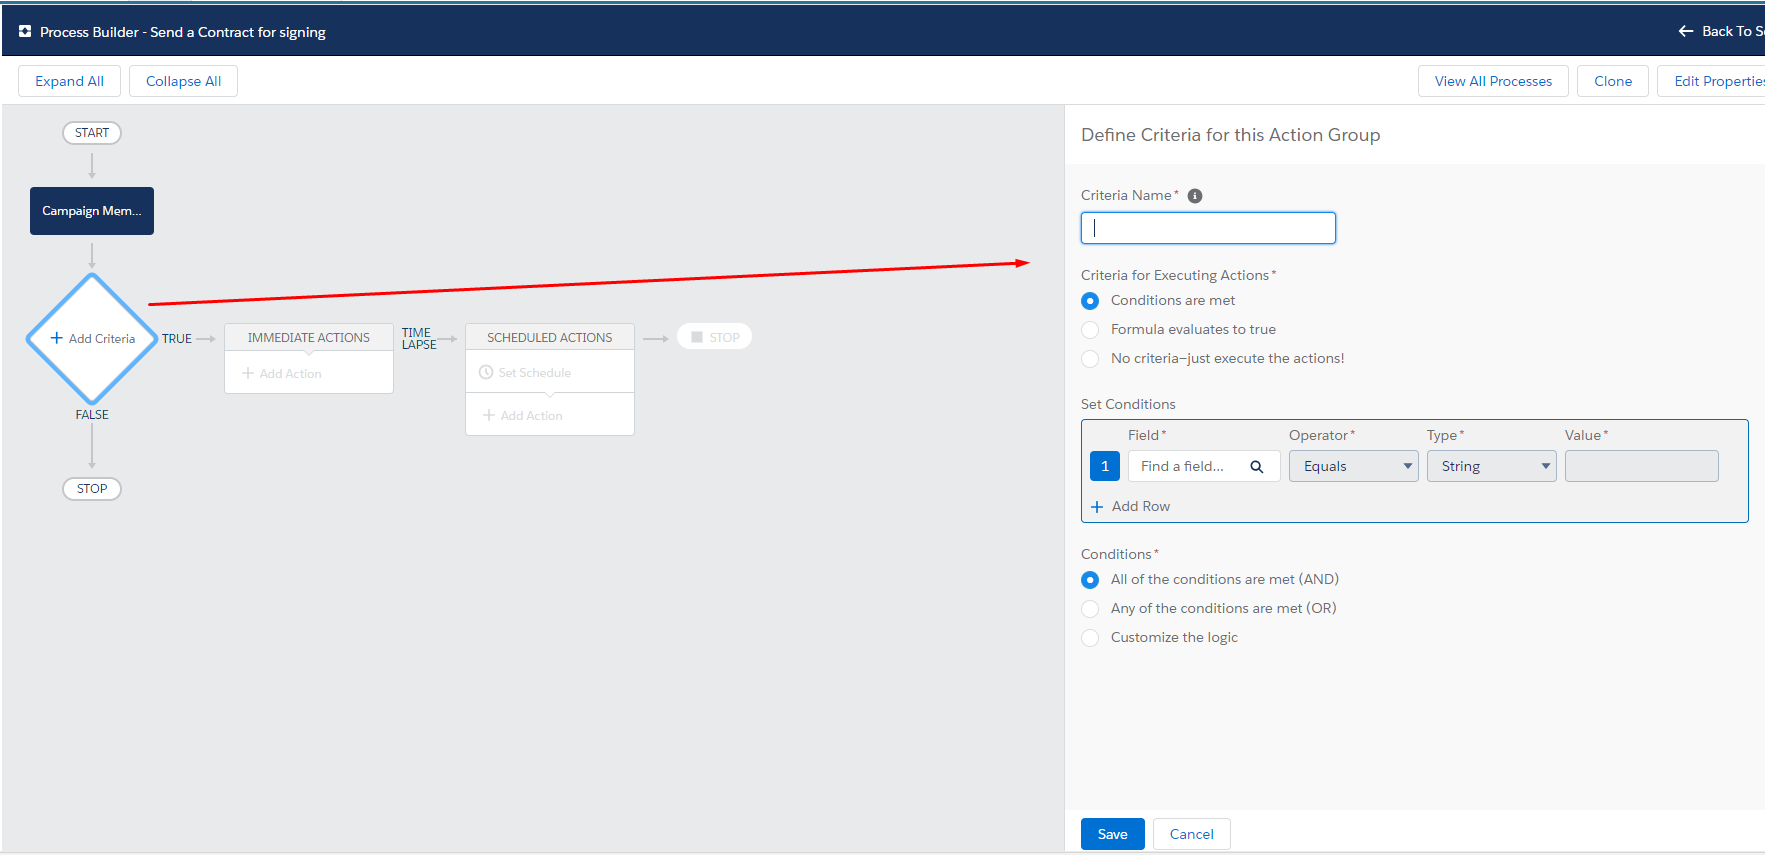
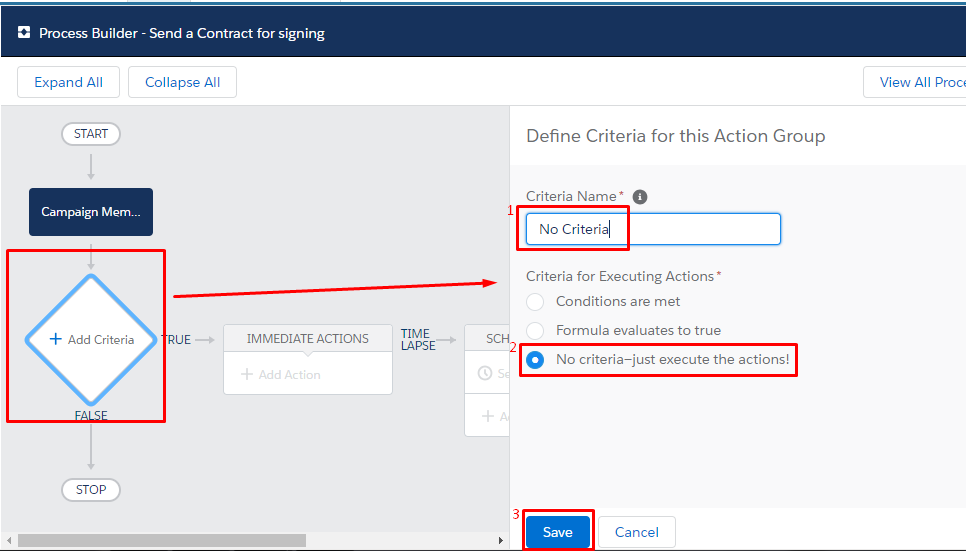
- Enter the Criteria name (No Criteria in the example). The name you enter will appear on the canvas. We recommend using a name that helps you differentiate between other criteria nodes.
Select No criteria-just execute the actions! for the criteria type to execute actions.
When finished, click Save.
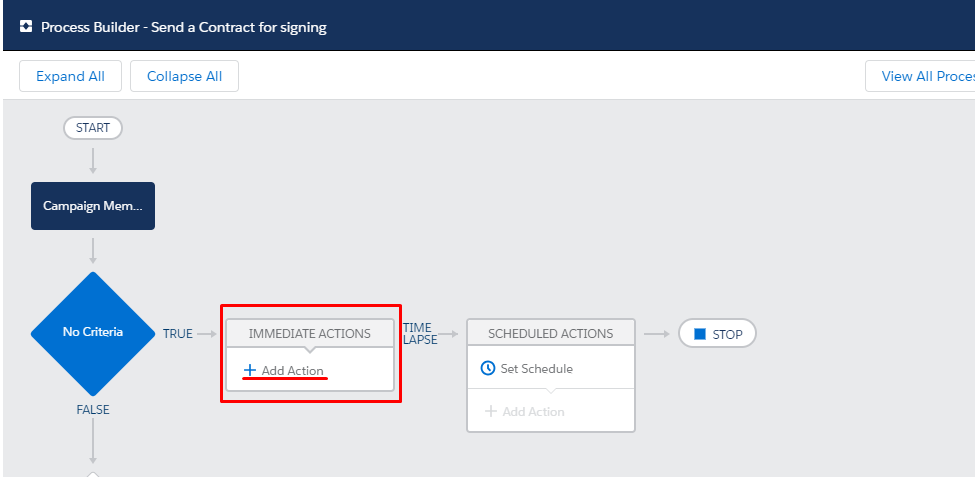
- You will be returned to the Process Builder settings scheme. Follow the TRUE arrow and in the Immediate Actions section, click Add Action.
The Action settings window will open. For the Action Type, select Apex from the dropdown menu, then enter the Action Name (Execute in the example). For the Apex Class, choose AutomatedTemplatesSenderController.
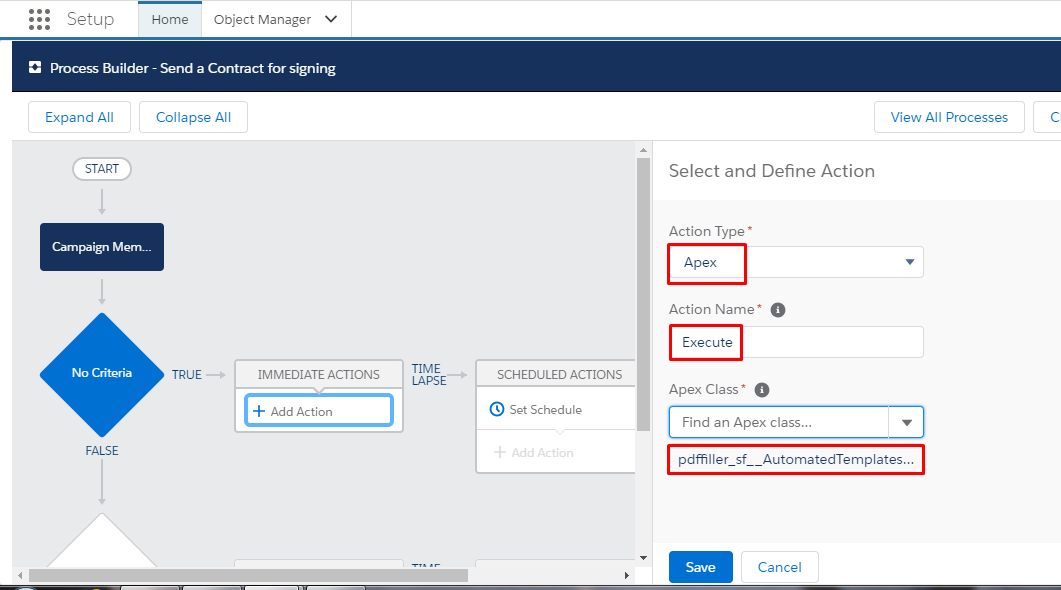
Once the Apex Class has been defined, the Apex Variables Settings section will appear.
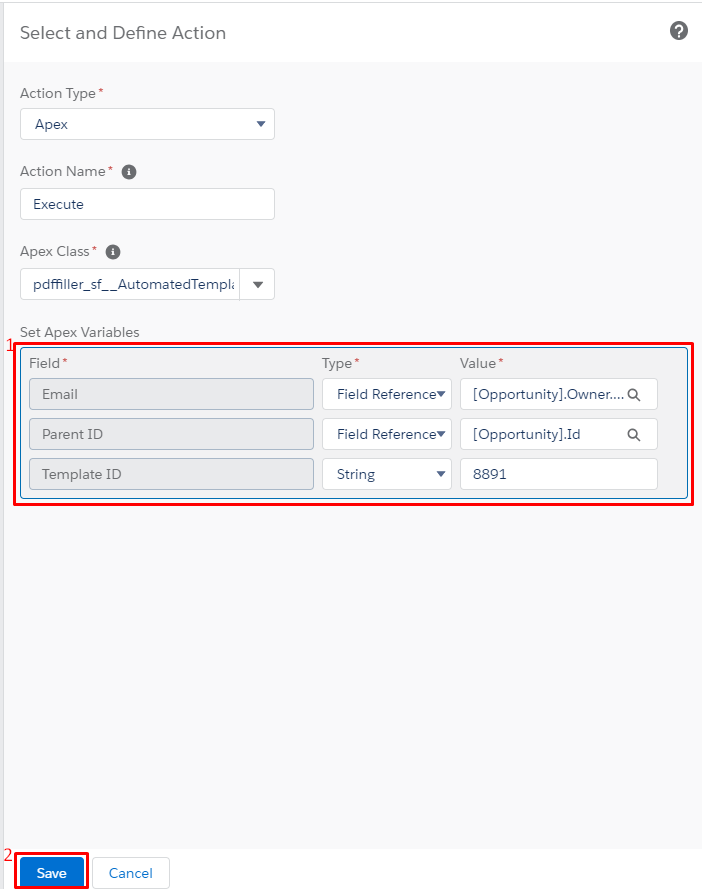
-
For the first row: Email (required field) → type: Field Reference → value: (Contact.Email, CampaignMember.Contact.Email, Account.Description ... etc.) Any field that contains an email in it.
-
For the second row: Parent Id (required field) → type: Field Reference → value: any ID Field in the object. (the filled template will be filled with this object’s data and then attached to this object).
-
For the third row: Template ID (required field) → type: String → value: templateId*.
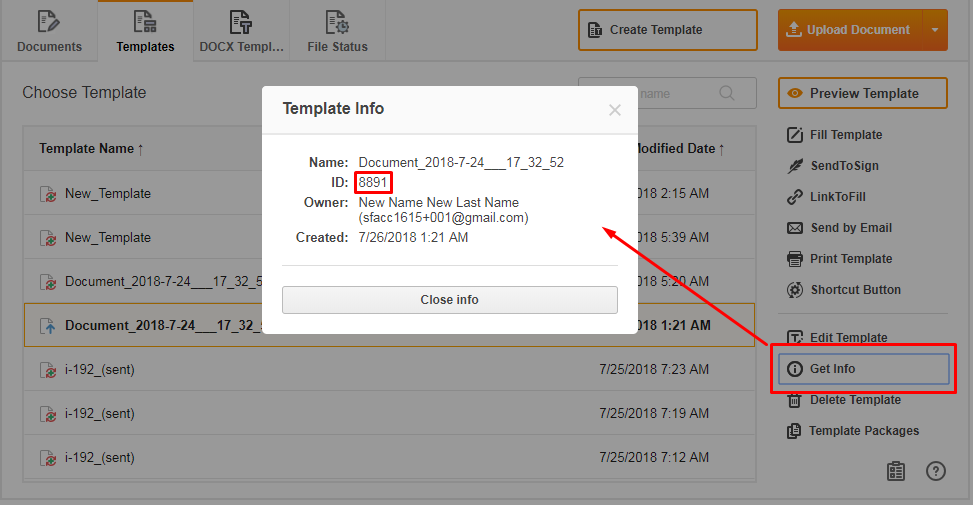
Note! To find a template ID, go to the DaDaDocs tab and select the template you want to be automatically sent out for e-signing with the Process Builder. Then click Get Info in the Template Option section.
When all settings have been specified, click Save.
To activate the Process Builder, click Activate on the Process Builder settings page.
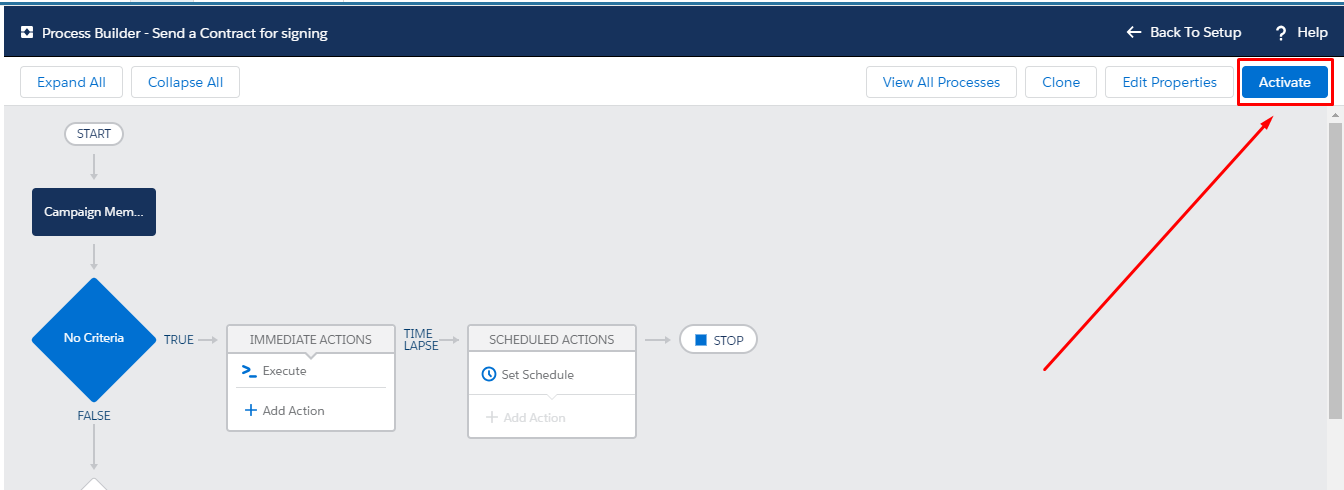
That’s it! Now you can add new contacts that will automatically receive templates for e-signing.
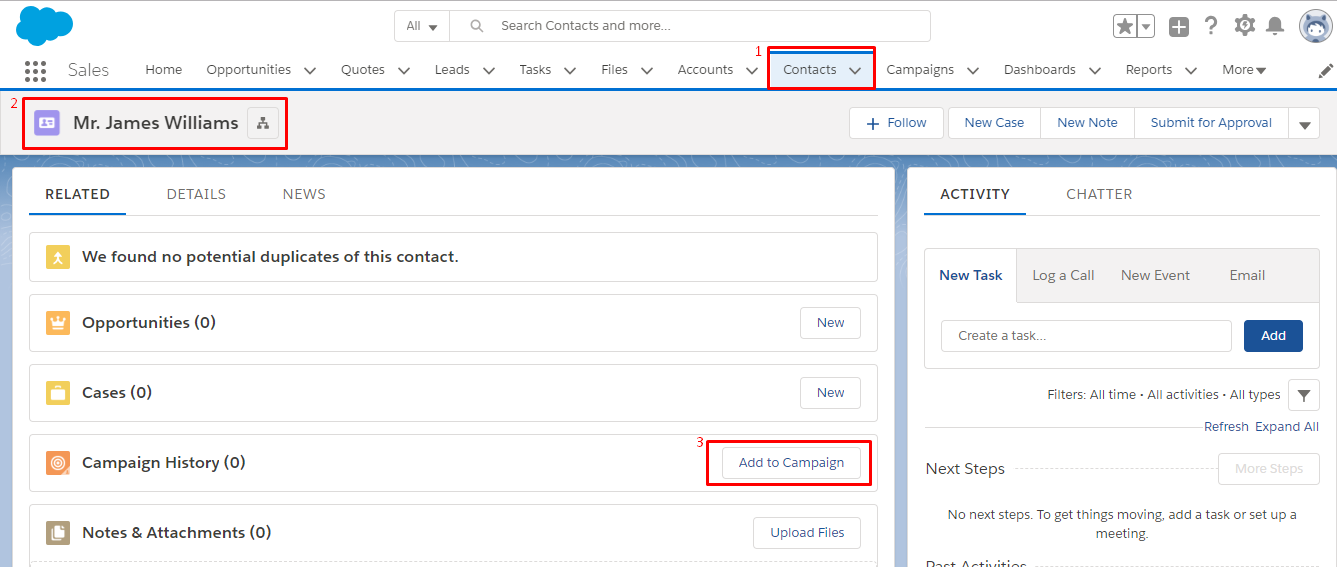
To do so, go to the Contacts object. Choose the contact you want a template sent to and click Add to Campaign.
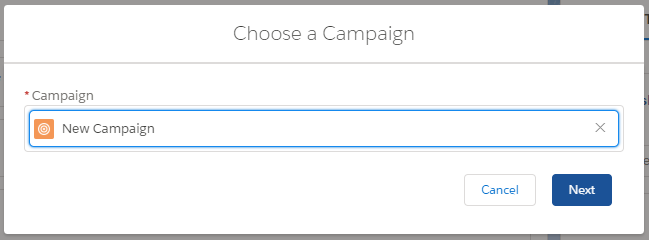
In the Choose Campaign window, select the desired process for your contact. Then click Next.
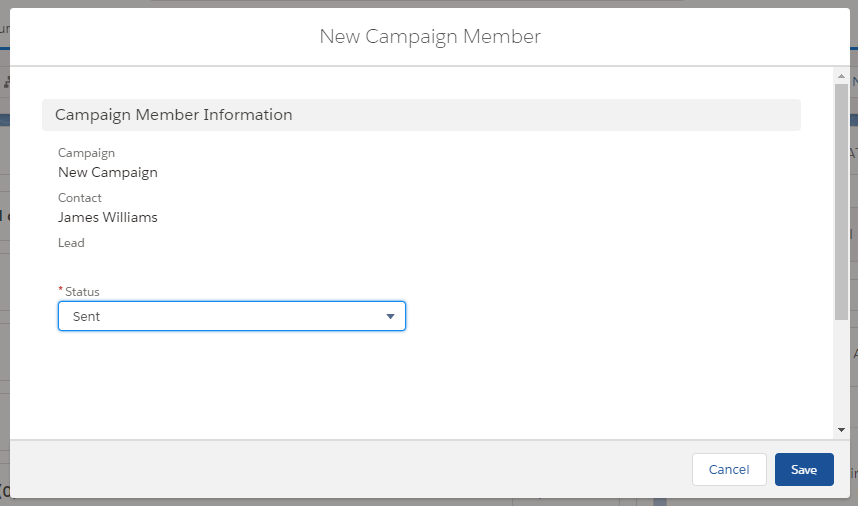
In the next window you will find information about new Campaign members added and the status of automatically sent templates. Click Save to save your settings.
Updated over 6 years ago
