Salesforce Lightning
Requirements:
- Salesforce Lightning organization with admin privileges (required for package installation)
- PDFfiller account
Installation
Follow these steps to add DaDaDocs to your Salesforce Lightning organization.
-
Go to the AppExchange main page using this link https://appexchange.salesforce.com/ and log in with your Salesforce credentials.
-
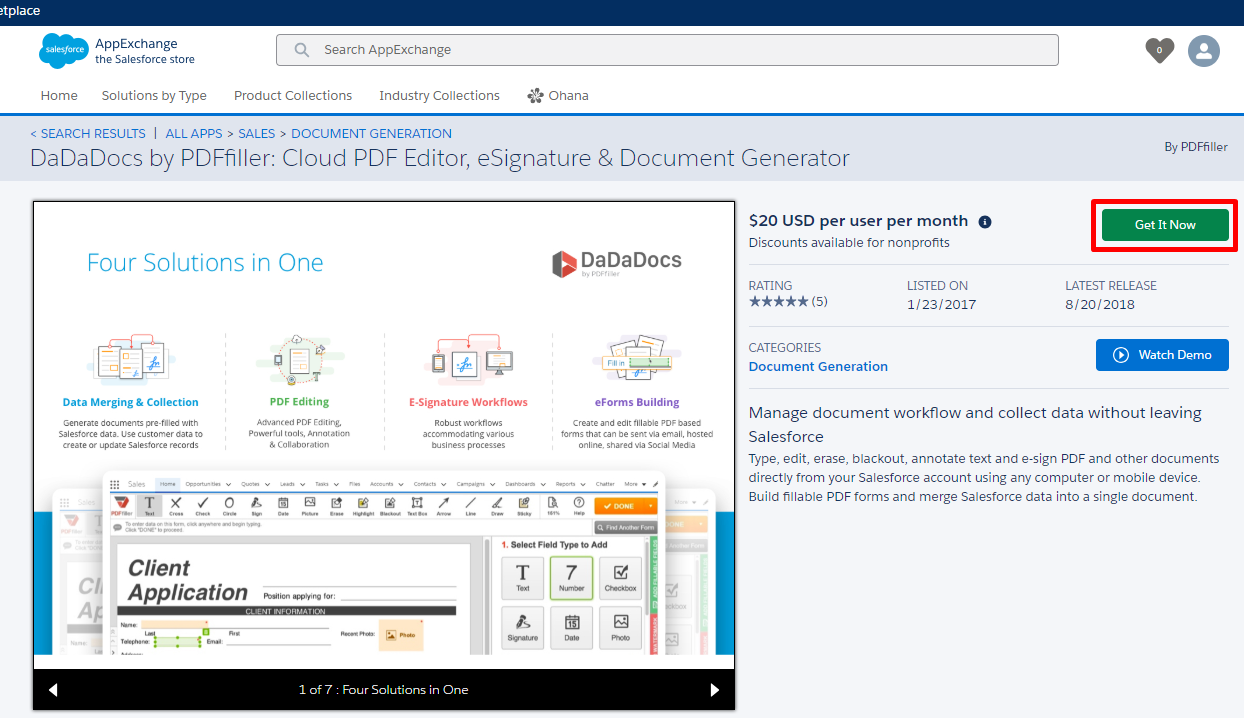
In the search field type DaDaDocs and press Enter. Select DaDaDocs by PDFfiller from the search results below.

- Click Get it Now.
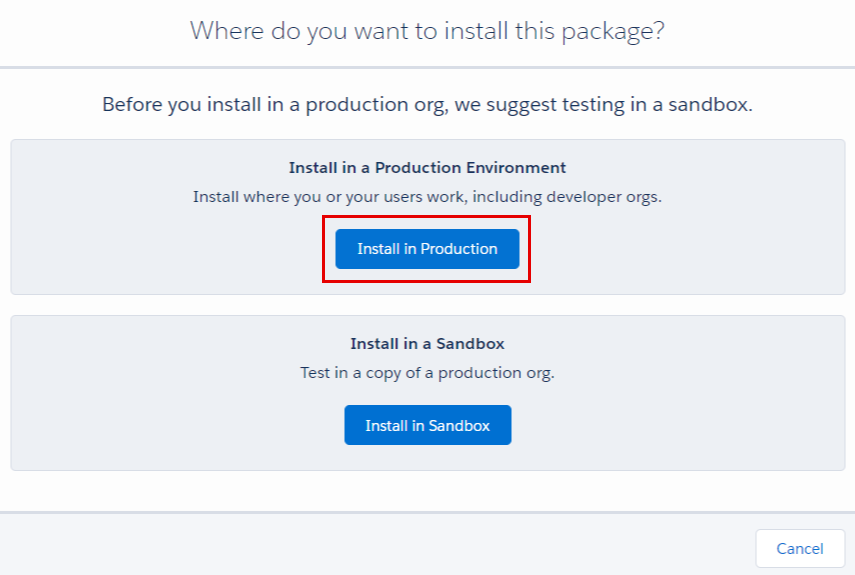
- In the next window, select Install in Production.
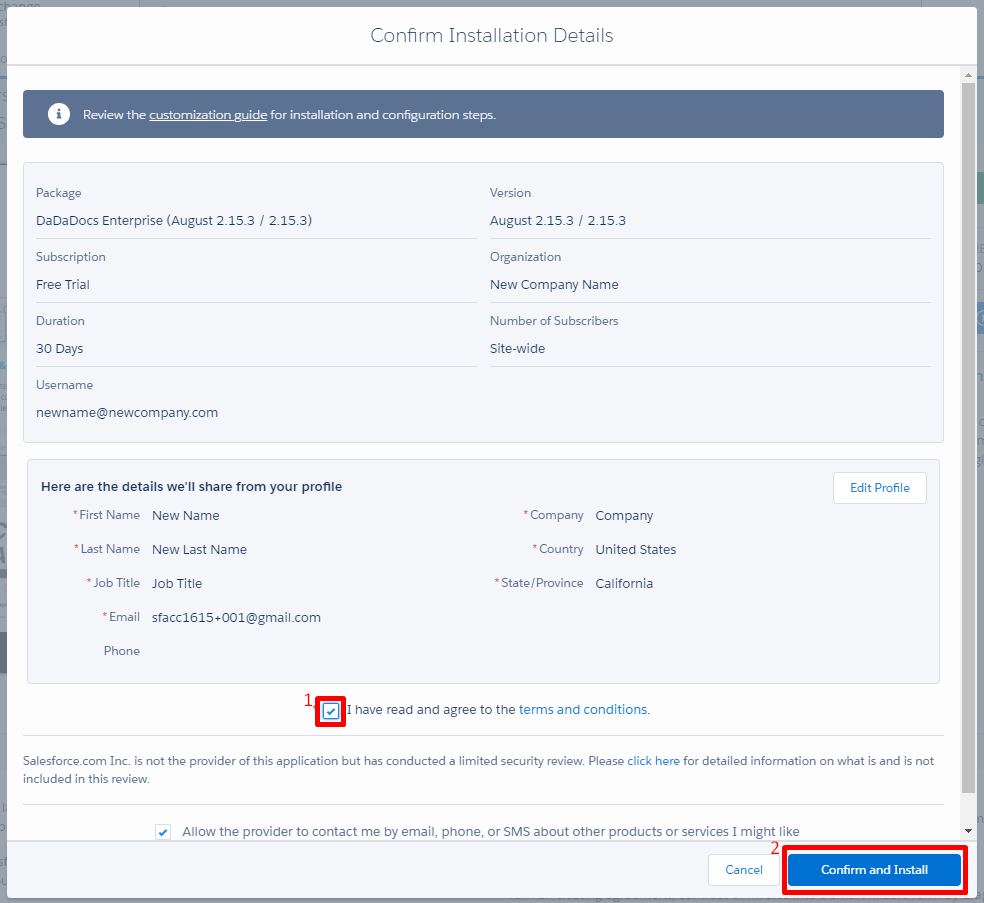
- Read the terms and conditions on the corresponding link and agree by ticking the I have read and agree to the terms and conditions checkbox, then click Confirm and Install.
-
On the next page select Install for All users and click Install.
-
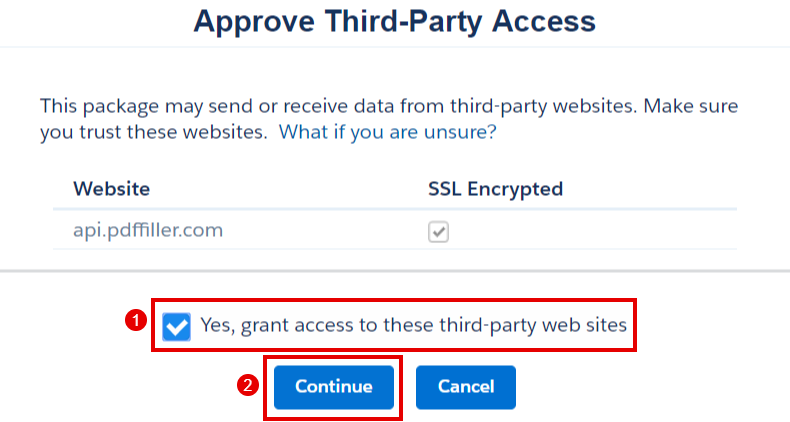
Tick the Yes, grant access to these third-party websites checkbox and click Continue (this is required to connect your DaDaDocs application with PDFfiller).
- The Installation process may take several minutes. When the installation is complete you will be notified via email.
Click Done to proceed to your organization and configure the application.
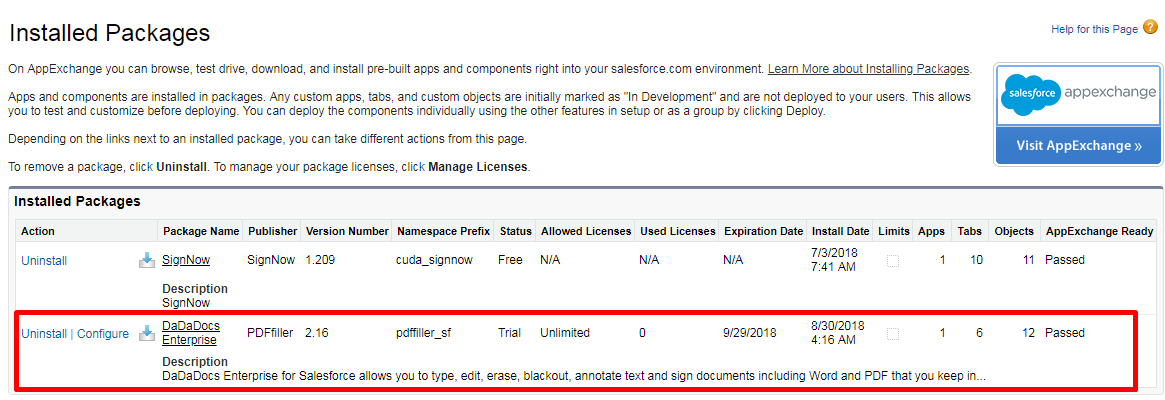
Now you have successfully installed DaDaDocs for your Salesforce Lightning organization and can proceed to the configuration.
Note that if DaDaDocs hasn’t appeared in the Installed Packages section, try refreshing the page.
Configuration
Easily authorize an administrator account in DaDaDocs without leaving your Salesforce organization. Configure the DaDaDocs application to work with your Salesforce Lightning organization and grant DaDaDocs access to multiple users at once, no additional authorization needed. Specify which object layouts to launch DaDaDocs from and adjust other feature-specific settings in just a few clicks.
The steps below will guide you through the process of authorizing an administrator account in DaDaDocs, connecting users to your DaDaDocs application and configuring DaDaDocs with your Salesforce Lightning organization.
Authorization
Instantly authorize with your DaDaDocs account or create a new administrator account in a few simple steps.
- In the main menu, go to the Admin Tools tab to access settings.
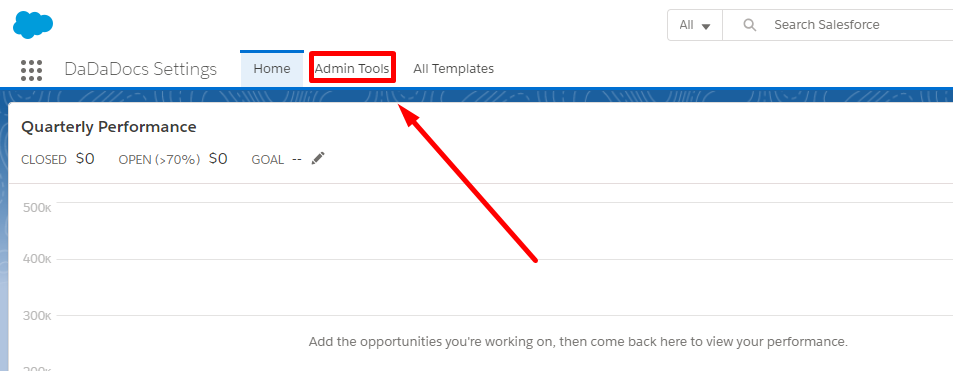
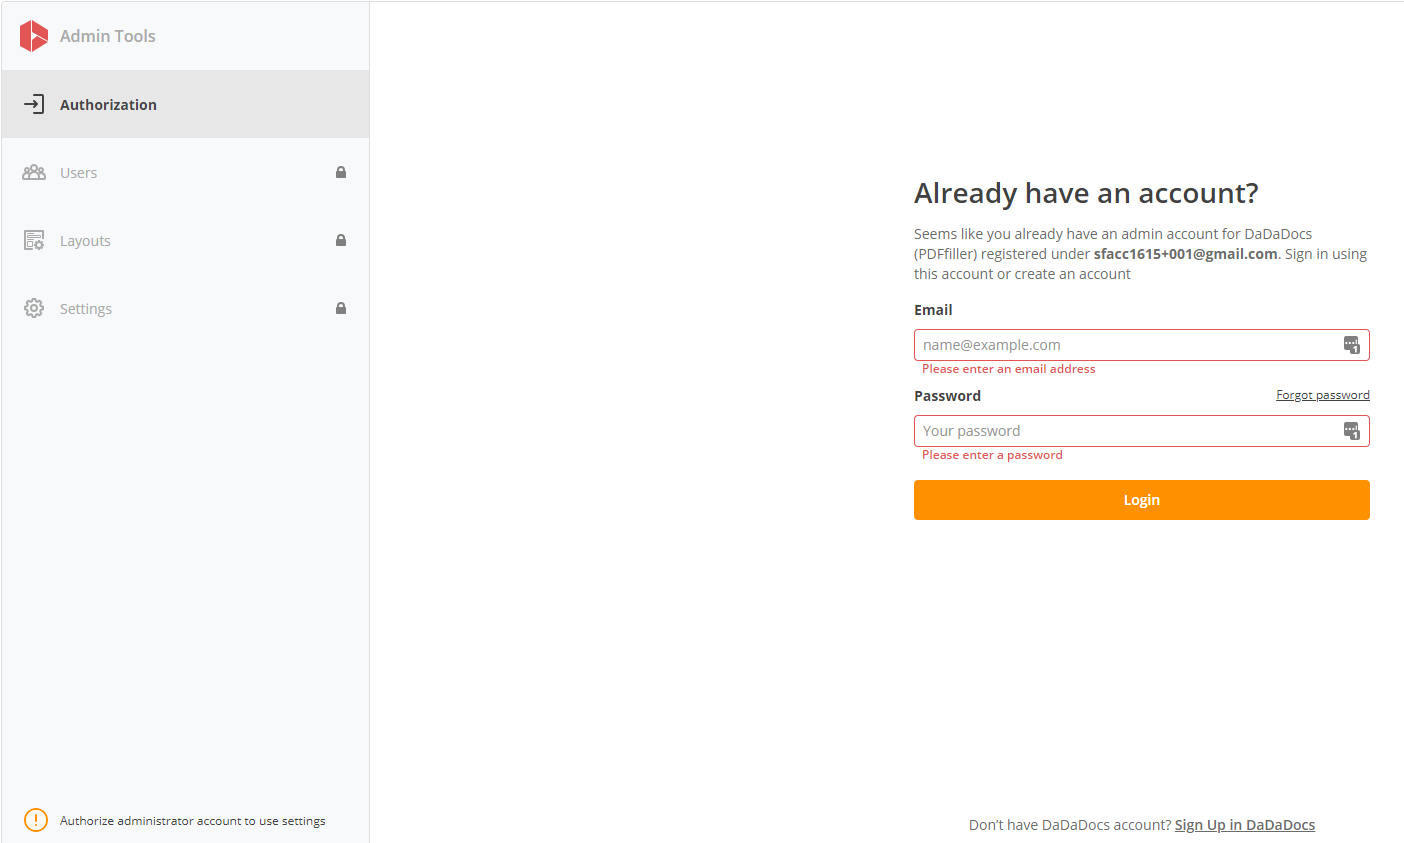
- In the next window, navigate to the Authorization tab to authorize DaDaDocs with your Salesforce organization.
If you already have an admin account for DaDaDocs, you will see a notification.
Log in to DaDaDocs with an existing account or create a new one. To create a new DaDaDocs account, click Sign Up in DaDaDocs at the bottom of the authorization page.
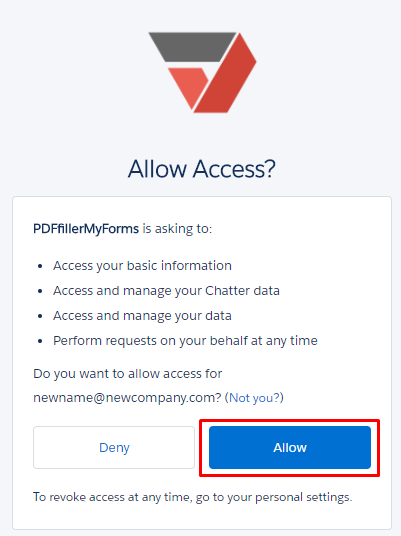
- Once you’ve logged in to DaDaDocs, the Allow Access window will open. Click Allow to proceed.
- On the next page, click Authorize to authorize DaDaDocs to access your PDFfiller account.
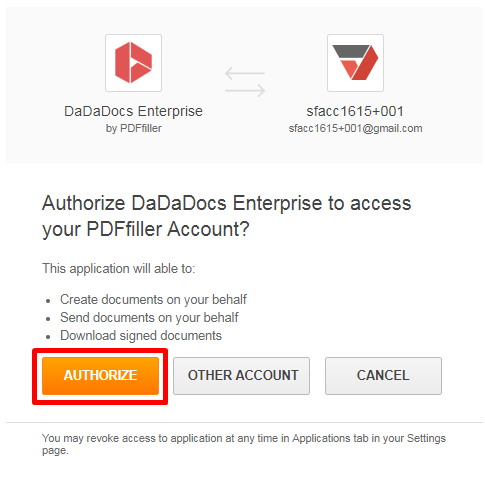
That’s it! Your PDFfiller account is now authorized with DaDaDocs.
You will be automatically redirected to the Users tab. Now you can easily add users to your DaDaDocs application in just a few clicks.
Users
Easily manage licenses of your organization’s users and grant them access to your DaDaDocs application in just a few clicks.
- To do so, select the checkboxes next to the names of the users you want to grant access to. Then, click Activate on the right.

To grant access to all users in the list, select the checkbox next to Full name in the upper left corner and click Activate.

Sort users by their license or profile by clicking the Show users dropdown at the top.

To deactivate active users, select the checkboxes next to users and click Deactivate on the right.

Alternatively, hover over the line with user details and click the Deactivate button.

Layouts
In this tab you can specify which layout to launch the DaDaDocs application from. Easily add the Use DaDaDocs button to one layout or several.
To add the Use DaDaDocs button to your Salesforce object page, click the slider next to the desired object layout.

Sort layouts by their type such as active or inactive by clicking the Show layouts dropdown on the top.

Once you’ve selected your layout(s), click Save changes on the right.
To add the Use DaDaDocs button to all layouts in the list, select Show in all layouts, then click Save changes.

By clicking Hide from all layouts, the DaDaDocs button will be automatically removed from selected layouts. Click Save changes to save your settings.

Settings
In this tab, you can enable or disable particular application features as well as connect your DaDaDocs application to cloud storage services.
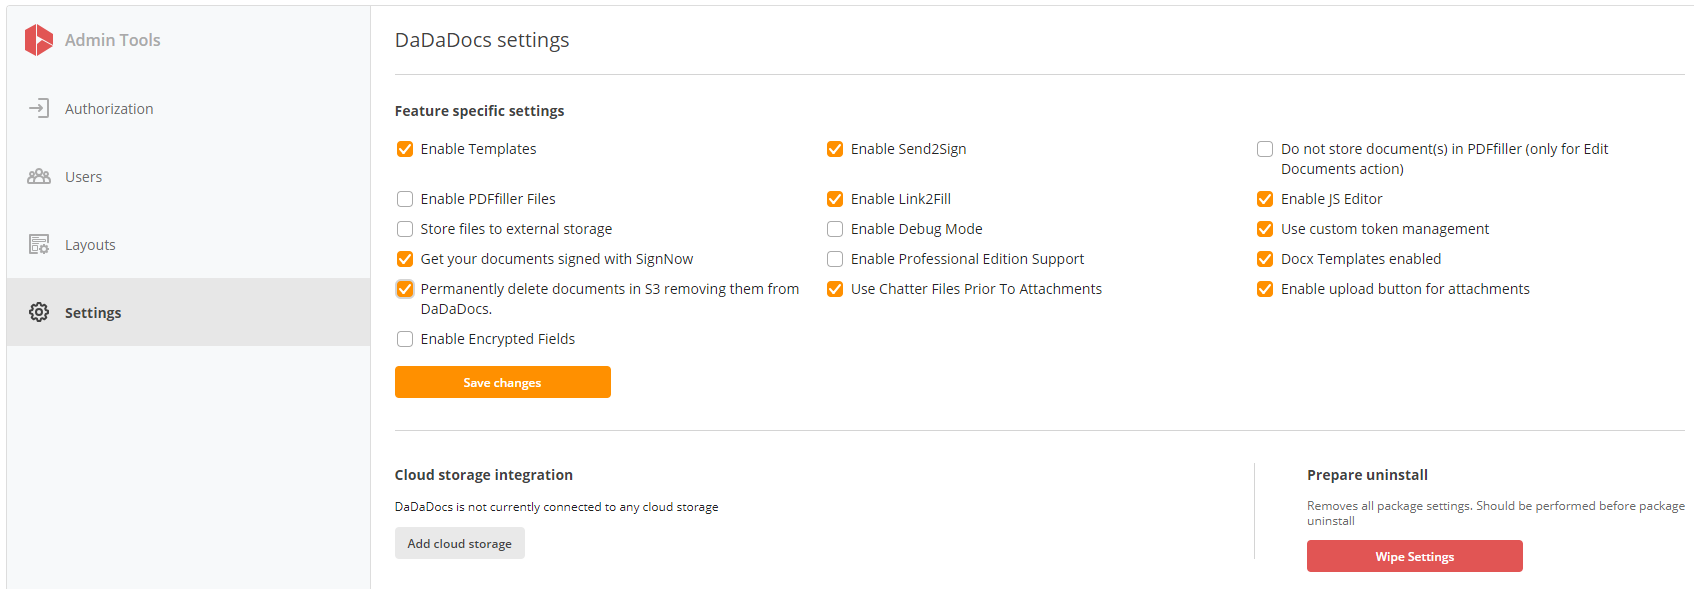
In the Feature specific settings section, check or uncheck needed boxes and click Save Changes.

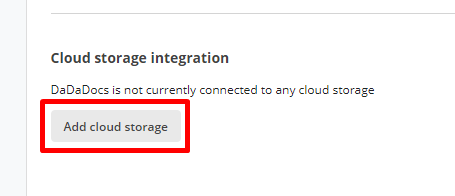
In the Cloud storage integration section, click Add cloud storage, if you’d like to integrate any cloud storage services with DaDaDocs.
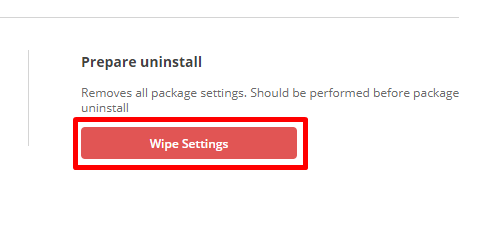
In the Prepare uninstall section, you can prepare your DaDaDocs package for uninstallation. Clicking the Wipe settings button automatically removes all package settings.
DaDaDocs is now configured and ready for use.
Go to the object(s) that you’ve added the Use DaDaDocs button to, then choose the record you want to start using DaDaDocs with. On the Salesforce object record page, click the Use DaDaDocs button.
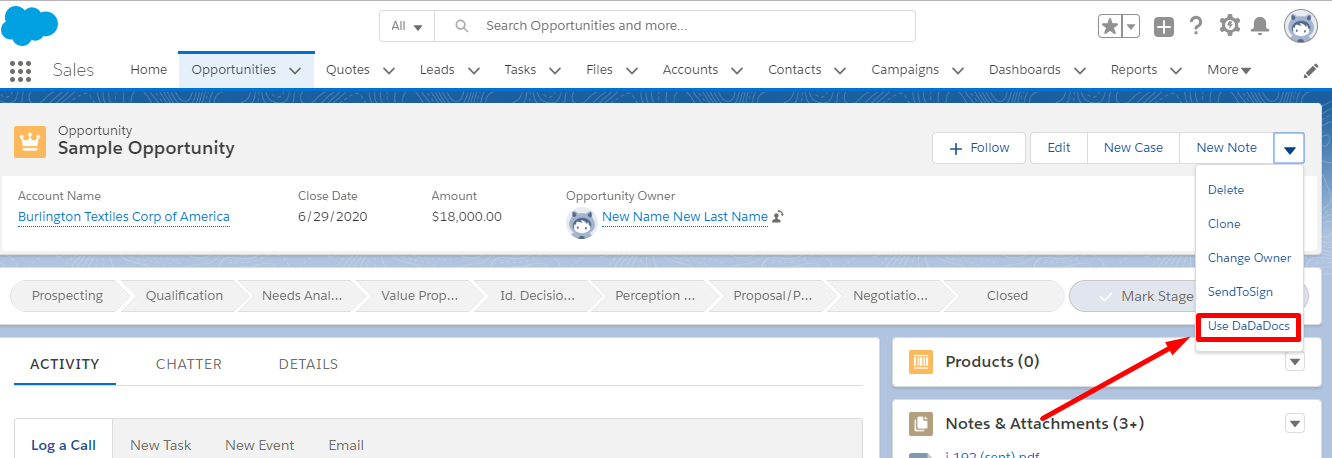
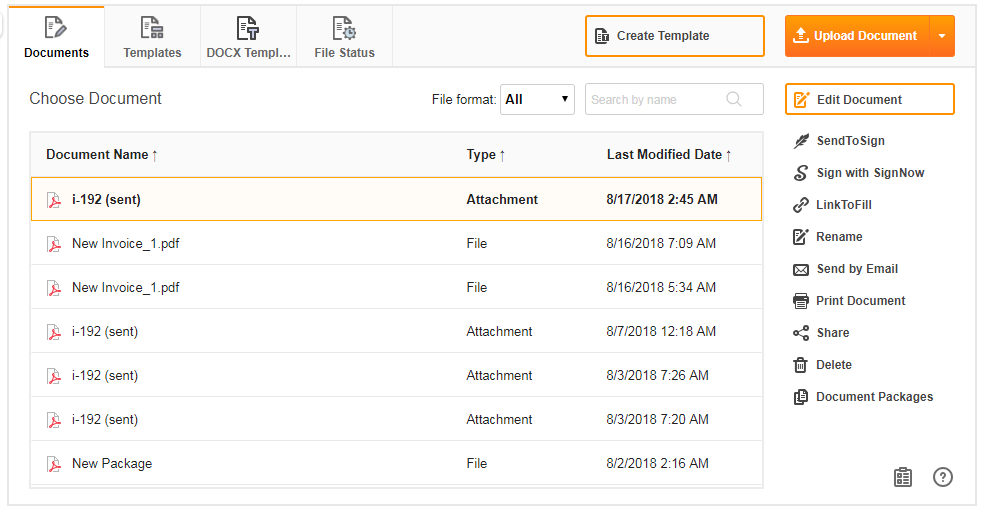
The DaDaDocs application is now ready for use with your Salesforce Lightning organization.
Custom Domain
Follow these steps to register your domain:
- Click on the gear icon in the upper right and select Setup in the dropdown menu.

Type “domain” in the Quick Find search field and select My Domain from the results below.
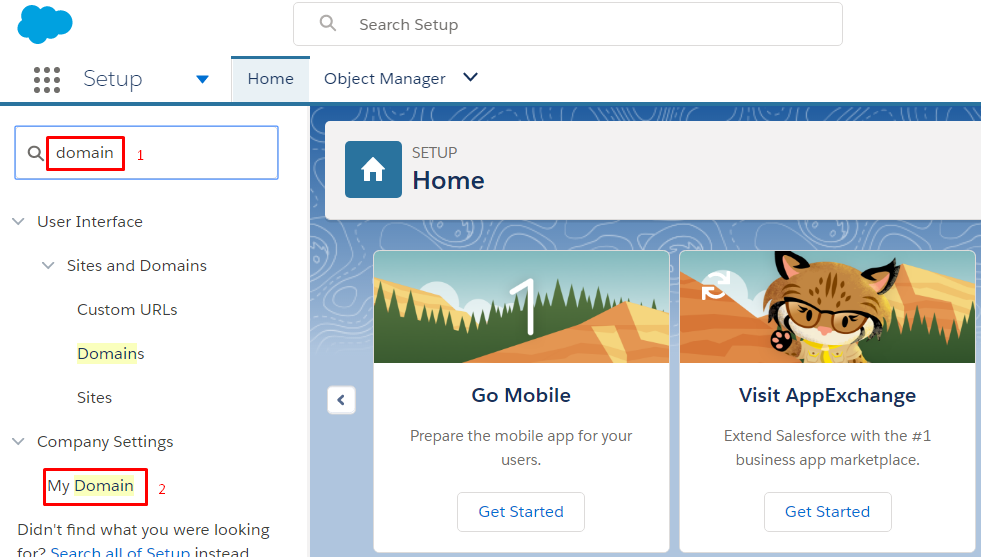
- Choose your domain name: type the domain name of your choice and click Check Availability.
If your domain name is available, click Register Domain. If your domain name is not available, try another one.

- Now your domain registration is pending.
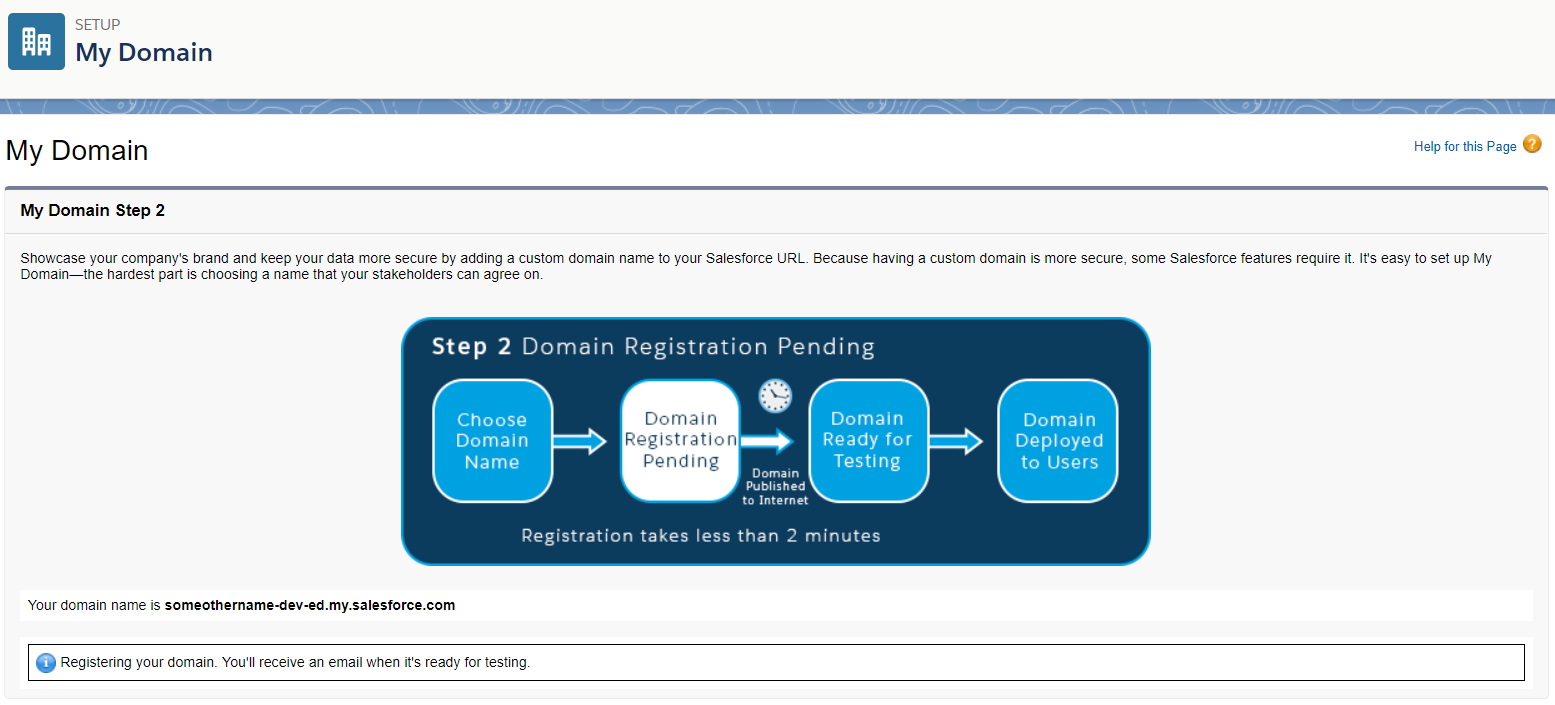
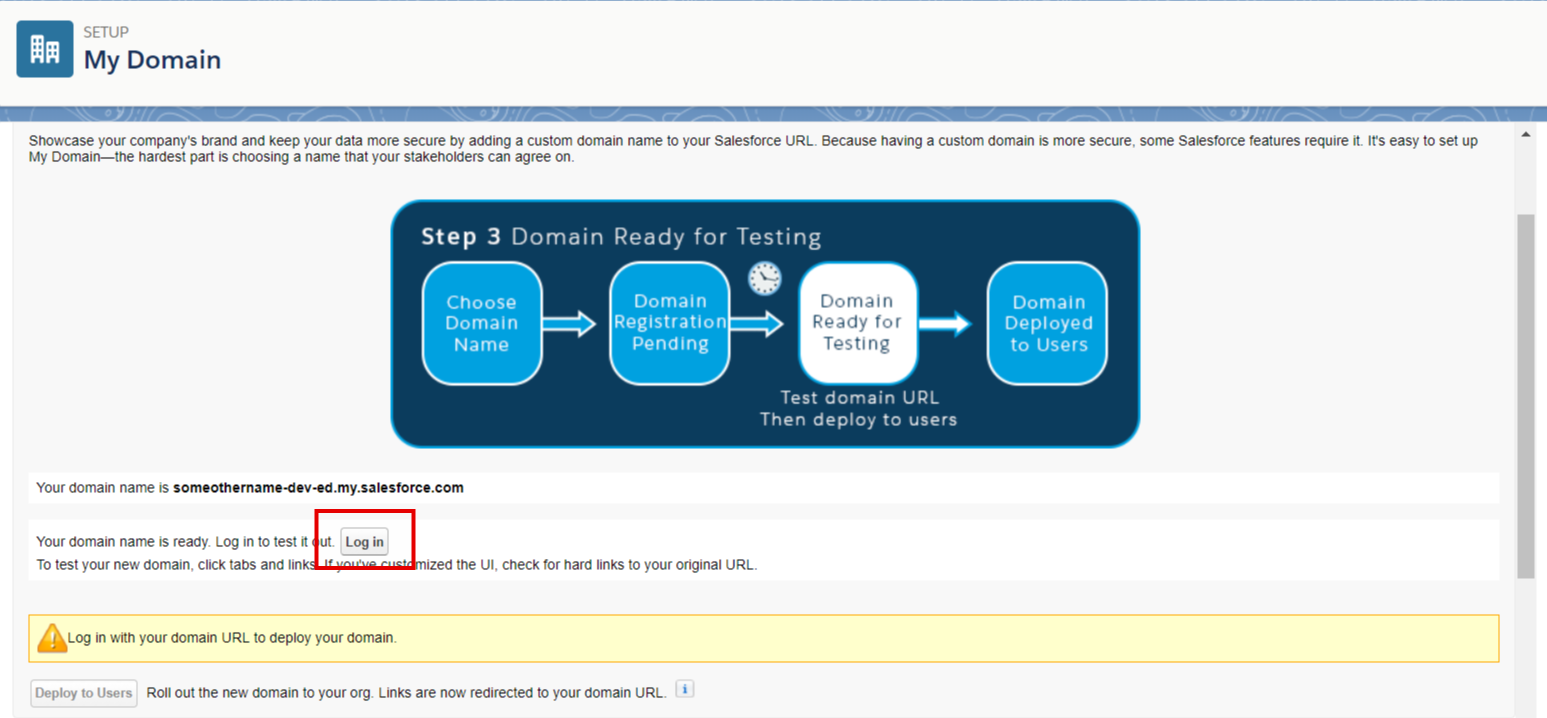
- When your domain is ready for the test you will be notified via email. Follow the instructions from your email and log in to Salesforce via the link in the email.

4.1. Alternatively, refresh the Domain Pending page in several minutes and click Log In when your domain is ready.
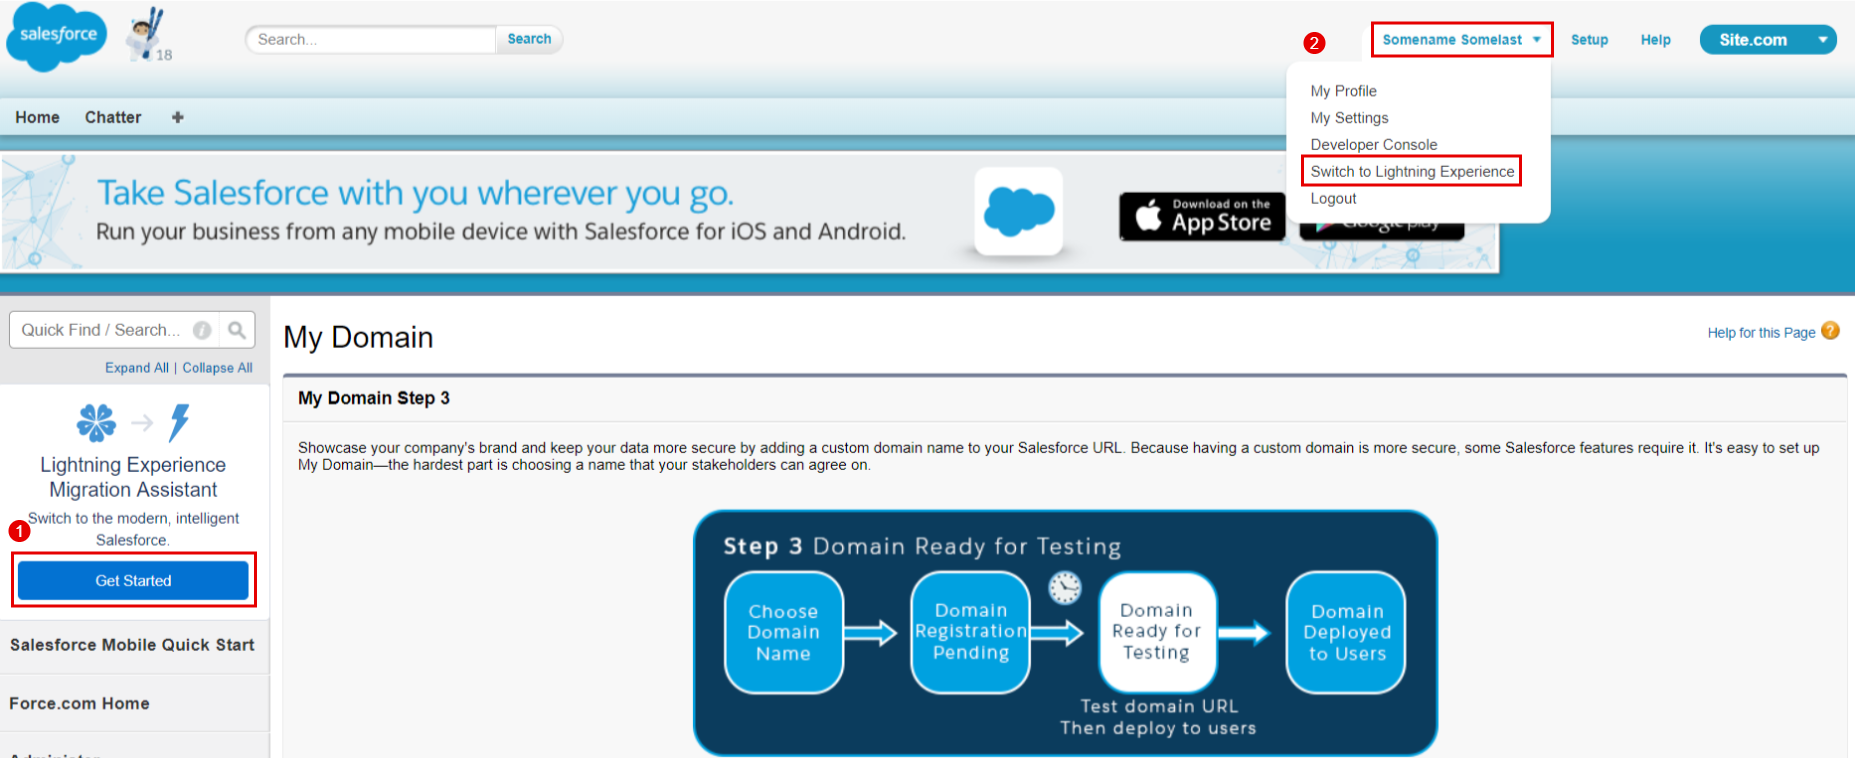
Note! If you log in directly on the Domain page (not using the link from the email), your Salesforce interface can switch from the Lightning version to the Classic.
- Click Get Started in the Lightning Experience Migration Assistant section on the left to switch Salesforce from the Classic interface back to the Lightning.
5.1. Alternatively, click on your username in the upper right and select Switch to Lightning Experience from the dropdown menu. Then proceed to your domain settings.
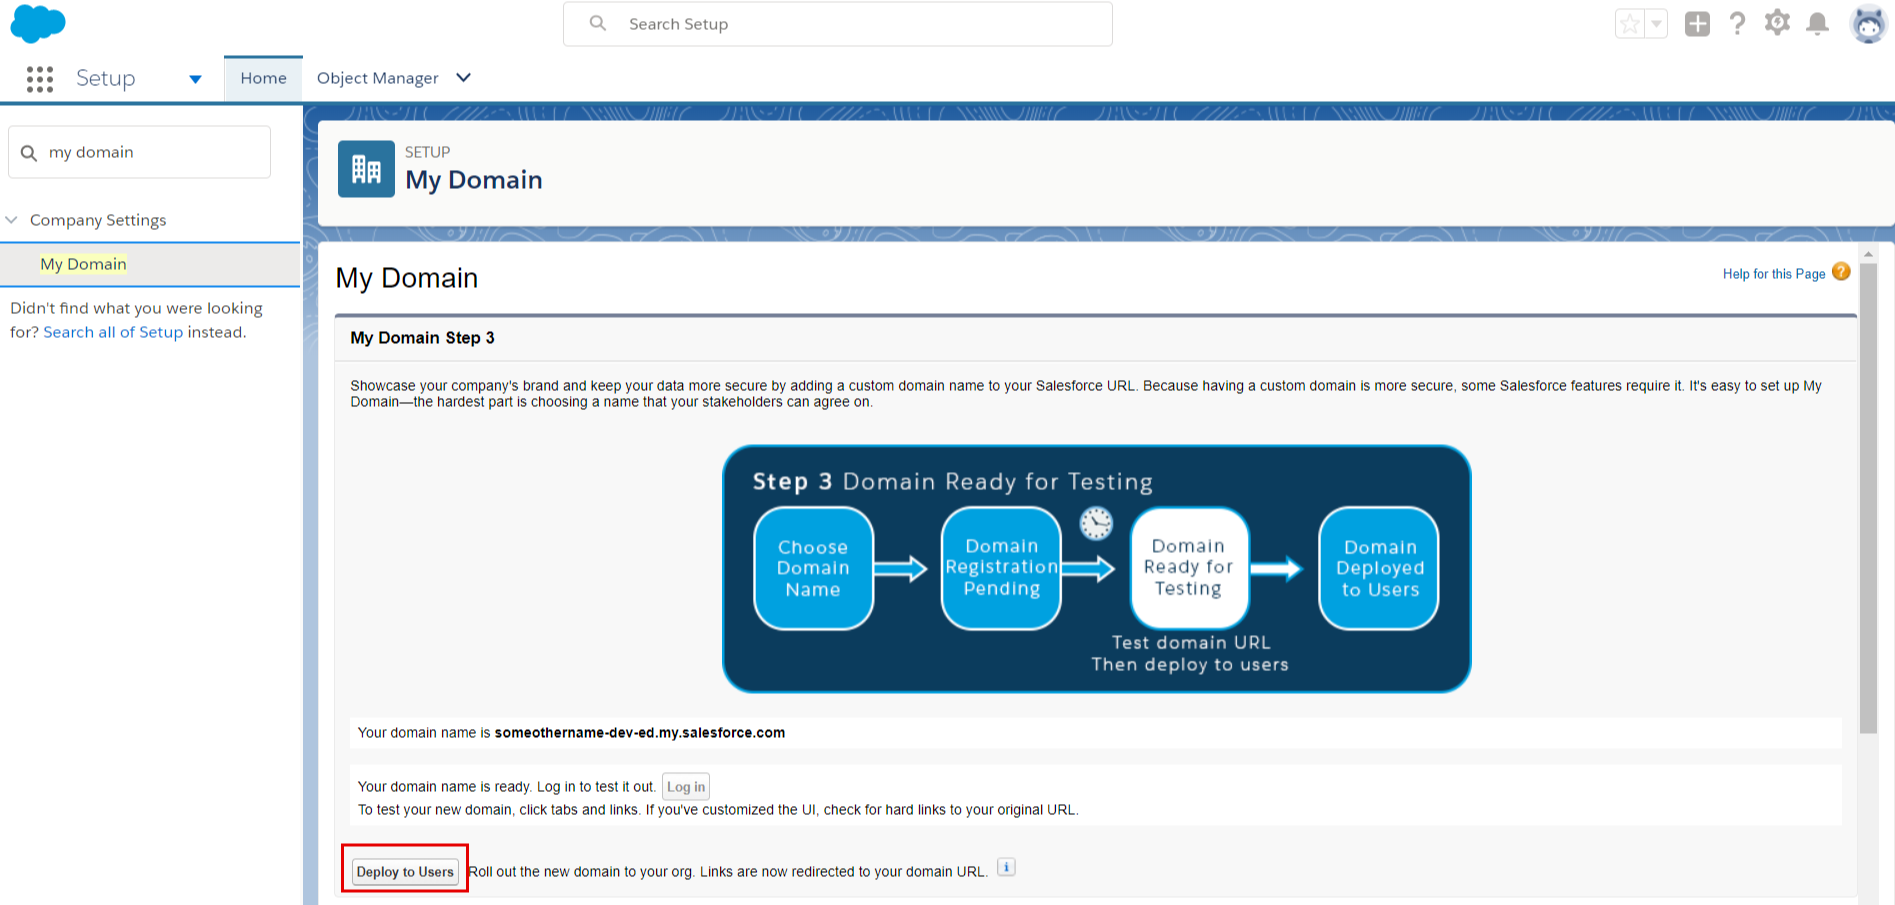
- Click Deploy to Users on My Domain Step 3 of the My Domain page.
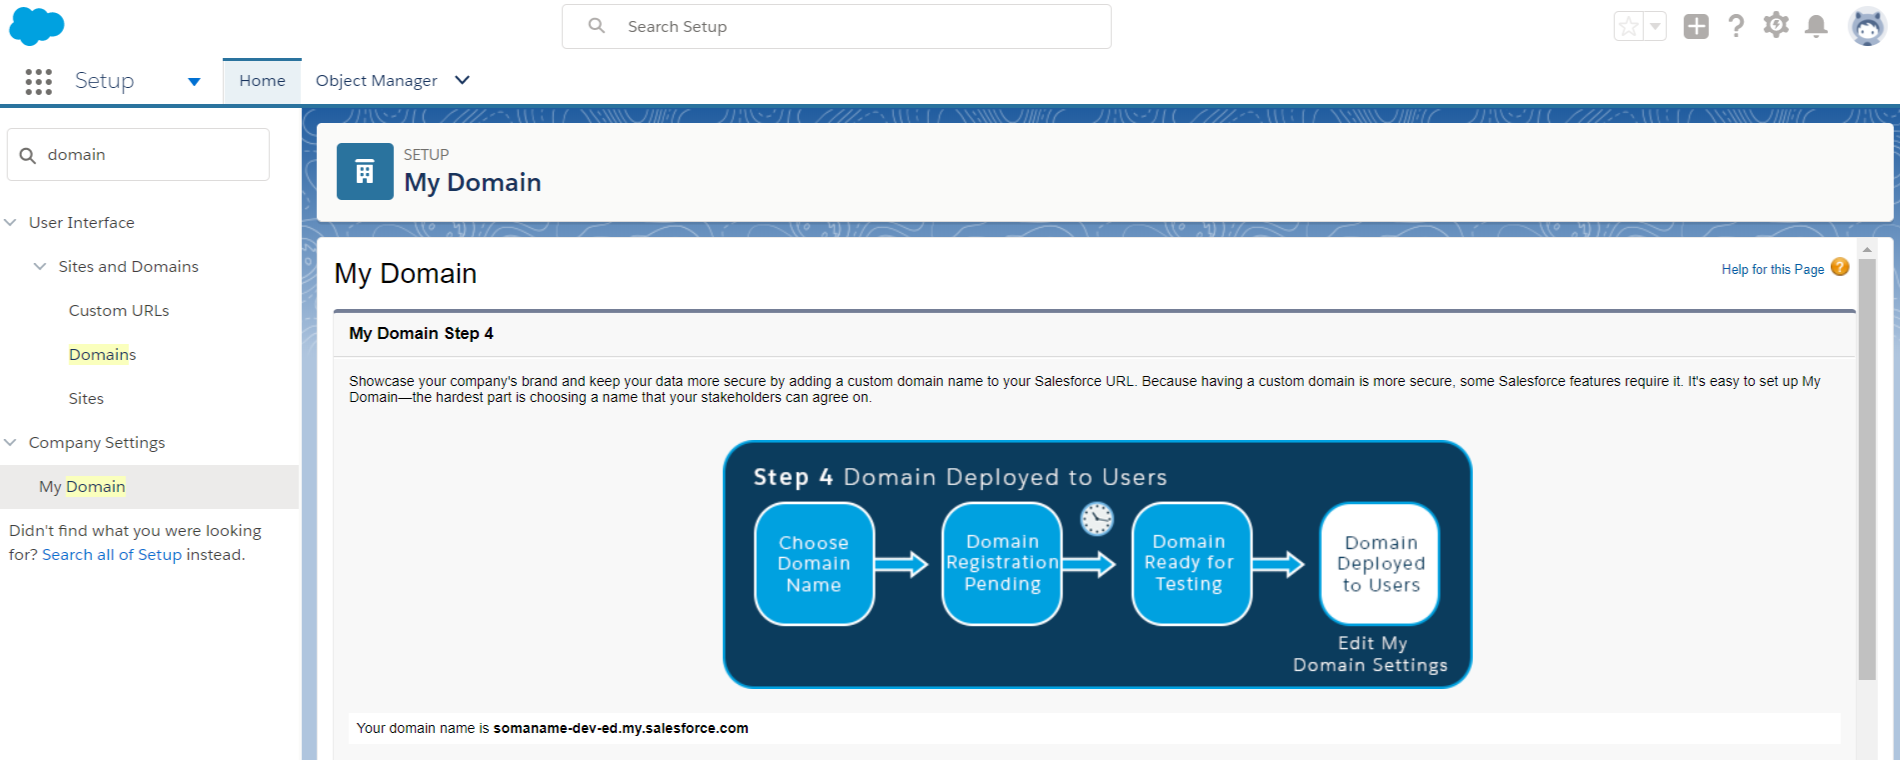
Now your domain is deployed to users.
Layout
- Go to the App Launcher and select your object (Opportunities in the example) from the All Items list.
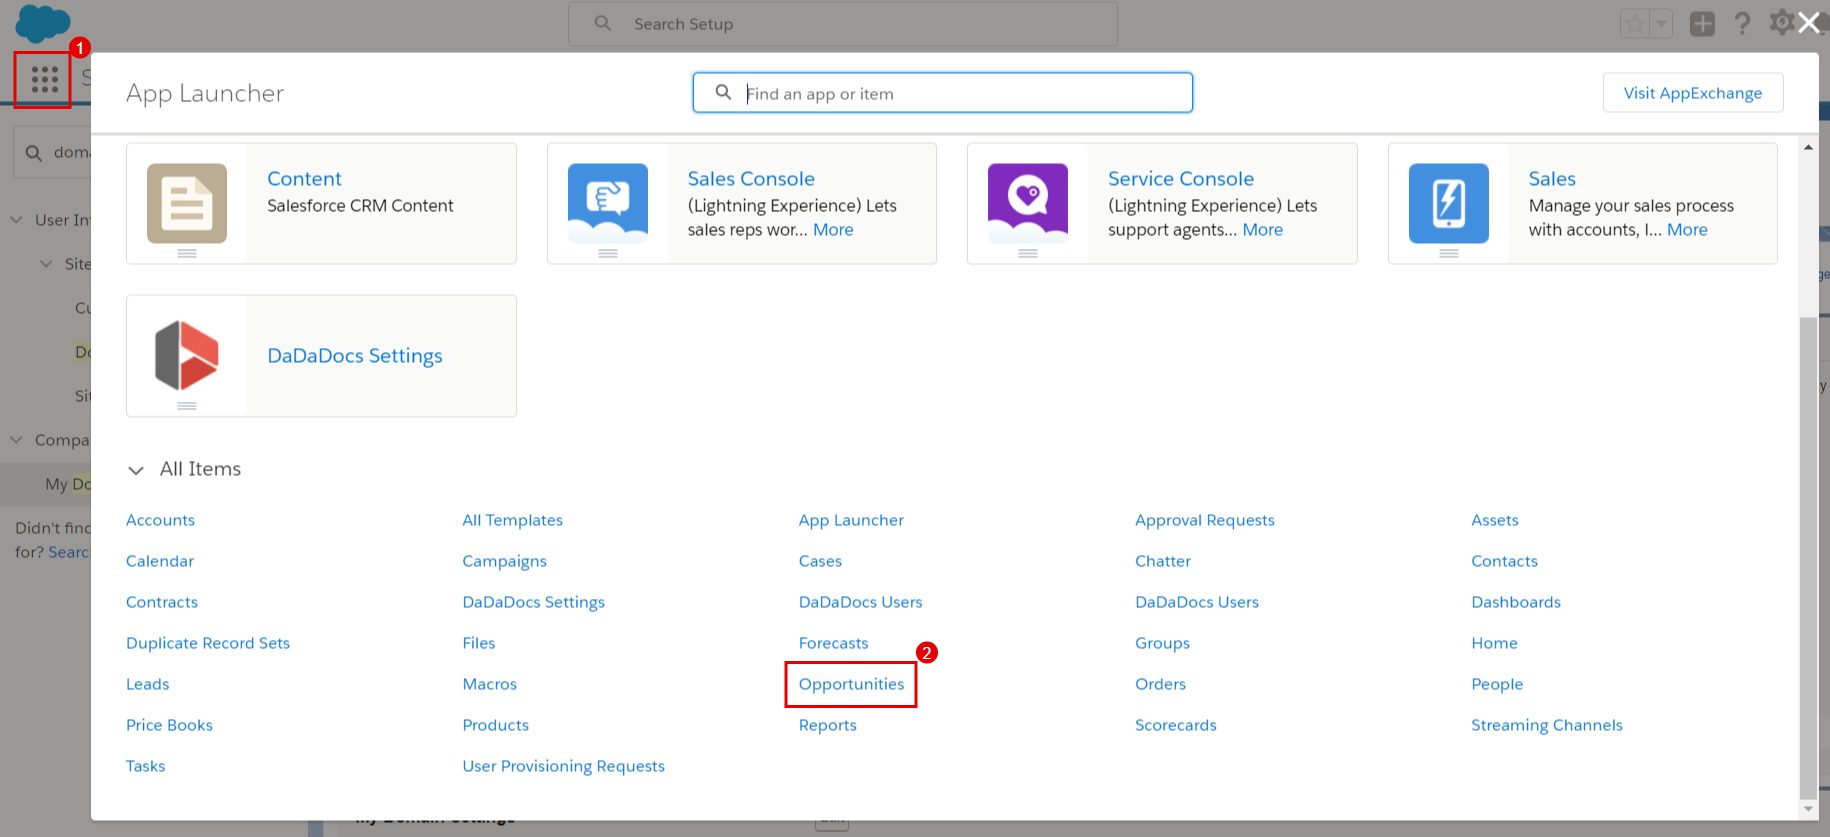
- Choose an Opportunity from the list (GenePoint SLA in the example) to get to the opportunity page.

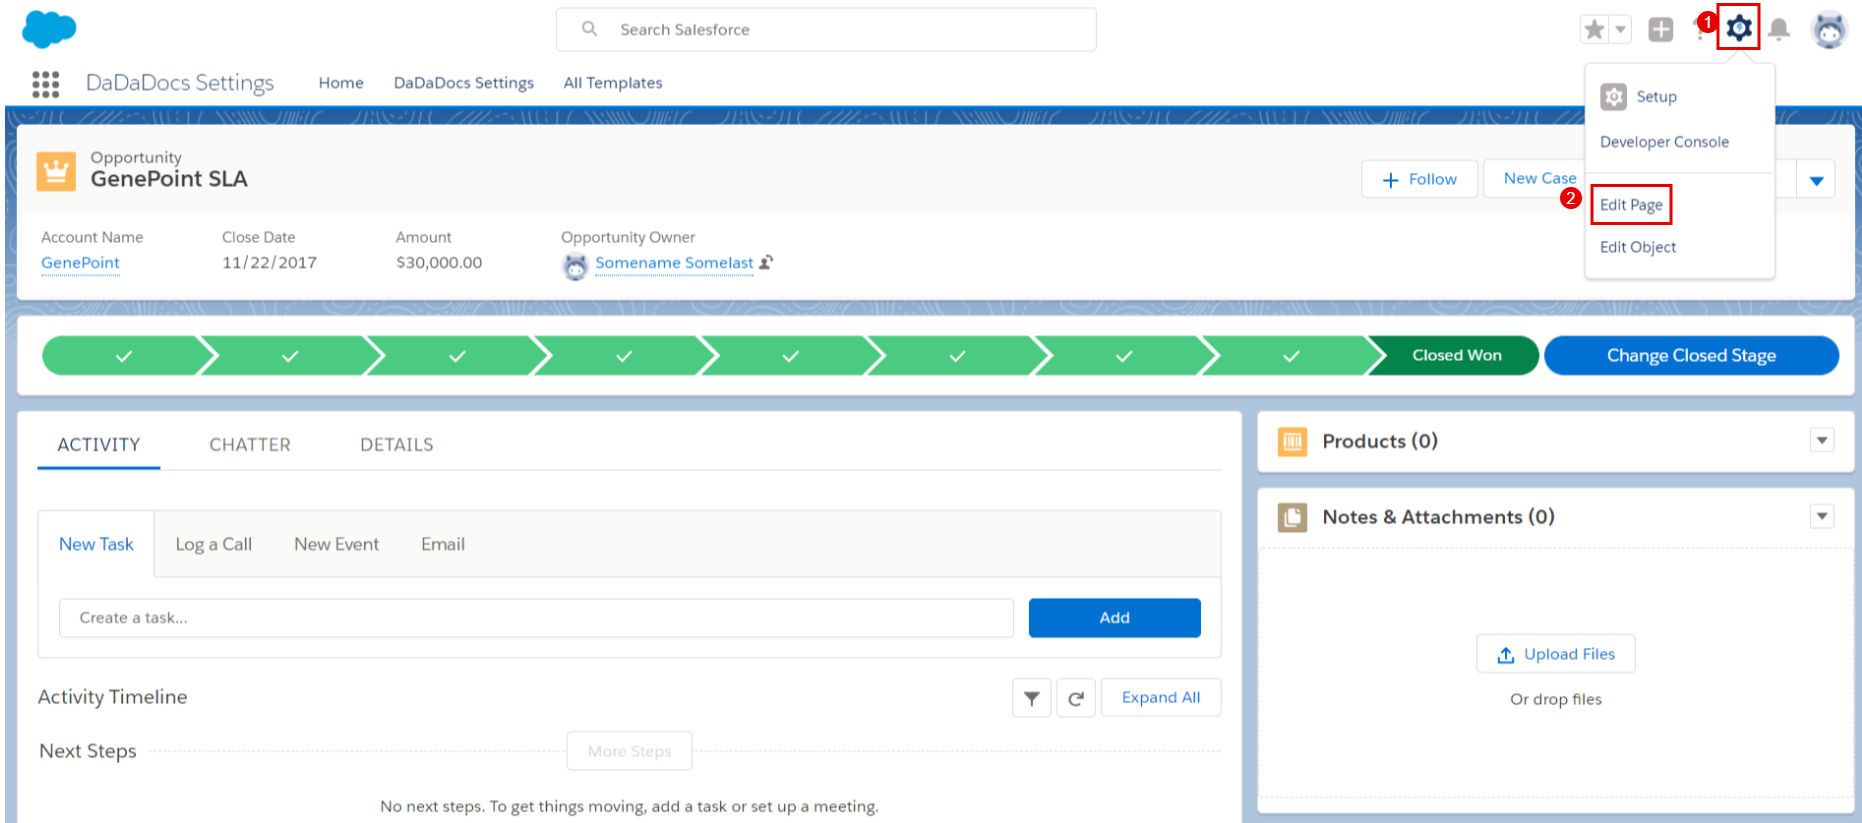
- On the record page click on the gear icon and select Edit Page.
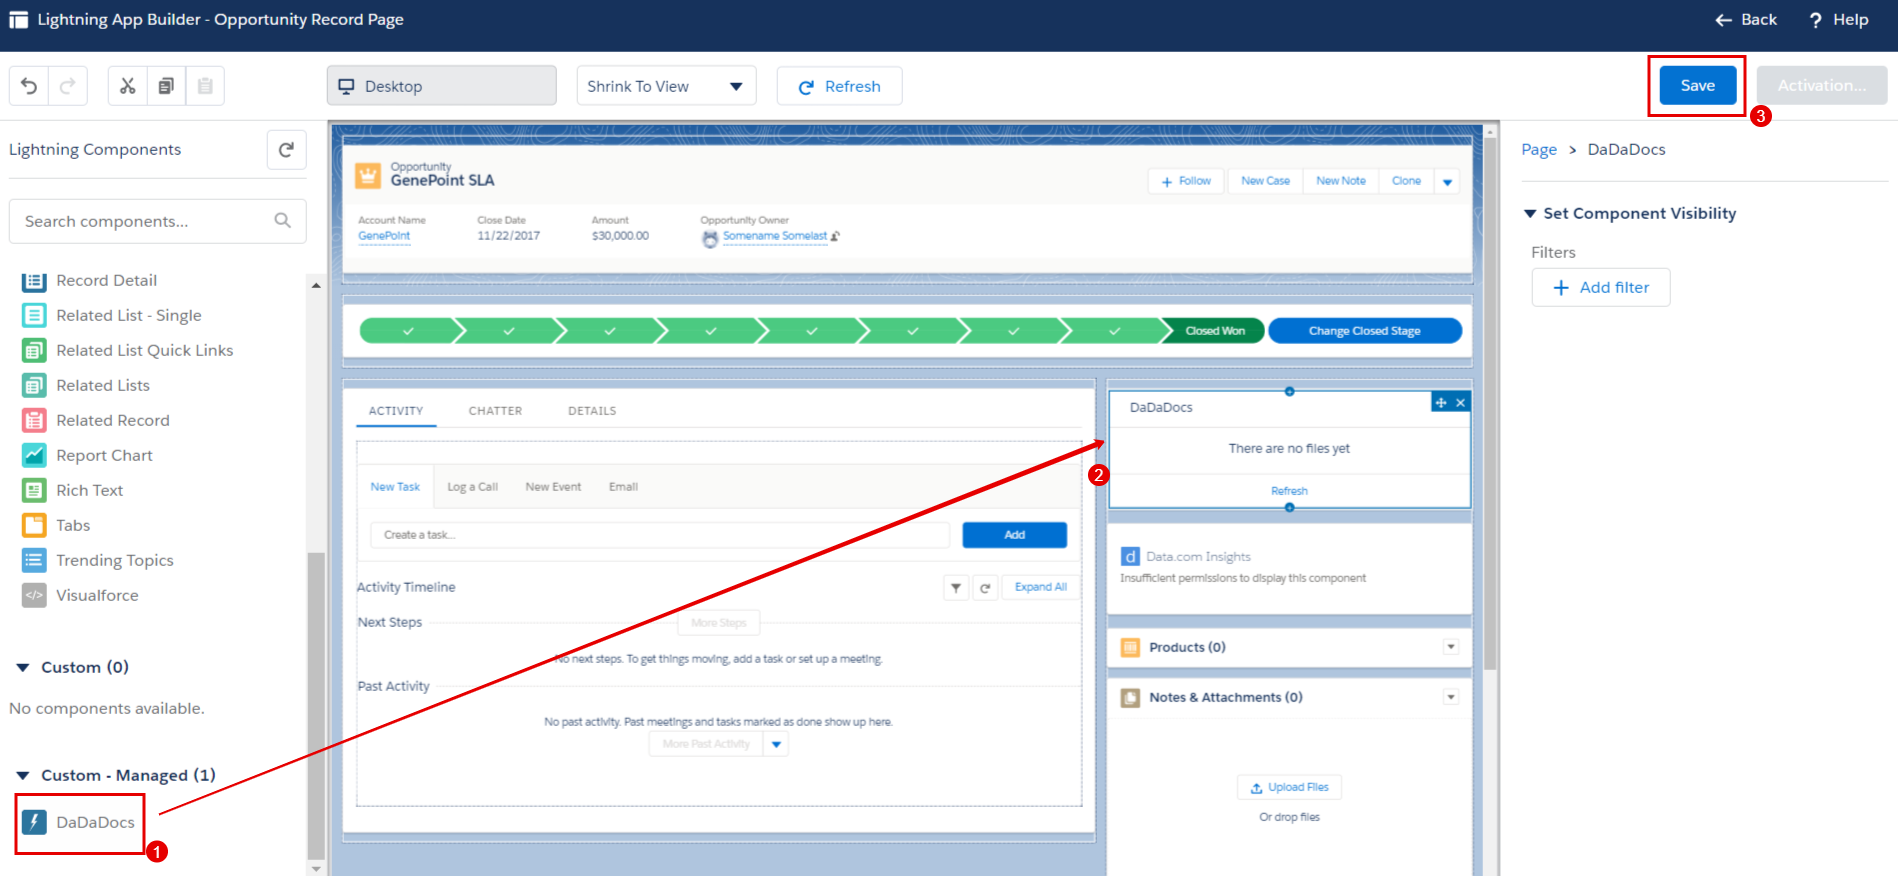
- Scroll down the navigation bar on the left to find DaDaDocs, drag and drop it on the Opportunity Desktop, click Save.
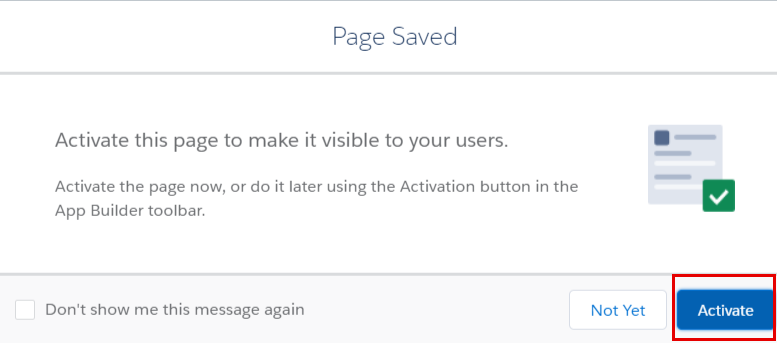
4.1. Click Activate in the Page Saved pop-up.
4.2. Click Assign as Org Default in the Activation pop-up.
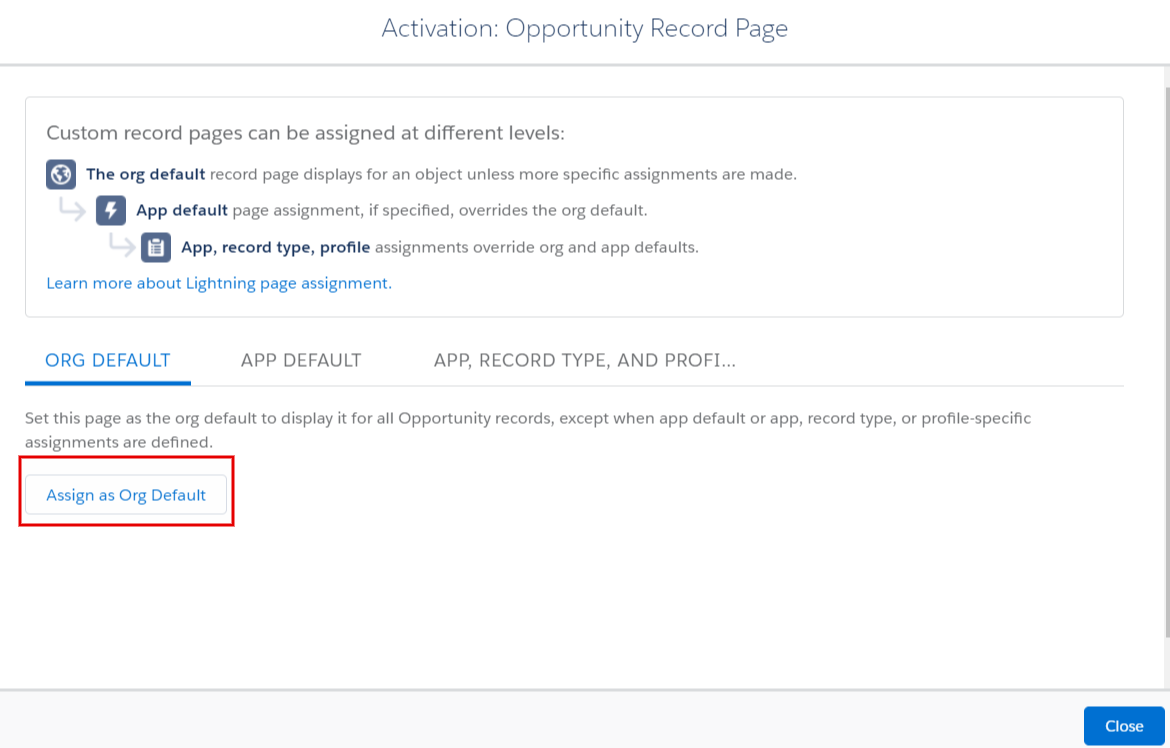
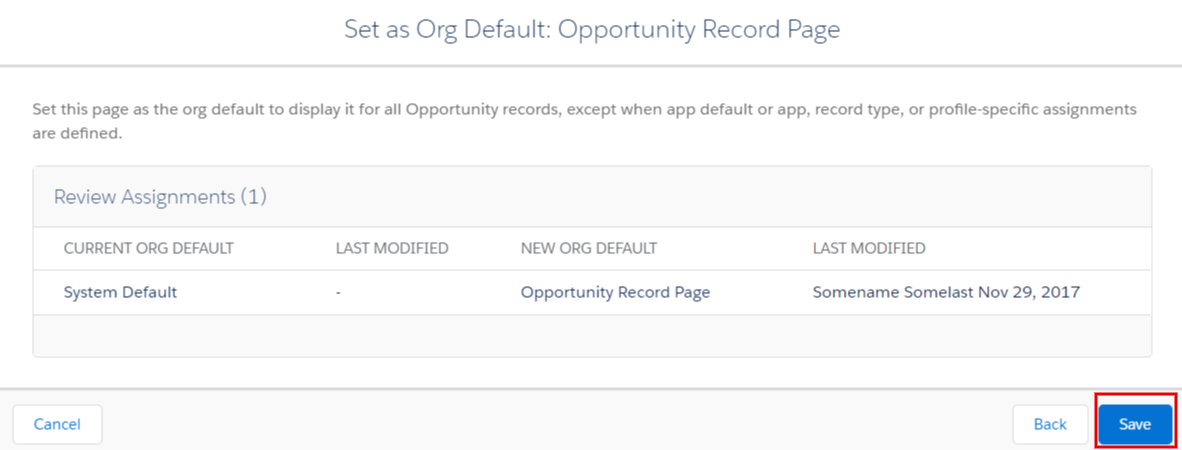
4.3. Click Save in the Set as Org Default pop-up.
4.4. Then click Save on the opportunity edit page and select Back to return to the opportunity page.

Now your DaDaDocs application is configured and ready to use. Navigate to the actions dropdown menu in the upper right and click Use DaDaDocs to start using it.

DaDaDocs Tab
Alternatively, you can add DaDaDocs tab to your object main page.
To add the DaDaDocs tab perform the following steps.
-
In your object (Opportunity in the example) click on the gear icon and select Edit Page.
-
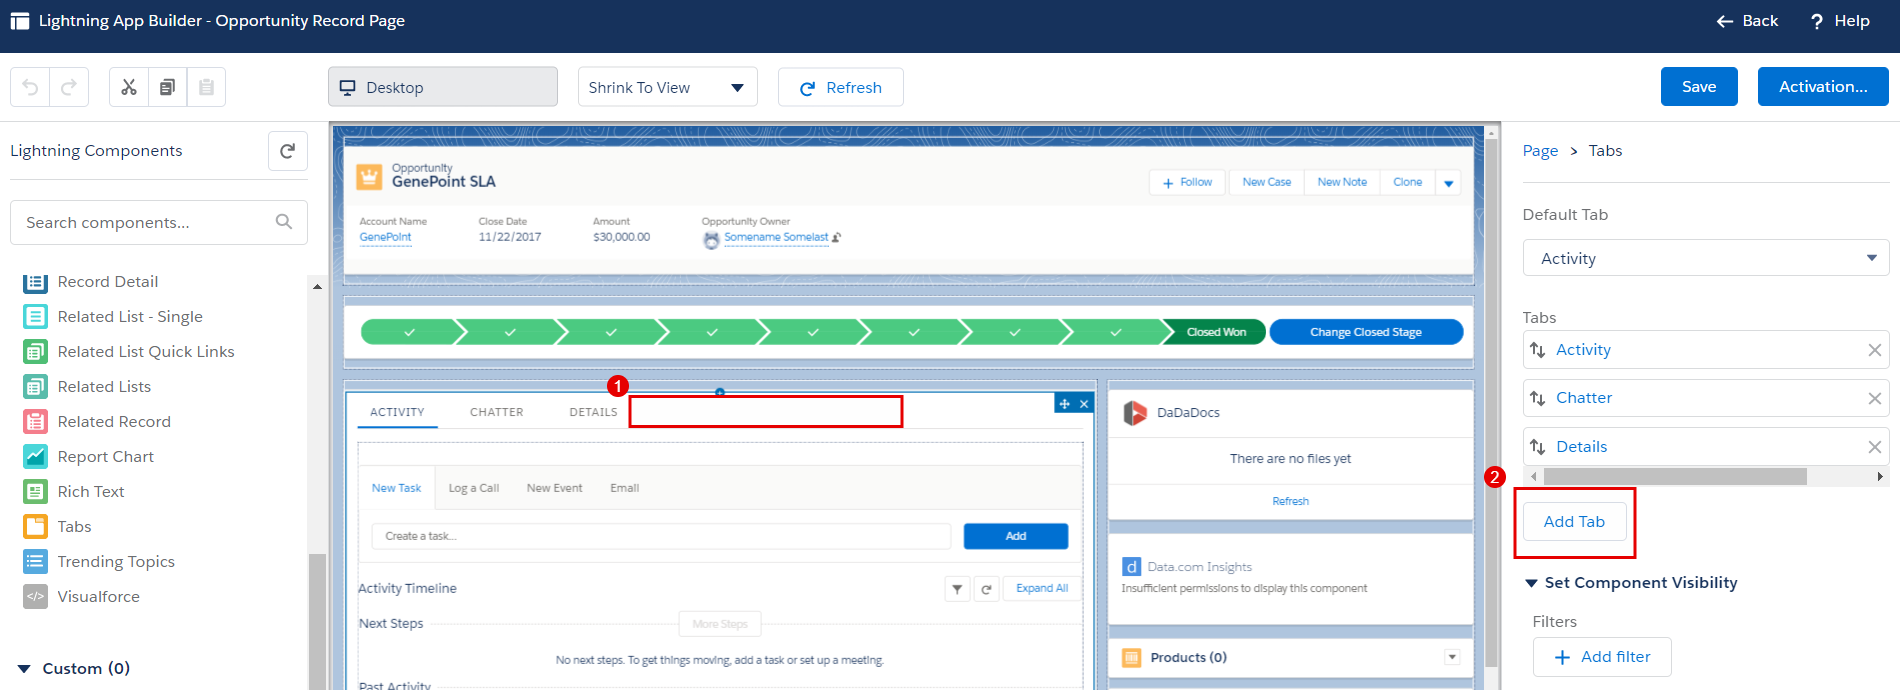
Click the tabs area on the main page, then click Add Tab in the tabs menu on the right.
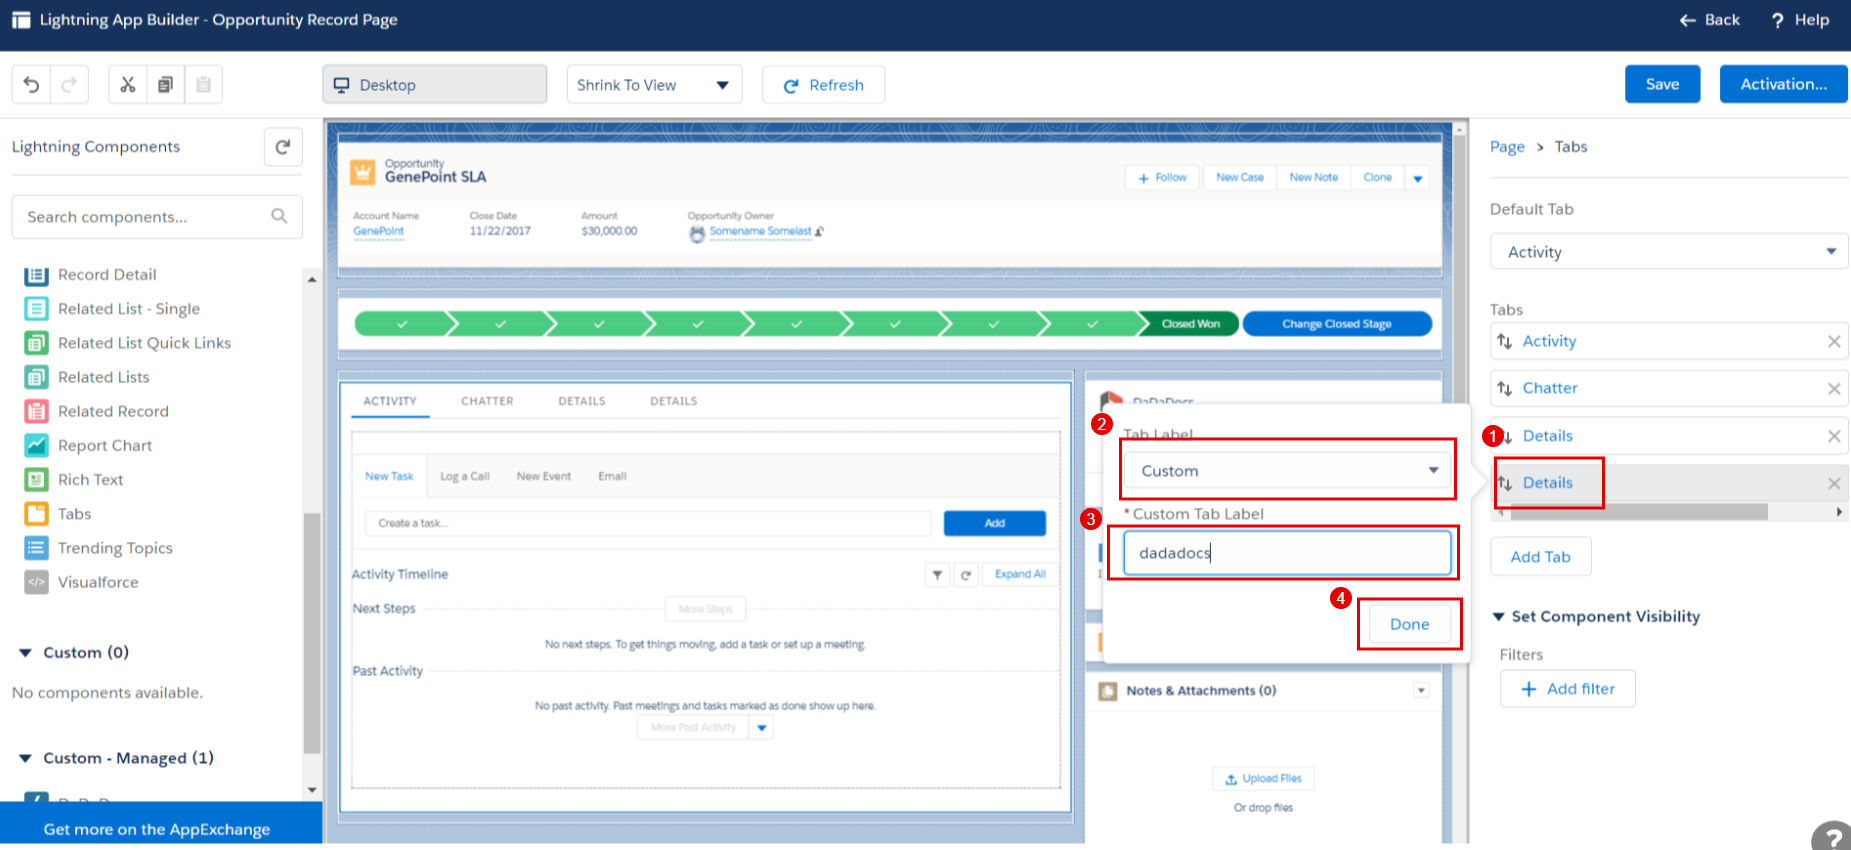
3 Click on the tab you have just added, select Custom from the Tab Label dropdown menu, enter “DaDaDocs” in the Custom Tab Label field and click Done.
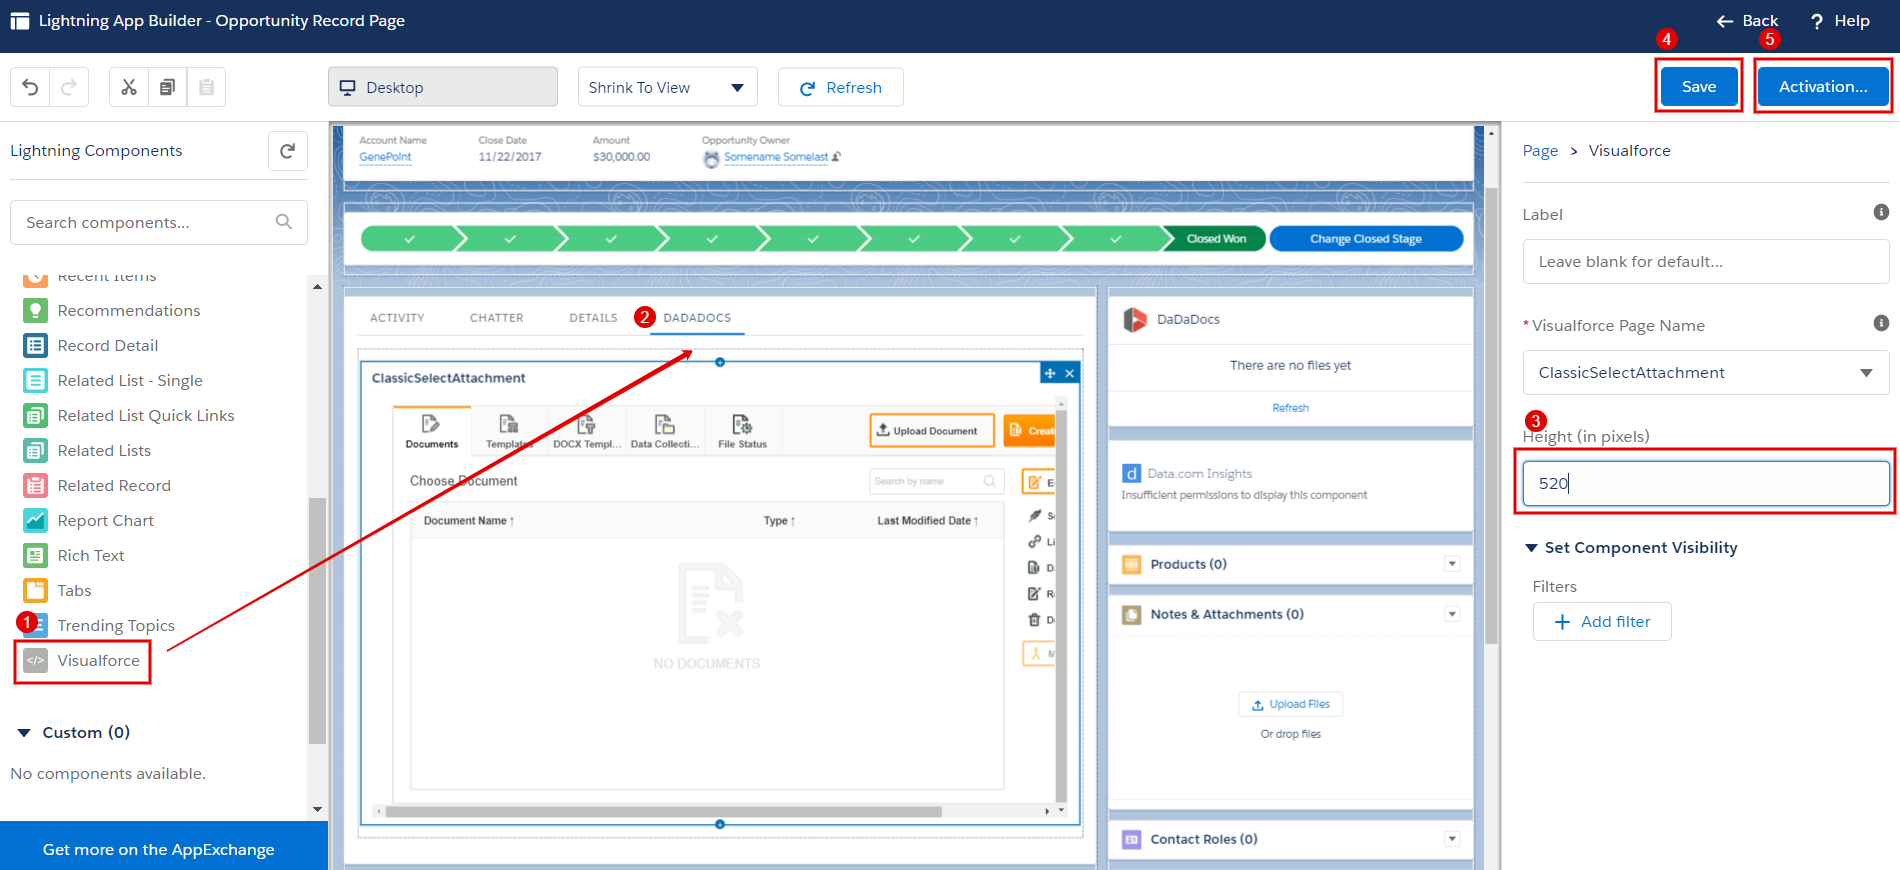
- Drag and drop the Visualforce component from the list on the left to the DaDaDocs tab.
Set to window height to 520 pixels to make it easier to see.
- Click Save, then click Activate to apply your settings.
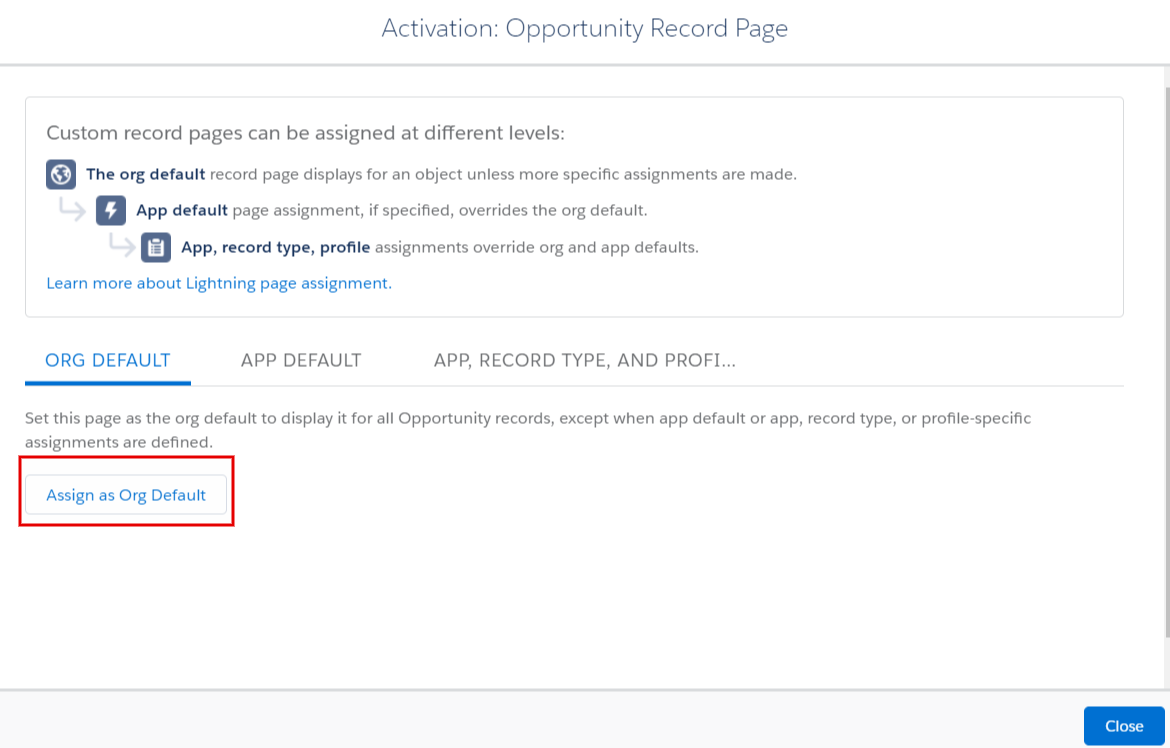
- Select Assign as Org Default in the Activation pop-up.
-
Click Save in the Set as Org Default pop-up
-
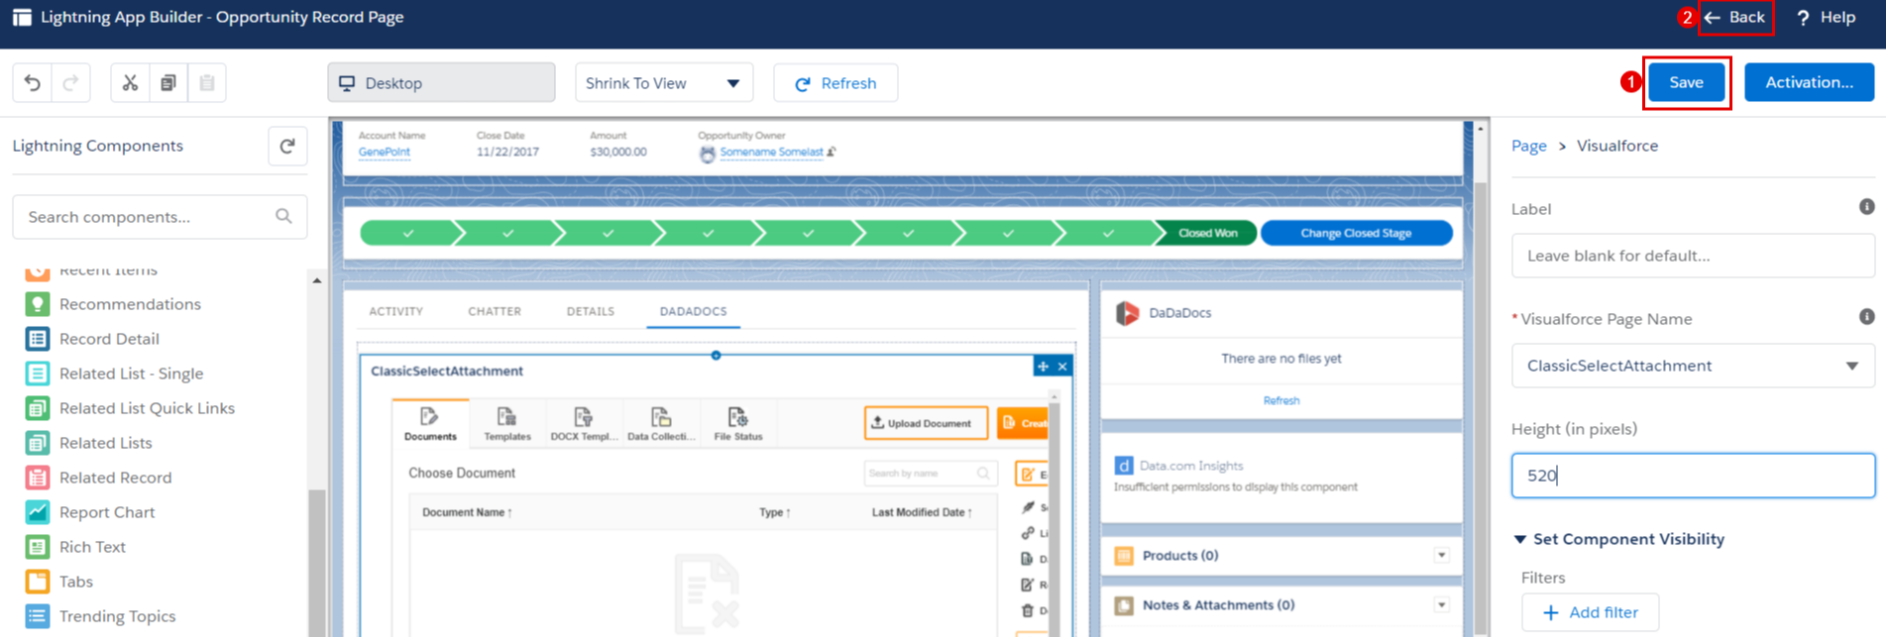
Click Save to apply changes, then select Back to exit Page Edit mode.
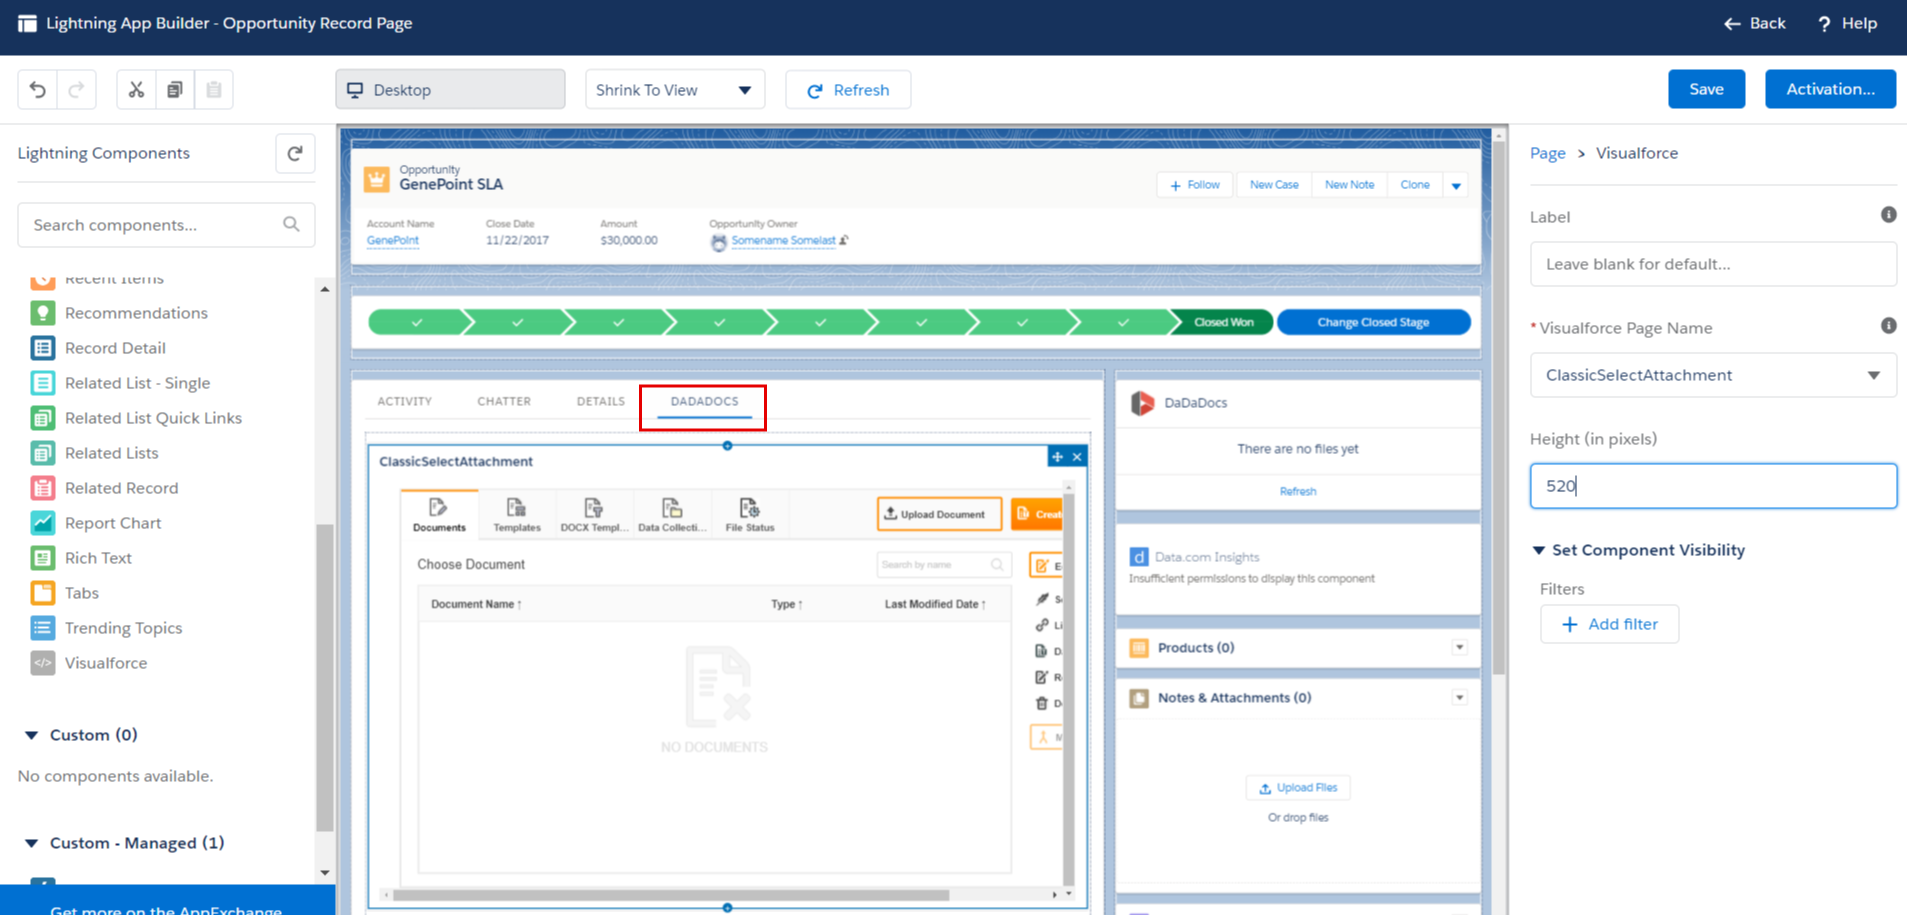
- Now you have a DaDaDocs tab on your opportunity main page.
Lightning Components
Use Lightning components for the direct access to Documents and PDF Templates, PDFfiller files, and DOCX Templates from one DaDaDocs component.
To add the component on your record page (Sample Opportunity in the example) click on the cog icon and select Edit Page.
Note that such an action only can be implemented by the administrator of the Salesforce organization.
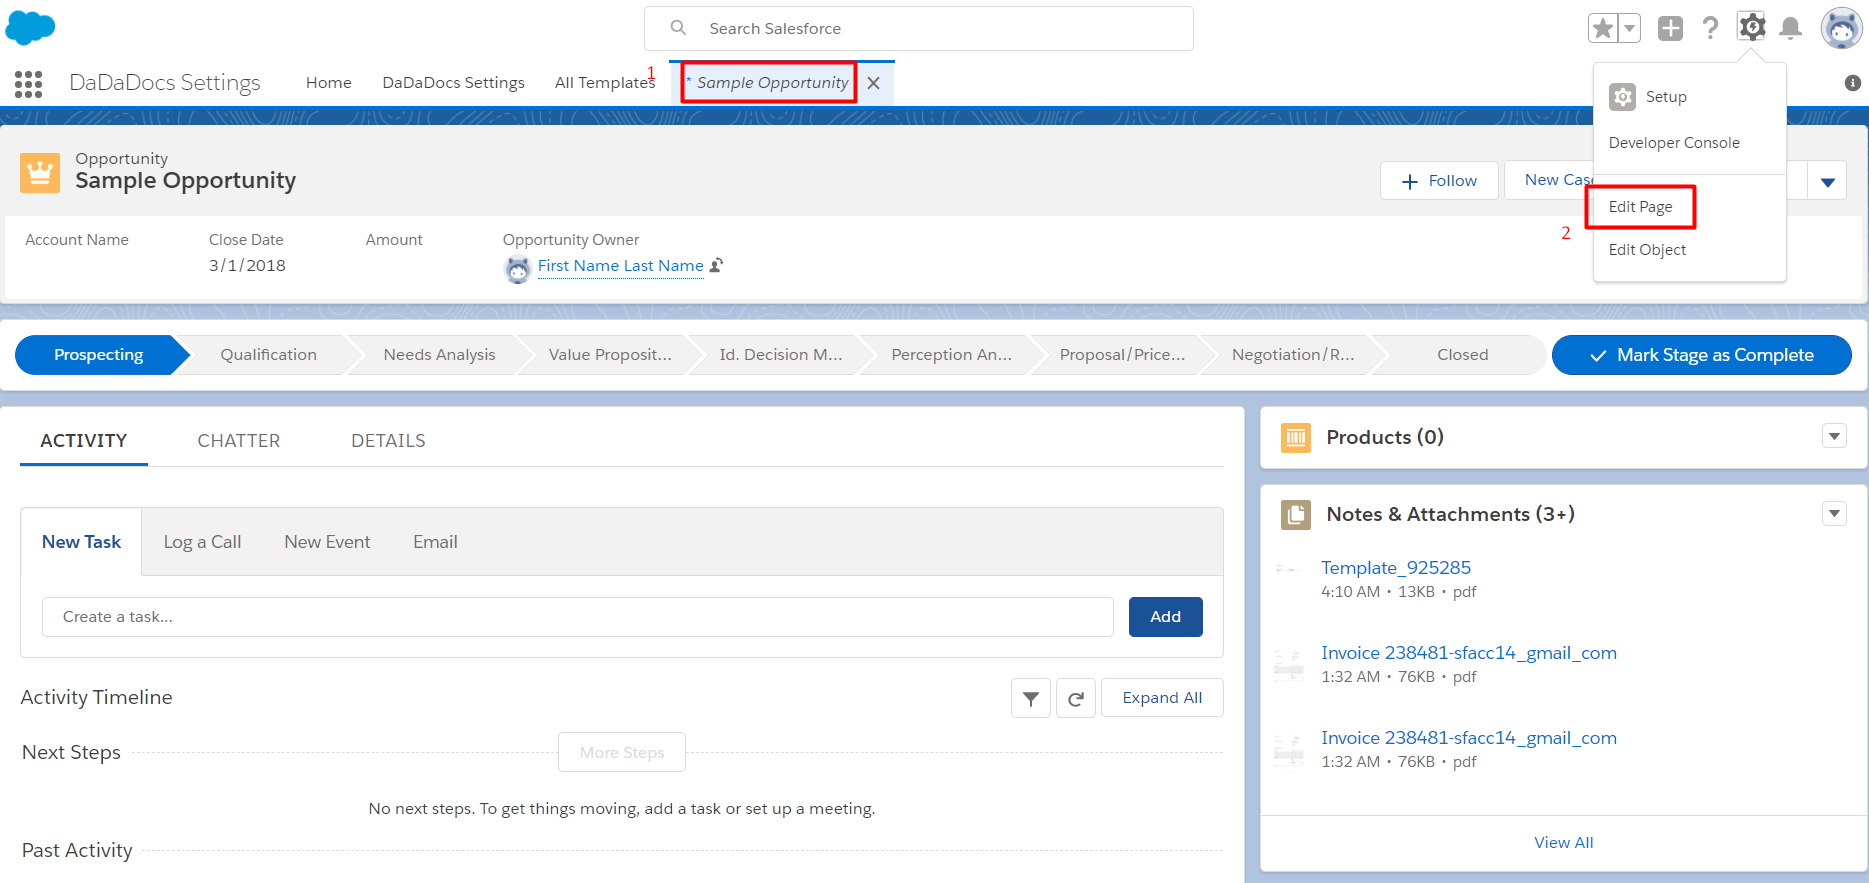
Scroll down the Lightning Components list on the left, select the required DaDaDocs components, drag and drop them directly on your record page. Click Save.
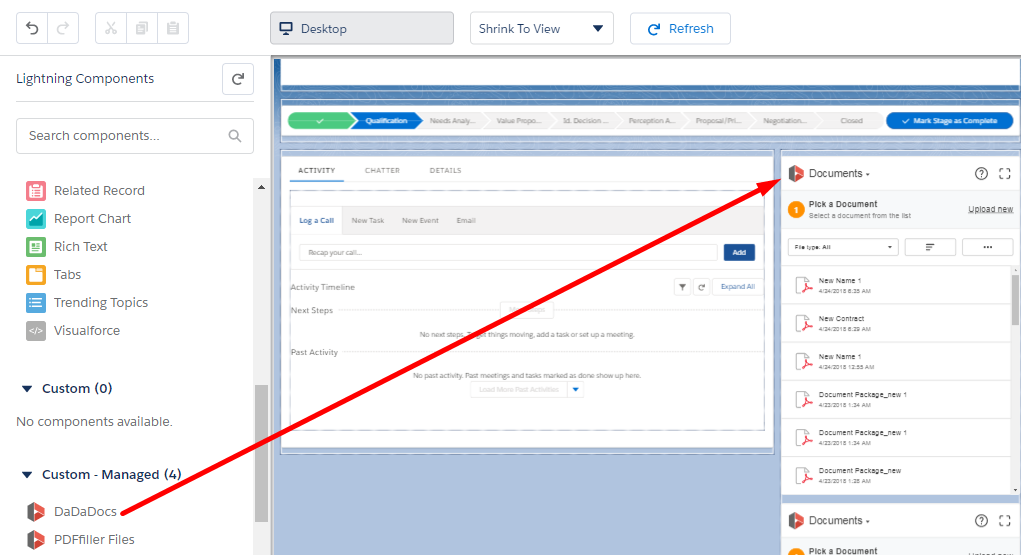
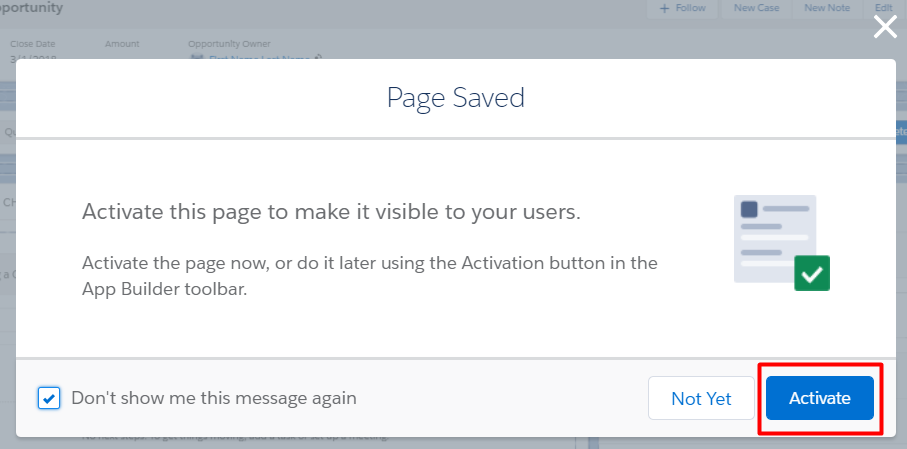
In the Page Saved pop-up click Activate to make it visible to the users.
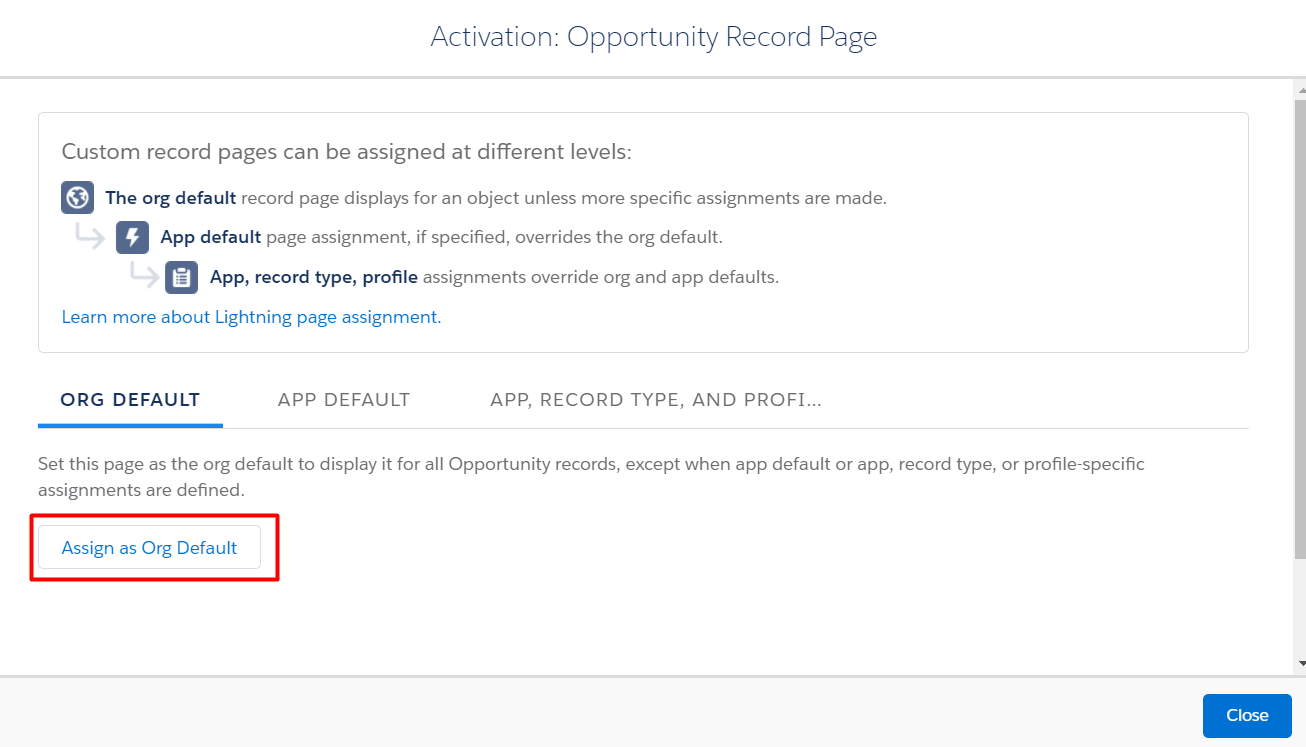
In the Activation pop-up click Assign as Org Default to make the components accessible on all the records of the organization.
Click Save in the next pop-up.
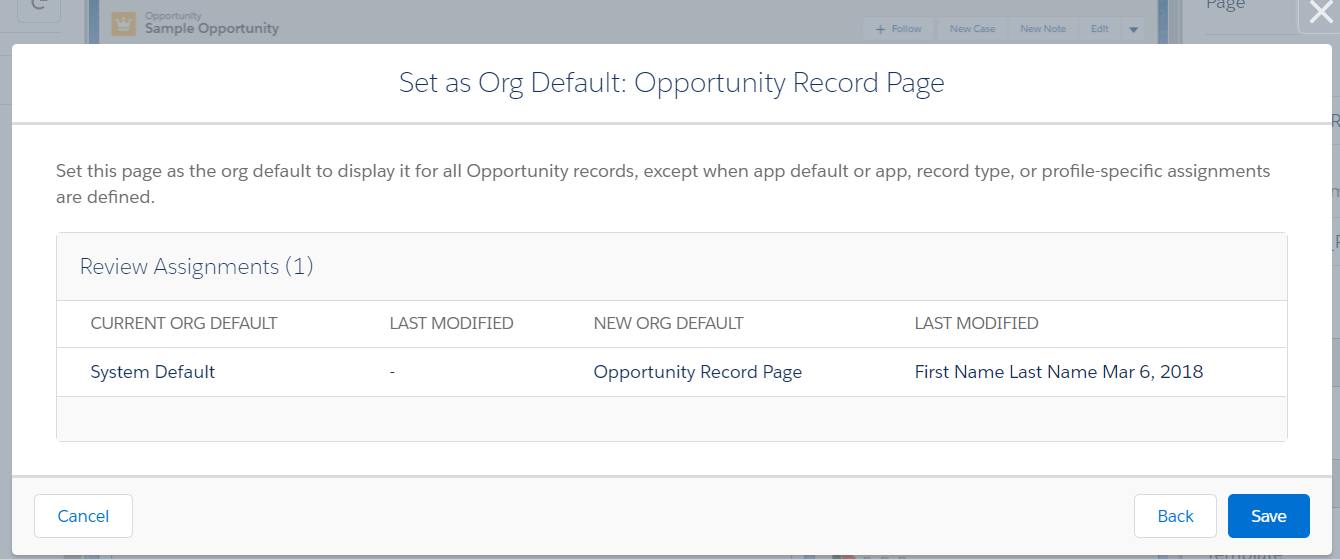
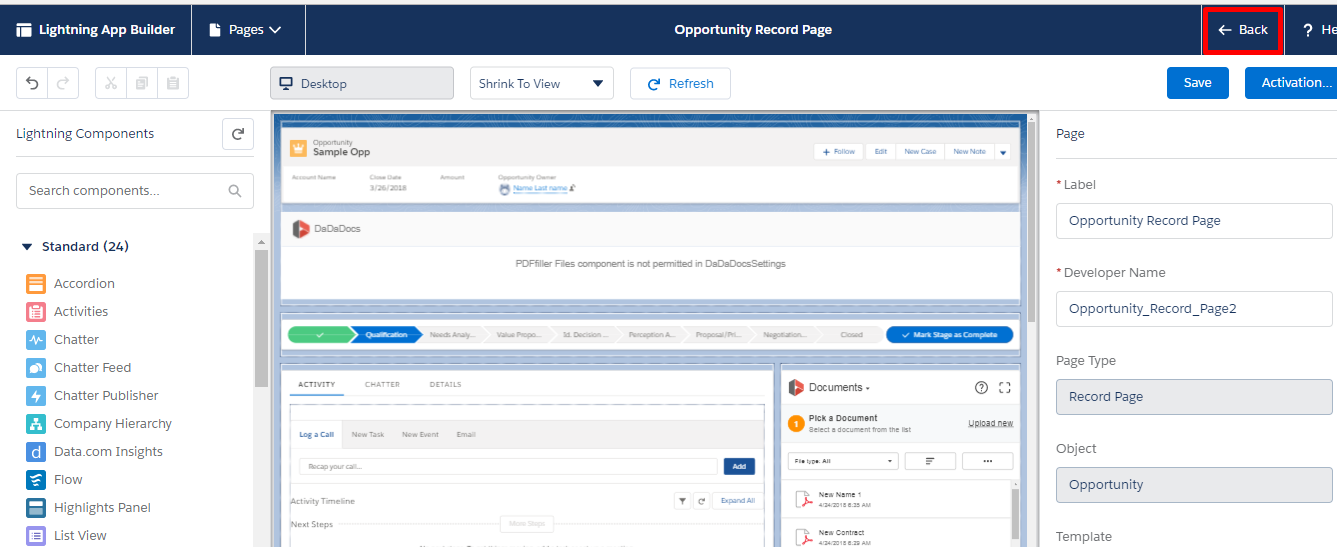
Click Save to the upper right to save changes.

Then click Back to the upper right to exit Page Edit mode.
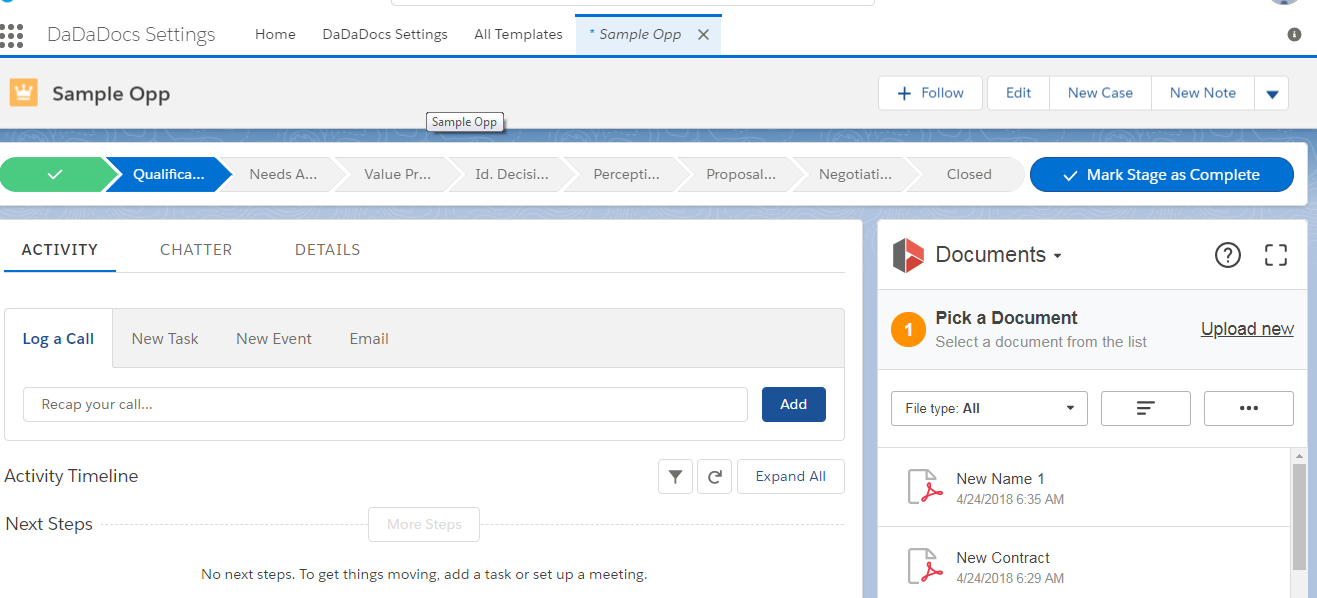
Now the DaDaDocs Lightning components are located right where you have added them on your record page which allows you to have direct access to the DaDaDocs Documents and Templates as well as to PDFfiller files and make basic actions like signature requests and sending fillable forms without the necessity to run DaDaDocs.
How to use Lightning Experience Sidebar Component?
DaDaDocs for Salesforce allows you to send documents out to be completed and e-signed by customers and partners. Collect submitted documents, update existing objects or create new ones in the Salesforce Lightning Experience using interactive fillable templates from the Lightning sidebar component. There is no need to switch to Salesforce Classic as all templates types are now available in the Lightning sidebar component.
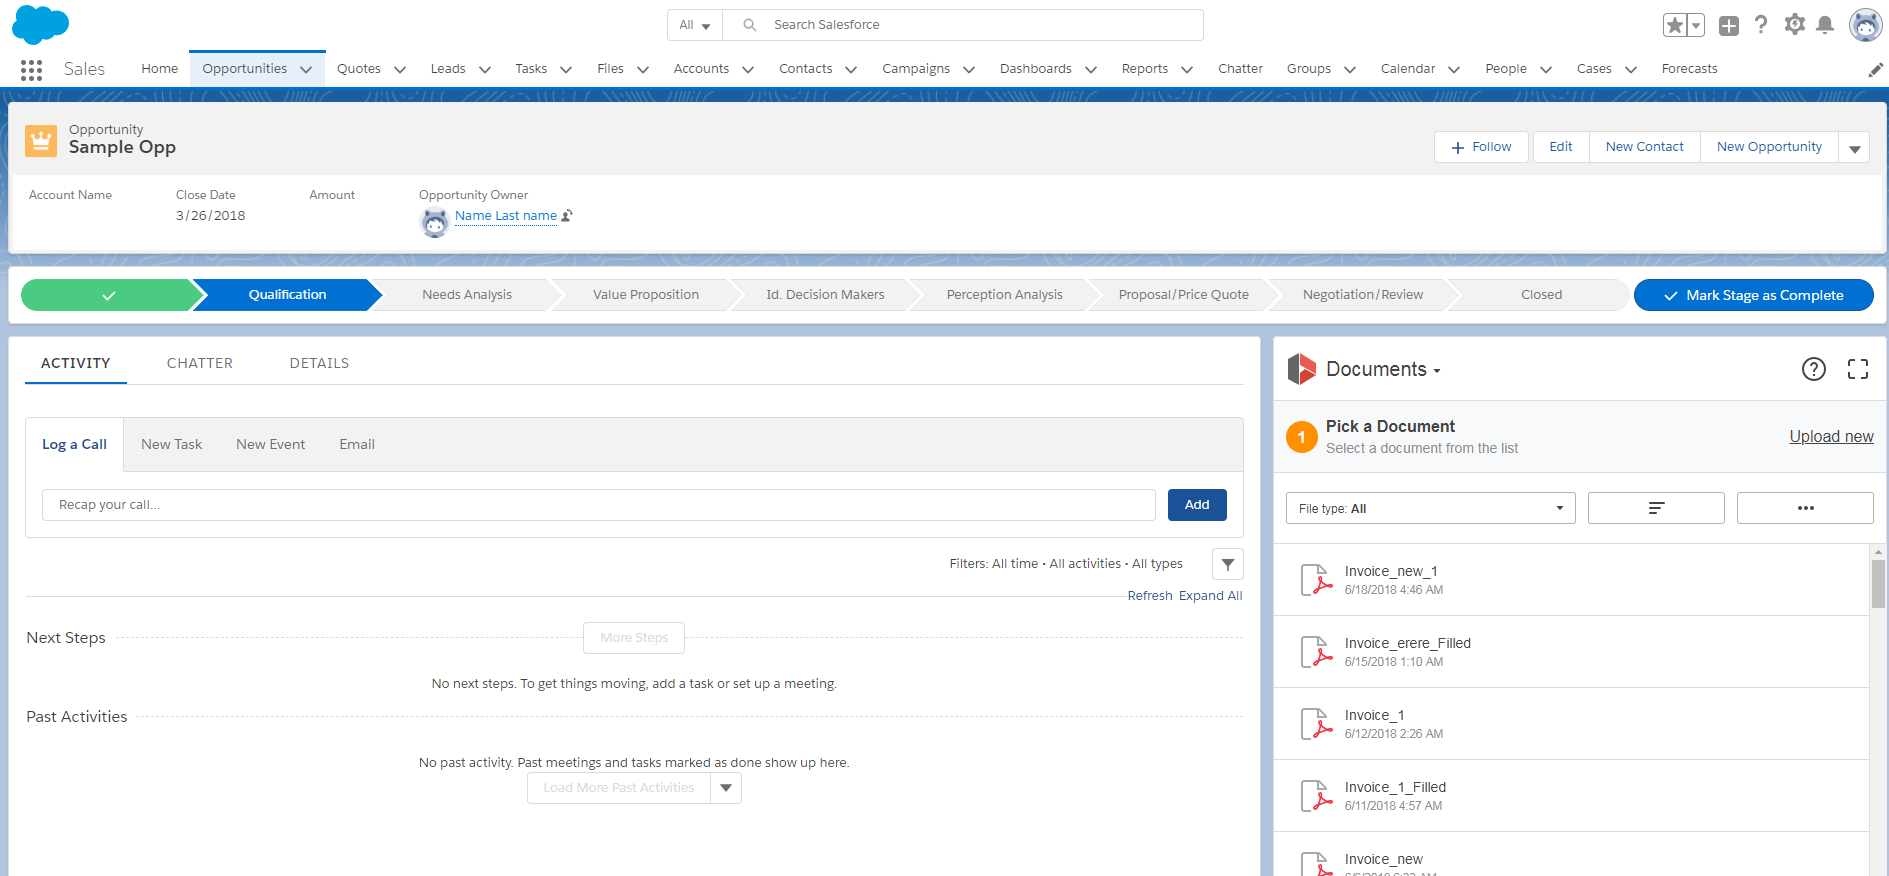
Below is the step-by-step instruction that will help you create a new object or update an existing one as well as use any of the templates directly in your Salesforce Lightning Experience.
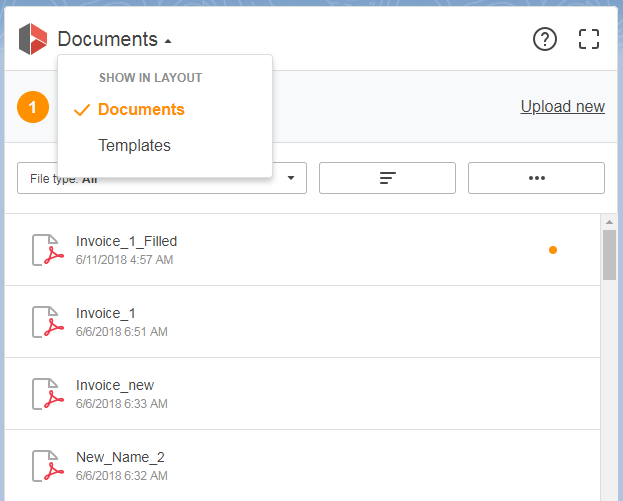
To start working with your lightning components in the Document type dropdown menu, choose Documents or Templates.
Document Tab
The Document tab is where all your documents are stored. Pick the document you need and use it to request signatures, turn it into a fillable template as well as create or update your records. Find detailed instruction below on how to use your documents directly in the Salesforce Lightning Experience sidebar component.
- To upload new a document click the Upload New button. It is possible to drag and drop or upload multiple documents.
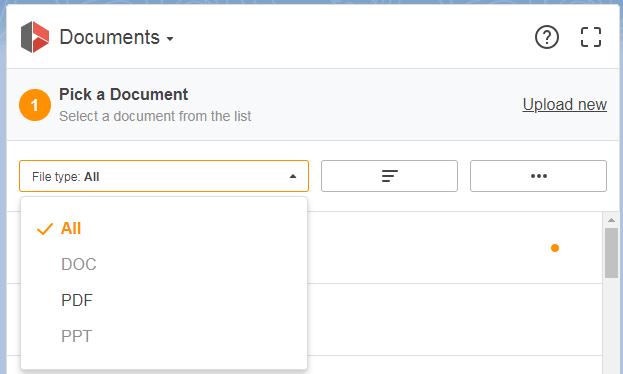
- In the File type dropdown choose the file type you need.
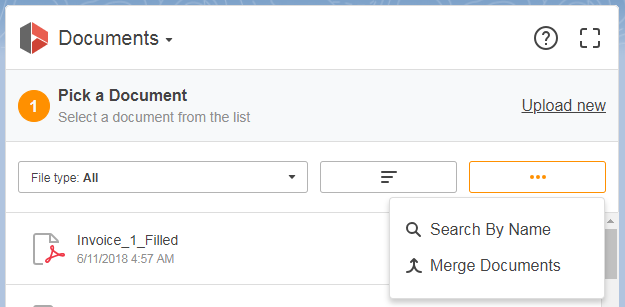
- Click the button on the right of the Document Option section to choose the quick search or merge option.
- Once you’ve finished making the necessary settings, select a document from the list.
After clicking a document, the Action menu will open.
You can edit a document, send it out for signing, make it publicly accessible via a link as well as create a template intended to update or create an object.
Note that you can choose another document by clicking Change near the selected document.
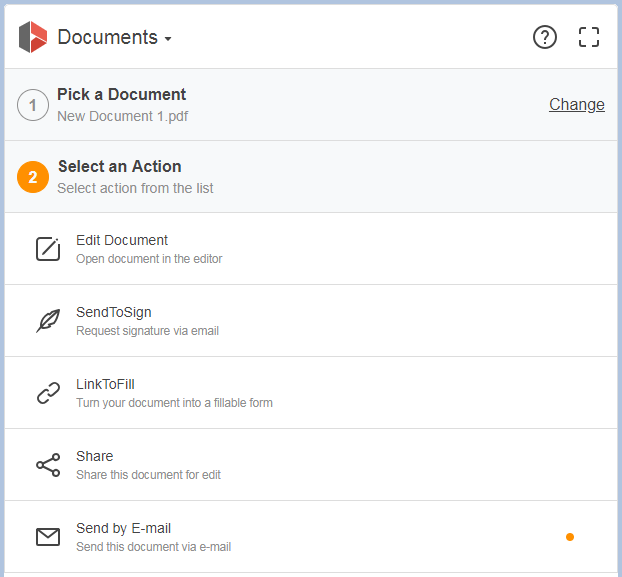
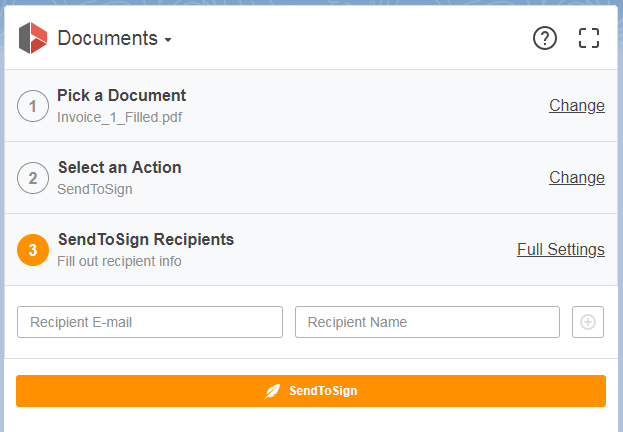
- To send the document out for signing choose the SendToSign option.
Enter the emails of the recipients and click SendToSign at the bottom.
You can add as many recipients as you need. To make more settings for your signature request click Full Settings to the right.
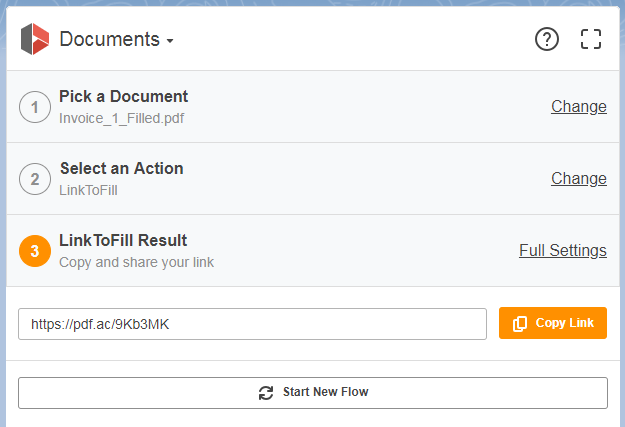
- Choose LinkToFill to share your document via a link.
The link for your document will be automatically generated.
Click Copy Link to copy your link to the clipboard. For more settings click Full Settings to the right.
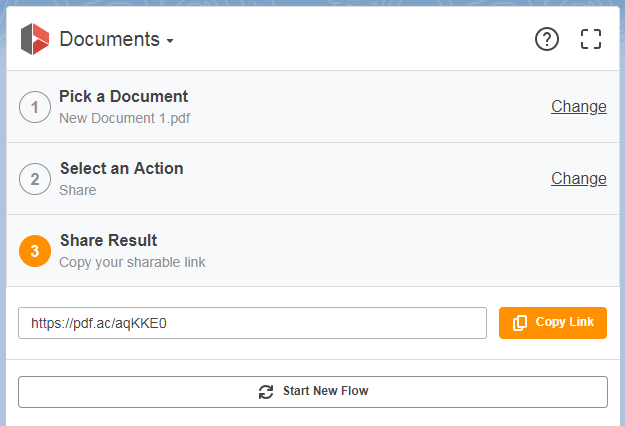
7. Select Share to collaborate on any PDF, DOC or PPT documents with non-salesforce users by sharing them via a direct link.
Share your documents in a few clicks with as many recipients as you need.
Just click the Copy Link button to copy your link to the clipboard and then share it directly with your recipients.
- The Send by Email option allows you to easily share your documents with as many recipients as you need via email.
Enter a recipient’s email address and click the plus icon to add it. Then click the Send E-mail button at the bottom.
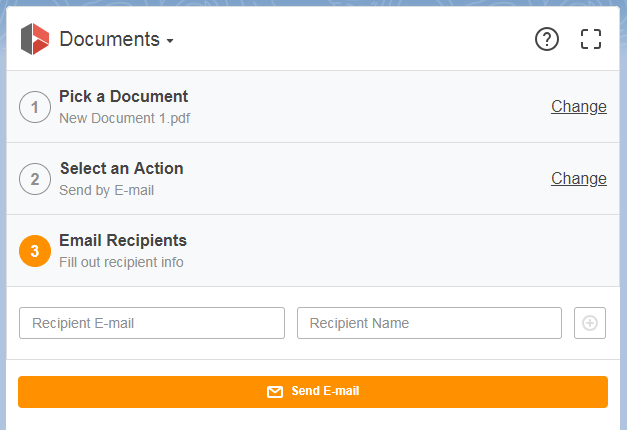
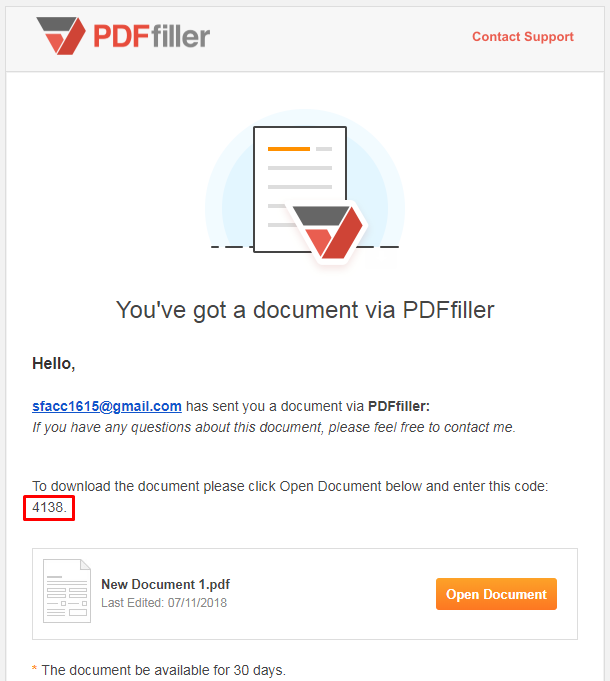
Recipients will receive an email with a code that must be entered in order to open the attached document.
Template tab
The Template tab is where your fillable templates can be used.
-
Choose your template type from the list and then share it with customers via a link or send it out for e-signing.
-
To create a new template click the Create New button. You will be redirected to the DaDaDocs tab where you can turn a selected document into a template type.
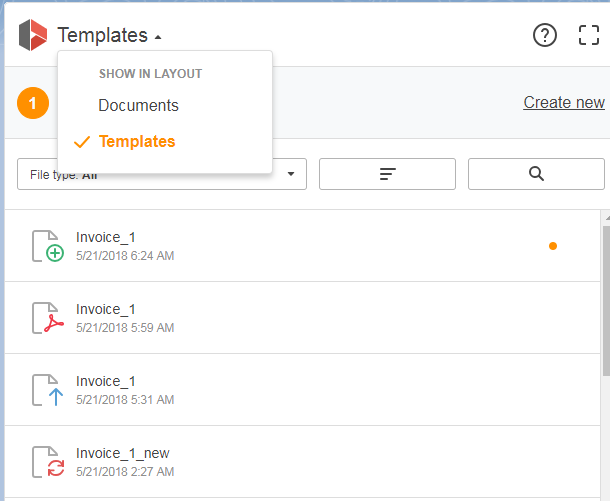
2. In the File type dropdown choose a file type.
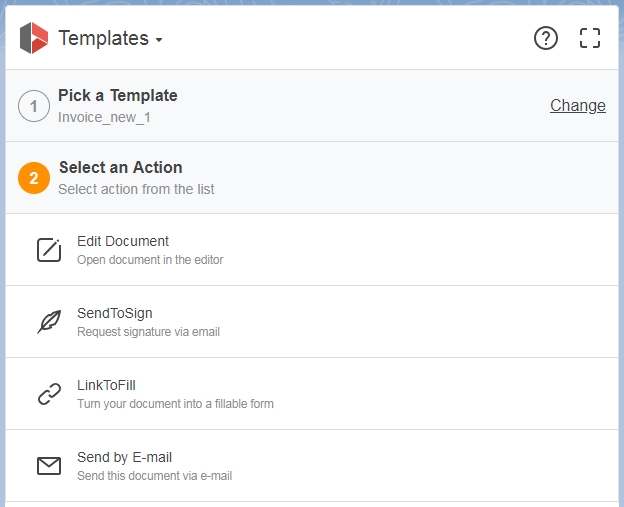
3. After selecting a template in the list, the Template Option menu will open.
You can edit a template, send it our for signing or make it publicly accessible via link.
Note that you can choose another template by clicking the Change button near the selected document.
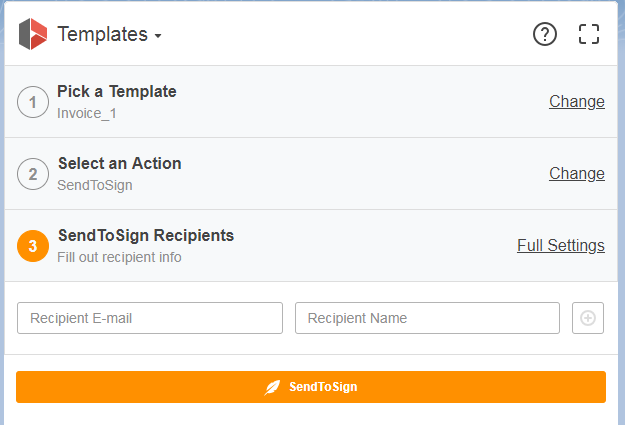
- To send the template out for signing choose the SendToSign option.
Enter the emails of recipients and click SendToSign at the bottom.
You can add as many recipients as you need.
To access more settings for your signature request click Full Settings to the right.
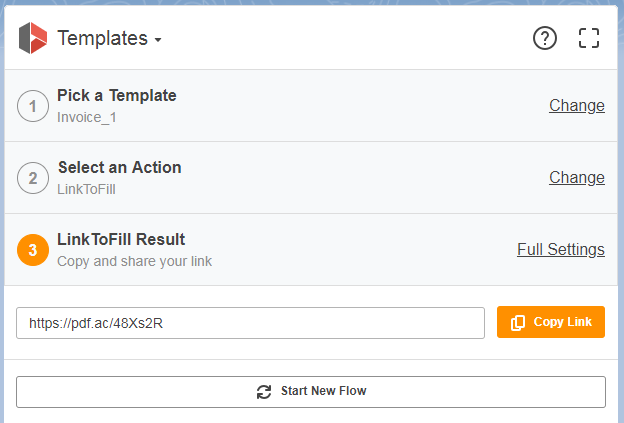
5. Select LinkToFill to share your template via an automatically generated link.
Click the Copy Link button to copy your link to the clipboard. For more settings click Full Settings to the right.
If you are using Internet Explorer, there’s an extra step to configure the DaDaDocs package.
-
Go to Internet Options in Internet Explorer and select the Security tab.
-
In the Security level for the zone section click Custom level. The Security Settings - Internet Zone window will appear.
-
Scroll about a third of the way down to Miscellaneous and in Access data sources across domains select Enable.
-
Click OK and in the Internet Options window select Apply to save changes.
Updated over 6 years ago
