Smart tags for documents and templates
Easily track changes made to your documents and templates using smart tags. Smart tags simplify your workflow by allowing you to see what actions have been performed to your documents and templates. What is more, you can use smart tags for filtering searches for documents and templates.
There are two types of smart tags:
- System
- Custom
Below is a detailed description of each tag and their meaning.
System tags
System tags are automatically assigned to your documents once certain actions have been performed.
Uploaded
Once a new document is uploaded to the Documents tab, it is automatically marked as Uploaded.

Sent by email
After a document has been sent to recipients via email, it will be marked as Sent by email.

LinkToFill
Once you’ve sent out a document for filling, a copy will be created and tagged with Fill pending and LinkToFill.

When a recipient finished filling your document, the Fill pending tag will disappear from the document copy and only the LinkToFill tag will remain.

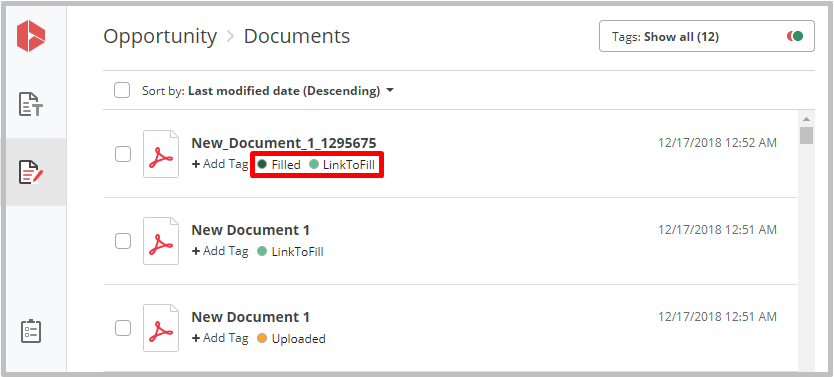
Once a document is filled, it is saved to the Documents tab and is tagged with Filled and LinkToFill.
SendToSign tags
When sending your documents for signing with SendToSign, a copy is created and tagged with Sign pending and SendToSign.

Once recipients have signed your document, the Sign pending tag will disappear from the document copy and only the SendToSign tag will remain.

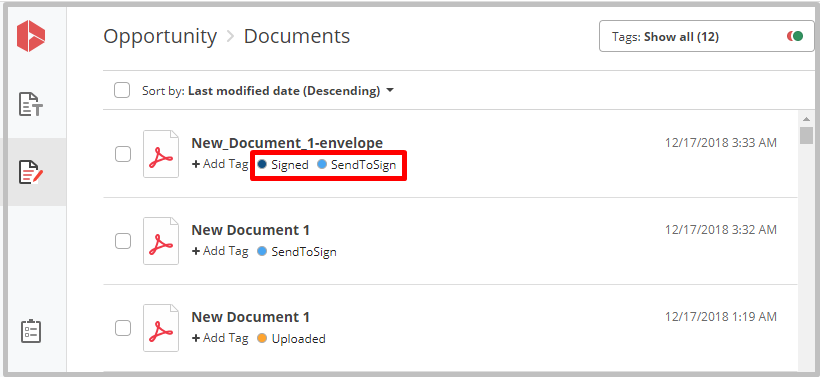
Signed documents are saved to the Documents tab and are tagged with Signed and SendToSign.
If a recipient refuses to sign a document, it will have the Declined signing tag.

Generated
Once you have generated a document from a template, it is saved to the Documents tab and marked with the Generated tag.

Merged
After several documents have been merged into a single document, it will have the Merged tag.

Custom tags
Custom tags are tags you can set personally for both documents and templates. As templates aren’t marked with system tags, you can assign them your own tags that will help you to organize them in groups and easily track all actions performed with them.
Note that custom tags should be set separately for the Documents and Templates tabs.
Let’s have a look at how to add custom tags to your documents or templates:
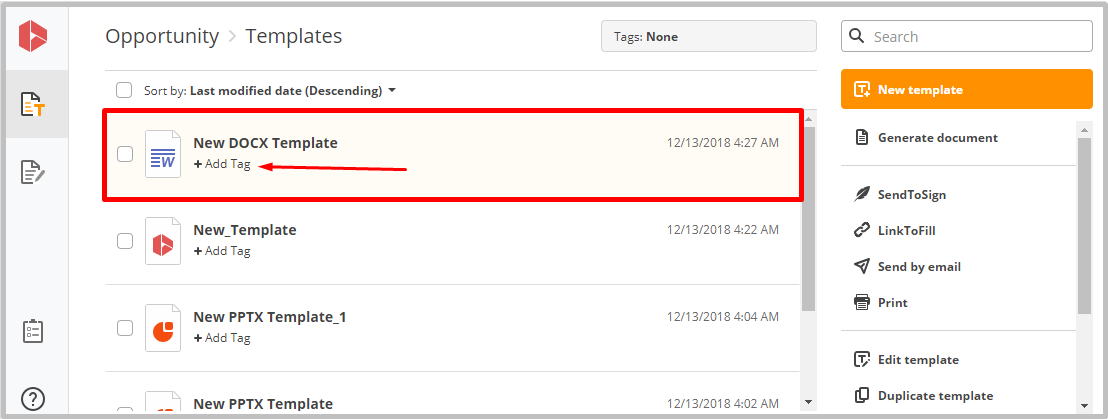
- Choose the document or a template you’d like to mark with a custom tag and click +Add Tag (Template tab in the example).
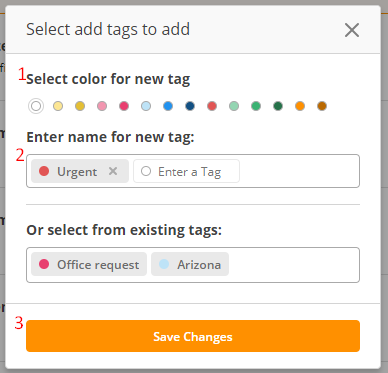
- In the Select tags to add pop-up, select a color and enter a name for the new tag. If you’ve previously created custom tags, you can choose a new tag from the existing tags.
Add as many as tags as you need by separating them with a comma or pressing Enter on your keyboard.
When finished, click Save changes.
The tags you’ve added will be automatically assigned to your documents or templates.
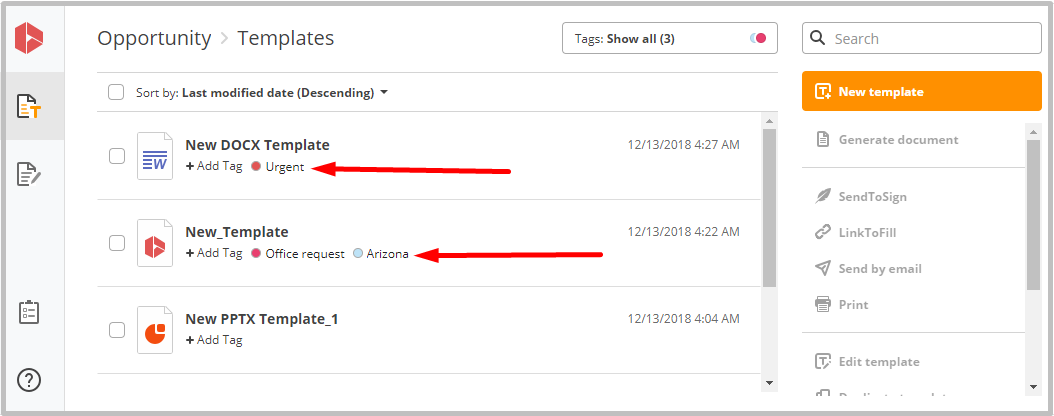
Apply tags
Easily locate your documents and templates by searching for them using smart tags as your criteria. Simplify your workflow by organizing them into groups using both system and custom tags. Let’s look at how it works:
- In the Documents or Templates tab, click Show all tags.
Choose the tags you’d like to include in your search by checking the boxes next them.
To unselect a tag, click the minus icon.
When finished, click Apply.
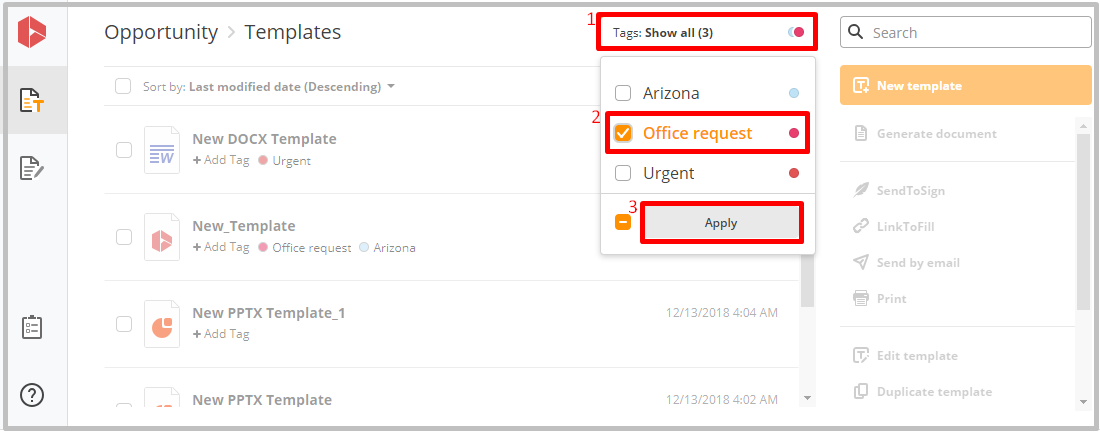
- The list of documents or templates will be automatically filtered according to your search criteria.

Updated over 6 years ago
